Daily Sweet: Zumbo, the Book

Zumbo

May I introduce my new favorite-favorite-thing in the world...

Zumbo: Adriano Zumbo's Fantastical Kitchen of Other-Worldly Delights I freaking love this book. It's like Willy Wonka plus Pierre Herme, times rainbow awesome. The unicorn is not actually on the cover, but I added it to see how it would look. It looks pretty at home, doesn't it?

I learned more about Mr. Zumbo from the publisher:

Adriano Zumbo's playful approach to food, far-ranging imagination, and cheeky attitude have made him one of Australia's best known chefs. He opened his first patisserie in in 2007 and his appearances onMasterChef Australia have since won him a national following.

While leafing through the pages, you'll find things like this:

Zumbo! Love it.

and this:

Zumbo! Love it.

and this:

Zumbo! Love it.

And incredibly inspiring, clever and cute artwork:

Zumbo! Love it.

AAAAH! MACARON HEAD PEOPLE!!! Zumbo! Love it.

Laminated pastry people too!

 Buy it here: Zumbo: Adriano Zumbo's Fantastical Kitchen of Other-Worldly Delights.


Daily Sweet: Thanksgiving: How to Cook it Well by Sam Sifton

Thanksgiving: How to Cook It Well.

I knew I liked this book when I read the headnote to the Pecan Pie recipe which read "It is hard to say when exactly the food cognoscenti turned against corn syrup, a silken suspension of glucose-rich corn syrup that plays a significant part in many recipes for pecan pie." That made me smile, even though technically I don't know what "cognoscenti" means or how to pronounce it. I still got the idea. 

Actually, the book made me want to ask Sam Sifton an important question: "If you had to have a Thanksgiving pie in the face, what kind would it be?". But when I asked the publisher, who had sent me the review copy, if they could ask him for me, I was informed that "due to his busy schedule" he was unable to field that question. Well. 

Nonetheless - the book is chock-full of Thanksgiving recipes, tales, and miscellany that I found witty and charming. You can buy it here: Thanksgiving: How to Cook It Well

Daily Sweet: Good Housekeeping Little Book of Baking

Little Book of Baking

Today, I asked my cupcake (which lives on a pony): "What do you think of this book?" It has a big name for a tiny book: Good Housekeeping The Little Book of Baking: 55 Homemade Cookies, Cakes, Cupcakes & Pies to Make & Share.

Little Book of Baking

And after reviewing it for a few minutes, the cupcake said "you should buy it."

Why is that? Helpfully, the cupcake gave me several reasons.

Grape and ginger tart

It has interesting recipes. I'd never seen a recipe for a Grape and Ginger Tart before! Helpful tips!

It has helpful tips. You never can be too educated. Yummy stuff

It has tasty versions of classic recipes. For example: hazelnut brownies; cherry-pistachio biscotti. Not crazy-different, but they might just challenge you a little bit. Tasty classics  

Why not listen to the cupcake? Find the book online here: Good Housekeeping The Little Book of Baking: 55 Homemade Cookies, Cakes, Cupcakes & Pies to Make & Share.


Meet the Recipe Tester: Betsy Eves of JavaCupcake.com

Source: javacupcake.com via Cake on Pinterest


It doesn't take a village to write a cookbook. But it does require a bunch of awesome and able-minded recipe testers.

And in advance of my upcoming oeuvre entitled The Secret Lives of Baked Goods, I'd like to introduce you to one of my recipe testers, Betsy of Javacupcake.com! She made the cake pictured above, btw. Here's a hint as to one of the recipes she helped test.

Recipe testing

...and proof that sometimes, the first round doesn't always work out as you'd like! (but this is why we test the recipes!! )

Recipe testing

But I digress. Meet the talent behind the testing! 

Hiyas! I’m Betsy Eves, owner of the baking blog JavaCupcake.com!  My blog is dedicated to not only cupcakes, but to baking cookies, cakes, pies and really… anything sweet! 

When I’m not baking, I’m busy being an Army Wife & Mommy to two great kids!  Currently, we are living in Germany with the Army, but I’m from Seattle originally… which is where I met the fabulous Jessie of CakeSpy!

I’m thrilled to be helping Jessie test recipes for her second book!  I can’t wait for it to come out and to test all the recipes myself!

Want to get to know Betsy's work? Here are her Top 5 Favorite Blog Posts from JavaCupcake.com

Source: javacupcake.com via Cake on Pinterest


1.    Chocolate Raspberry Petal Ombre Cake - Not only was this one of my most favorite cakes to eat, but it was my first ombre cake and the  most beautiful cake I’ve ever made!  (I don’t eat a lot of the stuff I make, but this is one cake I almost ate half of myself!)

Source: javacupcake.com via Cake on Pinterest


2.    Chocolate Chocolate Chip Cookie Dough Cupcakes – These cupcakes were a HUGE hit on my blog and were so incredibly delicious!

Source: javacupcake.com via Cake on Pinterest


3.    Pumpkin Snickerdoodles – A recent recipe, but another that I can’t keep the final product out my belly!  5 dozen made and 3 dozen in my belly! 

Source: javacupcake.com via Cake on Pinterest


4.    Emme’s Banana Bread – My daughter made this loaf of bread from start to finish.  To this day, it’s still my favorite banana bread recipe EVER!

Source: javacupcake.com via Cake on Pinterest


5.    Tree Hugger Apple Cupcakes – These were one of the first cupcakes where I came up with the entire cupcake recipe on my own.  No help from the internet or blogs or Pinterest.  I am super proud of this cupcake! 

Thanks again, Betsy, for being so rad! Look out for my book next year; look out for Betsy's latest work on javacupcake.com.

Why You Should Buy Bake it in a Cupcake by Megan Seling

Bake it in a cake book

Why should you buy Bake It in a Cupcake: 50 Treats with a Surprise Inside by Megan Seling of Bake it in a Cake?

Oh, don't be stupid. Why *shouldn't* you buy it? There is really no reason. But in case you insist on being stubborn about it, let me tell you just a few (ten) of the reasons why you must. 

I say so. And when it comes to books about cupcakes and baked goods, I own pretty much all of them, and I know what I am talking about. You trust me.

Buy megan's book!

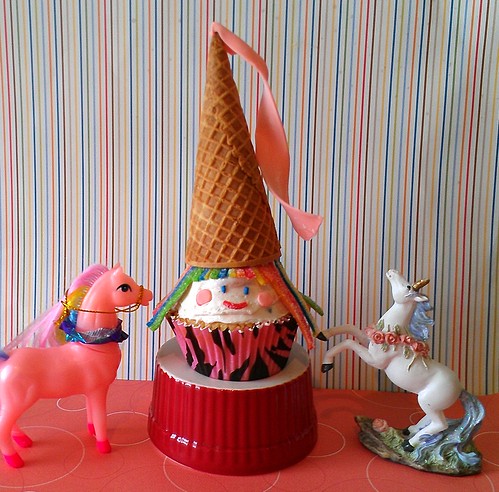
I am quoted on the back cover. Remember what you read in reason #1, about trusting me? Trusting me means it is also unicorn-approved. But wait, there's more...

I'm not alone in being quoted on the back cover. Also quoted are Dan Savage (yes, that one) and Andrew Zimmern. They also think you should buy the book, btw.

Megan is an amusing writer. Having honed her writing chops at Seattle's The Stranger, she's quick, clever, and witty. You'll enjoy reading her. Her witty repartee will amuse you while you wait for the cupcakes to bake.

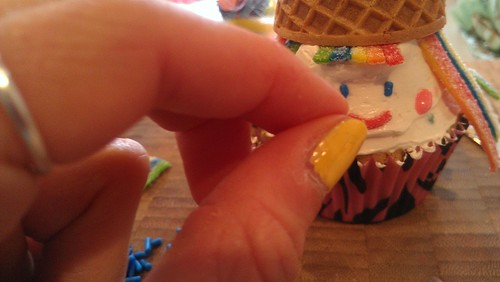
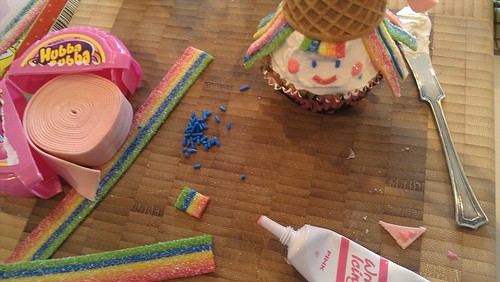
Her recipes are very easy to follow! These recipes are user-friendly, which is good for dopes like me who sometimes need reassurance.

Bake it in a cake book

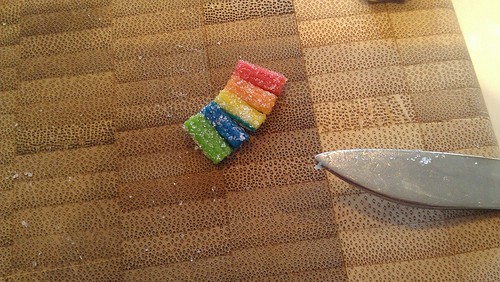
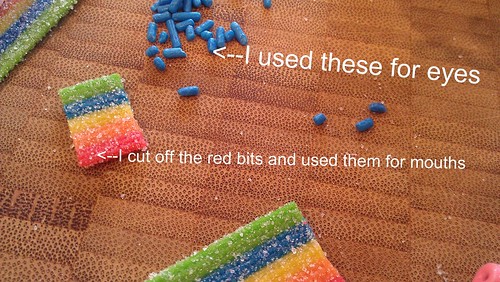
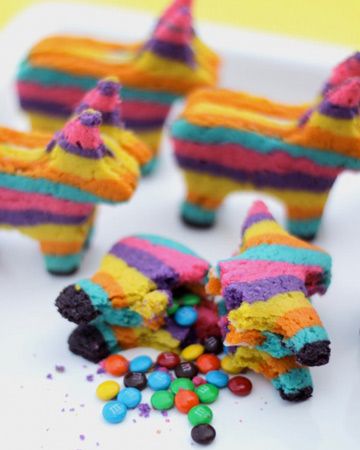
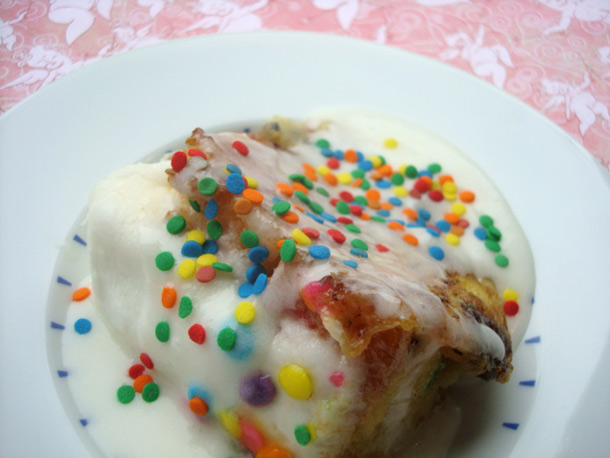
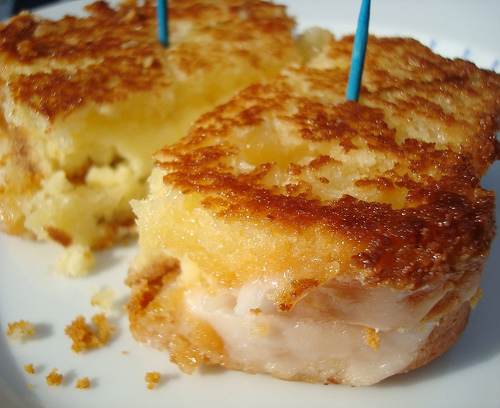
The recipes yield impressive results. Want to knock the socks off of visitors, friends, or co-workers? How 'bout making up some cupcakes with baklava inside, or a cheesecake stuffed with mini pie-stuffed cakes?You'll establish yourself as clever, talented, and internationally savvy.

The cupcakes will make you fat. But happy fat, not sad and lonely fat. They're buttery and delicious!

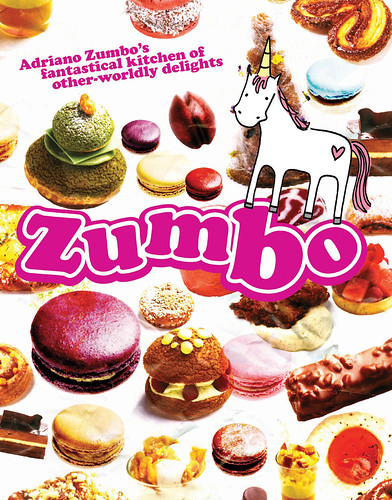
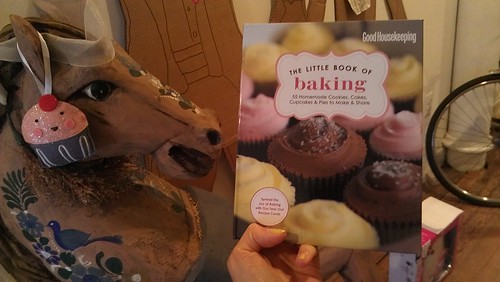
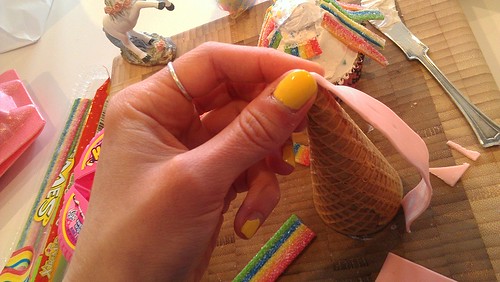
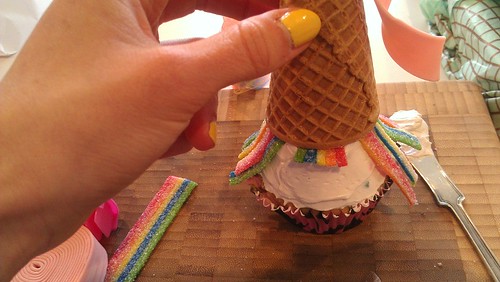
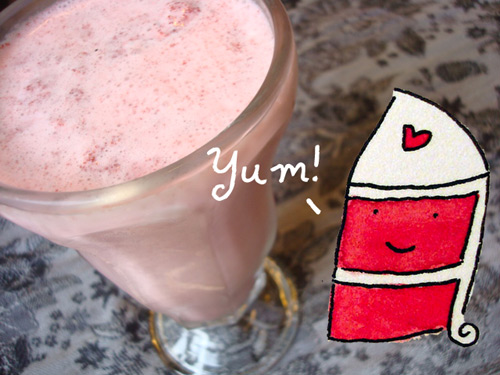
Because you've never had a book that can literally teach you how to bake love into a cupcake before. Come on! Just look at the cover!

Bake it in a cake book

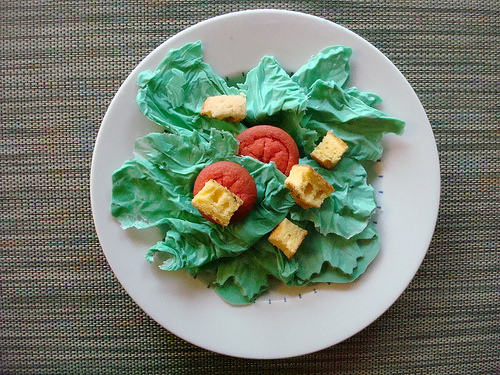
The recipes are crowd pleasers. You'll be able to find things to serve at dinner parties, but you'll also kind kid-friendly and even cat-friendly things, too!!

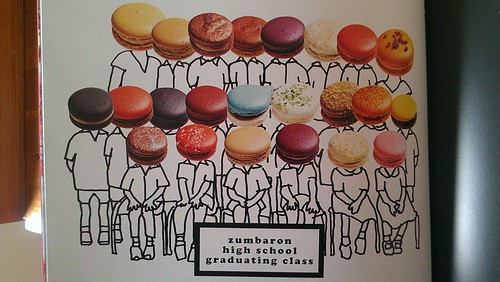
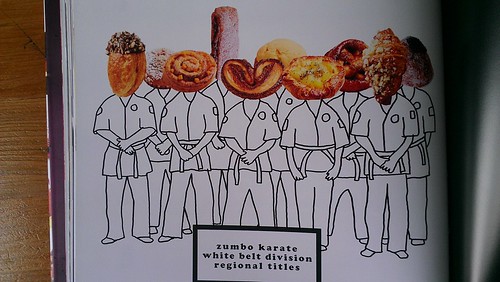
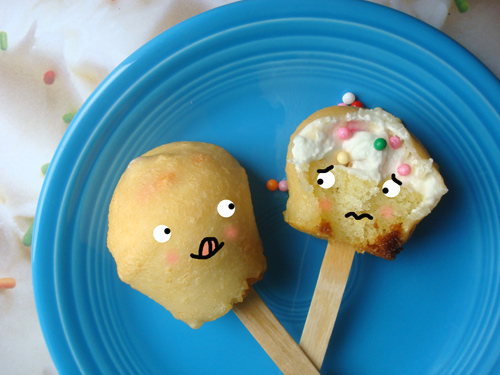
Because it's fun! Bake it in a Cake is clever, fun, and cute. What's not to love?

Also, I like Megan. Personally. I mentioned her in my book, CakeSpy Presents Sweet Treats for a Sugar-Filled Life, too!

In case you haven't already, you can buy the book here: Bake It in a Cupcake: 50 Treats with a Surprise Inside

How To Make Edible Rock Candy Jewelry

This necklace is not only delightful, it is delicious.CakeSpy Note: This tutorial is provided courtesy Cake Gumshoe Jasmin, a suspected sweet genius who, among other things, has invented cupcake-stuffed strawberries. Check out her work at 1 Fine Cookie!

It’s fashionable, pretty, tastes good, affordable and easy to make. What’s not to like about 1 Fine Cookie’s rock candy jewelry?

These precious “stones” are made with unique flavors, such as marshmallow, peanut butter and more. The flavor is up to your preference!

Make these for ladies’ night, showers, bachelorette weekends, birthday parties, with the kids, or for Mother’s or Valentine’s day. The possibilities are endless!

The bare-bones basics are listed below; for a more detailed tutorial, visit 1 Fine Cookie.

Ingredients and Tools:

  • clothes pin
  • large glass container
  • ribbon
  • sugar
  • optional but recommended: Torani syrups.
  • optional: food coloring

 Process shot!

How to make it happen

  1. Cook about one part water to three parts sugar. One necklace will be about 1 cup water, as a reference point.

  2. Once the sugar has completely dissolved and simmered, turn off heat and cool. Mix in any food coloring, and a few drizzles of your choice Torani syrup for flavor. 

  3. Soak middle of ribbon (about 2 feet or more) in the sugar water mixture, then coat in sugar overnight until dry.

  4. Place middle of ribbon inside of sugar water, which has been poured into a large glass container. Use clothespins to clip the ribbons and prevent from falling in.

Allow to grow! Move necklaces around a little every day to prevent it from sticking to the sides. While factors will play into how long this will take, including the size of your piece, the humidity, et cetera, you're basically looking at 1-4 weeks.

Cakespy has written permission to feature the recipe, writing and photos of 1 Fine Cookie. Be polite: if you would like to share as well, please visit the website for policies first.


Pike Place Market Inspired Honey Cream Biscuits Recipe

On the list of Things I Love To Eat, biscuits rank very high. So when I received a review copy of Pike Place Market Recipes: 130 Delicious Ways to Bring Home Seattle's Famous Market by Jess Thomson (who also co-wrote the Top Pot Doughnuts cookbook) and saw that it included a biscuit recipe, I knew I had to try it. The headnote drew me in:

"If you can get past the allure of Moon Valley Organics's honey-scented skincare products at its Pike Place Market Day Stall, you'll also find delicious honey, harvested in Washington's Cascade Mountains. Use it to make these biscuits, which are perfect for breakfast, served straight from the oven. Spread them with butter and--what else?--a little more honey.

Decadent cream biscuits, redolent of honey and topped with more honey? Done and done. Here's the recipe!

The book is well worth a look even if you're not from Seattle, btw--it's full of fantastic recipes, and wonderful stories about the famed and storied market. Oh, and the fishmonger on the right side of the cover, above? I have totally illustrated him in cupcake form. I'm totally not kidding. Someone asked me to do a custom piece once and asked me to use that guy as a picture reference because she had a crush on him. He's the tattooed cupcake, below.

Fish Thrower Cuppies!

Honey Cream Biscuits

Makes 8

  • 3 cups all-purpose flour, plus more for rolling
  • 1 teaspoon kosher salt
  • 1 1/2 tablespoons baking powder
  • 3/4 cup (1.5 sticks) cold unsalted butter
  • 1 cup plus 1 to 2 tablespoons heavy cream
  • 1/4 cup high quality honey
  • 1 tablespoon melted butter

also suggested: more honey and butter, for serving; or, do as I did, and add a big spoonful of brown sugar melted in butter.

Procedure

  1. Preheat your oven to 425 degrees F. Line a baking sheet with parchment paper and set aside.
  2. Whisk the flour, salt, and baking powder together in a mixing bowl. Cut the cold butter into 1/2-inch chunks, and using a large fork or pastry cutter, mix the butter into the flour mix until the butter resembles small peas. Add 1 cup of the cream and the honey, drizzling the honey evenly over the entire mixture, and mix well with a fork until no dry spots remain.
  3. Knead the dough a few times in the bowl to help it hold together (add the extra cream if needed). Turn it out onto a lightly floured surface. Roll it to an 8-inch circle, about 1/2 inch thick. Using a 3-inch biscuit cutter or drinking glass or similarly sized cookie cutter, cut out biscuits, re-rolling so you can use the scraps for more biscuits. 
  4. Invert the biscuits onto the prepared sheet so that the smooth side is up (that way, they'll rise up, not out), brush with the melted butter, and bake for 12-15 minutes, until puffed and golden. Let cool for 5 minutes on the sheet, then serve warm, with butter and honey.

Sweet Fancy: Magical Princess Cupcakes inspired by Amy Atlas

Please just buy Amy Atlas's new book already. Entitled Sweet Designs: Bake It, Craft It, Style It, this sweet book is chock-full of amazing party ideas and as packed as a cup of brown sugar is for a cookie recipe, with delicious recipes and adorable tutorials.

Princess cakes

But don't just take my word for it: check out this cute tutorial.

In the book, there's a recipe and tutorial for "Wicked Pumpkin Cupcakes" which employ overturned ice cream cones for witch hats and candy corn for noses. How cute!

Of course, since it's months from Halloween, I figured it would be pretty adorable to adapt this into a "Pretty Princess Cupcake". Yup, still adorable. And proof that you can use this book as a template to come up with your own party ideas too! Choose your own adventure, yo.

Pretty Princess Cupcakes

adapted from Wicked Pumpkin Cupcakes from Sweet Designs: Bake It, Craft It, Style It.

Makes 12

Assemble your cupcakes. Frost each, spreading until smooth on the cupcakes.

Adhere an approximately 4-inch piece of bubble tape to the top of your ice cream cone, to form a little veil at the top of the hat. You know, how princesses like to do. I adhered it by putting a tiny dab of frosting but then really just gently pressing the gum around the top of the cone; they stayed in place long enough to serve and be devoured. Repeat with remaining cones. If desired, add a little "twist" to the veil.

Making the hat

Place an ice cream cone "hat" onto each cupcake, making sure to leave enough frosting showing for the face. Place the longer licorice strands around the sides, for hair; use the shorter stands in front, for "bangs". I even cut along the color divisions for a nice little fringe on the bangs. 

Put on the hat

Fringe

Note: you can also do the hair first and then stick the "hat" on, but sometimes it doesn't stick as well (the cone won't stick as well to the frosting when the candy is already on it!).

How I did this thing

Create faces using your candy--you can use m&m's for the eyes, but I actually found that using small bits of sprinkles was decidedly adorable too. Using small bits of the leftover Taffy candy, I cut out 1/2 inch segments of the red section and used it as smiling faces, and formed tiny pieces of bubblegum from the bubble tape into tiny pink cheeks.

Sweet  

How I did it

Salted Caramel Tart Recipe from the Edible Seattle Cookbook

Salted caramel tart

I don't know if we have actively discussed how awesome Jill Lightner is. So awesome that I'm not even going to pause and correct the fact that I ended a sentence with "is". Make that two sentences. Hey, it's my website, I do what I wanna!

But back to Jill. She's the editor of the incredible publication Edible Seattle, and she has an encyclopedic knowledge of all things foodie in the greater Seattle area. And even better, her sweet tooth just about matches mine. She was one of the first in line to get a copy of CakeSpy Presents Sweet Treats for a Sugar-Filled Life signed at my book launch party. Yes, I like Jill very much.

Buy this thing

And now she has her own book out: Edible Seattle: The Cookbook . This gorgeous volume includes recipes for Pacific northwest specialties by Seattle area cooks and pastry chefs, as well as profiles on the local providers, ingredients, and inventors of these lovely recipes. It's a vital volume for anyone living in the greater Seattle area, but a great buy for non-Seattleites too. And the dessert chapter is very, very nice, including sables, pies, homemade ice creams, and--my favorite--a salted caramel tart.

Salted caramel tart

The recipe comes from the Volunteer Park Cafe, and yields a crack-like addictive result. The caramel recipe will yield double what you need for two tarts, but it keeps well in the fridge, so save it for a second tart, or just eat it by the spoonful til it's gone.

Here's the recipe for that tart to get your motor running--for more, buy the book.

Salted Caramel Tart

For the crust

  • 1 box (9 ounces) Nabisco famous chocolate wafers
  • 1 stick unsalted butter, melted

For the caramel

  • 2 cups sugar
  • 1 cup filtered water
  • 1 cup heavy cream
  • 1 stick (8oz) chilled unsalted butter, cut into small pieces
  • 1 teaspoon pink Hawaiian Alaea sea salt, smoked gray salt, or fleur de sel

For the chocolate ganache

  • 8 ounces fine quality bittersweet chocolate, chopped (chocolate chips ok)
  • 1 cup heavy cream

Procedure

  1. Preheat the oven to 325 F. Grind the cookies in a food processor or crush by hand until they are fine crumbs. Drizzle the melted butter over the ground cookies, and either pulse in processor or mix by hand until combined. Press into a 9-inch fluted tart pan. Bake 10-15 minutes, until it is fragrant (light browning will be hard to detect on the dark chocolate wafers). Cool to room temperature.
  2. In a heavy medium saucepan, bring the sugar and water to a boil over medium-high heat. Do not stir. Brush down the sides of the pan every 5 minutes with a pastry brush dipped in water to keep crystals from forming. Continue cooking until the caramel is a deep golden brown, keeping a watchful eye on the pot so it doesn't burn. Remove the pan from heat and slowly pour in the heavy cream, whisking constantly. The hot caramel will bubble, so be careful--if it hits your hand, it WILL hurt. Whisk in the chilled butter pieces. Add the sea salt, whisking to comine. Pour half of the caramel into the cooled chocolate crust. Chill until firm in the refrigerator, at least one hour.
  3. Near the end of your cooling period, prepare the ganache. Place the chocolate in a heatproof medium bowl. Over medium heat, bring the cream to a simmer in a small heavy saucepan. Immediately remove from heat and pour over the chocolate, stirring with a rubber spatula until the mixture is smooth and glossy.
  4. Gently pour the ganache over the firm caramel, spreading with an offset spatula. Chill until firm, at least one hour. When slicing, use a warm knife (hold under hot water and dry before using)and wipe off the blade between cuts. Sprinkle each slice with more salt, and serve immediately.

Buy the book: Edible Seattle: The Cookbook.

Magically Awesome: Rainbow Unicorn Pinata Cookies

CakeSpy Note: if you follow me on facebook or Twitter, you probably know I'm partial to documenting my sweet discoveries and daily goings-on. Here's where I post a daily feel-good photo, for no particular reason other than to showcase these sweet little nothings, in hopes that they'll make you smile.

Behold, the most magical cookies, possibly ever: Rainbow Unicorn Pinata Cookies. 

As Sheknows.com contributor (and possible soul twin) Sandra Denneler says,

These multi-striped, burro piñata sugar cookies come complete with hollow centers that you can fill with a secret stash of your favorite candies. Break open or bite into these festive treats and be greeted with a sugary surprise. Olé!

Now. I know that they are meant to be rainbow burros - but really, they look like unicorns to me, so I would like to announce that I have made my decision: unicorns they are.

In the day or two since this recipe was published online, an astonishing number of family, friends, and readers have sent this recipe to me, which is beyond flattering: when you think of sweet, magical, rainbow, unicorn things, YOU THINK OF ME! That's about how it should be, I think.

Find the full recipe and tutorial on sheknows.com.

Regional Sweets: Mom Blakeman's Creamed Pull Candy

Mom Blakeman's

How can I describe Mom Blakeman's Creamed Pull Candy in a way you'll understand?

Well, here goes. First, imagine taffy.

 But not sticky like taffy. Maybe the smoothness of taffy, but with the melty texture of a butter-mint.

...but even more butteriness. Like a dab of buttercream frosting in there, too. But not a fancy meringue buttercream...more like the grocery-store birthday cake frosting that you probably would never admit you like to your foodie friends.

Imagine all of these separate aspects, and now swirl them into a sort of nugget of candy. A deliciously rich nugget of creamy candy. Now you're getting the idea of the magic that is Mom Blakeman's.

Mom Blakeman's

I honestly forget where I first heard about this candy. Maybe my college roommate, who was from Kentucky? Or perhaps one of my awesome friends in KY like Brigitte or Stella? I don't know. But I definitely know how I first tasted it: a reader, Melanie, sent me a tub of the stuff. Related: I like Melanie.

Naturally, I got curious about this sweet treat's pedigree. Founded in 1961, the company was founded by Mom herself--here's what I learned:

The website told me a little more about the candy itself: "The candy is better-known in local community as "cream" or "pull" candy. Creamed Pull Candy is a team effort involving several people to cook, pour it on cold marble, pull, cut, cream, pack and seal the candy. Making creamed pull candy is an art passed from generation to generation."

And then it told me the fascinating story of how the company took off.

 Maxine "Mom" Blakeman started making her creamed pull candy in her home in Lancaster, KY in the 1940's. She had a restaurant on the public square and made her candy available to her patrons. She was known for her generosity. During World War II, she always served any armed service men who came into her restaurant a free meal.

Residents of Lancaster who knew Mom Blakeman still talk of how she always had some candy for any school children who stopped by. After her husband passed away, she sold her large house to a couple on the condition that she could live in and make her candy in the two story garage on the property.

Mom Blakeman's candy was well known throughout central Kentucky. Mom Blakeman was encouraged to market her candy in 1961 by her good friend, Colonel Harlan Sanders, founder of Kentucky Fried Chicken. Upon her death in 1970, the business was passed down to a friend who worked with Mom. Changing owners only a few times, the company is family owned and operated with one focus...making great candy.

Sweet! I always love a good backstory with my delicious treat. And this is certainly a sweet one--I can understand why Mom Blakeman's is sought out from far and wide! It's exactly the type of treat you'd really miss if you moved away from a place where it was readily available.

Mom Blakeman's

Of course, happily, in the age of the internet, we can order online and get it delivered to our door. Should you want to do such a thing, hit up the Mom Blakeman's website here. I also found a creamed pull candy recipe here.

Delicious Volume: Midwest Sweet Baking History by Jenny Lewis

Brownies: a midwest baking classic!

I'm fond of saying that "everything tastes better with a backstory". After all, isn't it more fun to eat a chocolate chip cookie while imagining Ruth Wakefield in a Massachusetts toll house, trying to take a shortcut making chocolate cookies by adding chocolate chunks, and inadvertently creating an American icon? Or picturing a hapless baker in St. Louis mixing up the sugar and flour in a recipe and ending up with Gooey Butter cake? 

If you find this sweet lore fascinating, then you should probably go ahead and invest in the new release Midwest Sweet Baking History: Delectable Classics around Lake Michigan by Jenny Lewis. It's published by The History Press. Did you know they existed? I didn't, but I am glad I do now--they have a ton of interesting books.

a book I like a lot

This volume is a comprehensive source for learning about the popular treats of the Lake Michigan region--but really, it goes beyond that. 

While you'll get plenty of sweet stories about specific foods, you'll also get a very interesting primer and backstory on the general history of baking in America.

There are chapters devoted to the development of popular baking ingredients (ever wonder when baking soda became a common pantry item?) and the developments in kitchen technology which played into what and how we ate. Author Jenny Lewis, who is a pastry chef, Certified Culinary Educator (did you know that was a thing? I didn't! I also didn't know all of these degrees existed!), and clearly One Smart Cookie, also gives some of the backstory on companies such as Kraft, Nabisco, and even smaller manufacturers in the Midwest such as Lessafre Yeast Company.

And then there are recipes. Yes! From historical--including one of the first printed brownie recipes, from the Chicago area, old fashioned doughnuts, and homespun pies--to contemporary, such as peach crumble with cornmeal cinnamon streusel, apple tart with salted caramel, and cherry whiskey cake.

Morever, what we learn is that recipes--and baking methods--aren't so much invented as they evolve--and so, the popular baked goods will reflect the immigration patterns of the United states, often the result of "old country" favorites getting a "new world" makeover based on the kitchen technology and ingredients available in the new surroundings. And it's a fascinating and delectable journey.

Buy the book here: Midwest Sweet Baking History: Delectable Classics around Lake Michigan; listen to an interesting interview with the author here.

Sweet Discovery: Cake Magic by Kate Shirazi

Cake Magic

Recently, I was sent a review copy of a book called Cake Magic by Kate Shirazi. And after careful review, I have decided that even if it hadn't been sent to me for free, I'd probably buy this book. And I would recommend it to friends, too.

Now, I don't want to be bossy about it. But I know that you're not going to really read the reasons (the creative projects, the fun lore and stories in the headnotes, the user-friendly format), so I'm just going to go right to showing you five things that intrigued me right away in the book.

First off: English Madeleines? What? I've never heard of such of a thing. But gosh, now I want to get to know them better.

Cake Magic

Second: Little tarts featured with a photo of little dollhouse people. I don't even care what flavor they are, I want one! Cute.

Cake Magic book

Third: Teacakes that look like some sort of tricked-out Mallomar. I vote yes on this. 

Cake Magic

Fourth: The snuggle loaf. I have had the urge to snuggle with carbohydrates before, and I consider this permission to act on this urge.

Cake Magic

Fifth: The Fancy Pants cheesecake. Eat it with your pinkies out, yo!

Cake Magic

Ready to buy? Thought so. Find it here: Cake Magic.

Save the Date: Joy The Baker at CakeSpy Shop on March 17!

Want the recipe? Come buy the book!Save the date, sweeties.

Joy the Baker is coming to CakeSpy Shop in Seattle!

We are THRILLED to be hosting this extra-special event for our dear friend, Joy the Baker! Join us to celebrate Joy and her first cookbook at CakeSpy Shop on Saturday, March 17th! Come hang out with Joy, CakeSpy founder Jessie, and the winner of the "So You Wanna Be a CakeSpy?" contest, Molly Allen!

Want to learn more about the book? OK.

Joy the Baker Cookbook: 100 Simple and Comforting Recipes is a celebration of butter, sugar, and cream--all of our favorites! Everyone is just looking for an excuse to eat chocolate for breakfast, and this book is reason enough to indulge. With 100 recipes and photographs, like Avocado Pound Cake to The Best Chocolate Bundt Cake, the Joy the Baker Cookbook is designed to be fun, approachable, and meant to make you feel like a wizard in the kitchen.

Joy will be here to tell us all about her awesome new book, answer questions for her fans, and of course have a stack of books to sign!

Date: March 17

Time: 3-6pm

Location: CakeSpy Shop, 415 East Pine Street, Seattle; 206.325.1592

Check out the Facebook invite here. Oh, and you might like to hear the interview with Joy and CakeSpy together, too!

Sugarlicious: A Blog Tour and Giveaway

It's official: we have a tie.

Not that there was a contest, of course, but I have to concede that when it comes to Most Adorable Book Ever, I think that  my book now has to share the title with Sugarlicious , the newest release by Meaghan Mountford of The Decorated Cookie and Edible Crafts Gossip. I'm happy to share the title, though, because it truly is delicious, and the author is totally sweet.

Here's some info about the book:

Sugarlicious is filled with over 200 colorful pages of ideas for decorating cute and clever sweets, including cookies, marshmallows, cupcakes, cakes, cake pops, petits fours and candy clay. You’ll learn to put sweets on sticks, color icing and frosting, pipe with a decorating bag, make fondant decorations, use edible writers and icing sheets, paint and stamp with food coloring, decorate with candies and sprinkles, and so much more. Froggy cupcakes, milkshake cake pops, mustache and bow tie cookie pops, sparkly marshmallows, a lawn ornament cake and pretty painted petits fours are just a tiny sampling of what’s inside.

And here's some proof of the cuteness:

Sugarlicious by Meaghan Mountford Sugarlicious by Meaghan Mountford Sugarlicious by Meaghan Mountford

And you can win a copy, along with other awesome stuff! The prize is a copy of Sugarlicious and the prize pack (photo attached), which includes a Sugarlicious apron, hot pink oven mitt, spatula, post-it notes, and a little recipe booklet. 

How do you enter? It's so easy. You just leave a comment on this post and tell me about either the cutest dessert you've ever made OR eaten! You get entered TWICE if you post a link to a recipe or photo of it!

The winner will be chosen at random next Saturday, February 18; due to shipping fees, we are only able to offer this giveaway to US and Canadian entrants. If you can't wait to see if you won, you can buy Sugarlicious here. Good luck!

Cashew Talkin' Bout? Cashew Crunch By Sweet Girl Sweets

It is time for me to tell you about my latest obsession: Cashew Crunch by Sweet Girl Sweets.

Sweet Girl Sweets was borne out of baker/candy maker Cindy Parsons' passion for making sweet treats for friends and family; she's upgraded to a small commercial operation, and will ship her Cashew Crunch nationwide.

I had the pleasure of meeting Cindy and sampling the Cashew Crunch when she was in town for business and dropped by the Tom Douglas cookbook social; she was kind enough to bring some of the sweet stuff for me to sample. Now, after one bite of the sweet confection, I was hooked.

How to explain? Well, if you imagine the most delicious peanut brittle you can, and then take it into the back alley and pummel it, pound out the peanuts and replace them with creamy, slightly salty, delicious cashews, you're starting to get the idea. I literally could not stop eating this stuff. I was tempted to say I'd never eat peanut brittle again, but I wouldn't want to be too hasty, you know?

But I digress. Basically what I am telling you is that you should buy this stuff. Per the website: 

The specialty of the house is Cashew Crunch, a simple blend of fine cashews, real butter, and sugar, combined to make a sweet treat you won't be able to put down once you've had your first bite.

Sweet Girl Sweets makes each batch to order.  We don't make a big batch and split it up.  This "small-batch" thing seems to work for scotch and wine and other fine foods, so why not for our exceptional candy as well?


You can find Sweet Girl Sweets online here.

Sweet Snapshots: Deep-Fried Kool-Aid and Scones at the Puyallup Fair

The Puyallup Fair is a legendary thing in the Seattle area. There's something for everyone: rides, games, animal shows, and--most interesting to me--plenty of fair food.

Famous foods from this century-old fair include the Fisher Scone, Ice Cream Dip, and of course corn dogs and burgers (you know, to keep the sweets company). 

Today marked my first ever visit to the fair--on the last day of its 2011 run.

I got to taste the famous scones, of course. At $1.25 a pop, these sweet, biscuity, butter-and-jam filled treats are decidedly exquisite among the usual fair fare (which is generally more iconic than it is delicious, if we're going to be honest).

However, that's not to say that fair food isn't fun. And to honor that, I also sampled something from the "Totally Fried" booth. Sadly, they were out of my first two choices, Deep-fried Bubblegum and Deep-Fried Butter--but happily, they DID have Deep-Fried Kool-Aid. It was gummy, it was tangy, it was sweet, it was fried.

It was awful and awesome, all at once. I am not sad I did it, but I don't feel a need to eat it again any time soon. Or ever, really.

Of course, there's more eye candy: here are some sweet snapshots of some of the sweet foodie things that were at the fair this year--be sure to visit next year to get in on the sweetness yourself! Visit thefair.com for more. I have also featured a couple of the fair's prizewinning recipes this week--for Maple Spam Doughnuts and tricked-out Banana Bread!

Sweet Find: Scanwiches by Jon Chonko

From Scanwiches by Jon Chonko, published by powerHouse Books.I am absolutely obsessed with the new book Scanwiches by Jon Chonko, published by Powerhouse Books. This book features oddly sexy, almost Damien Hirst-style sandwich cross sections, presented in a high design sort of way and then gives a blurb about the sandwich's specs and place in society. While it is not a recipe book per se, it does feature the "construction" of each sandwich, so it invites readers to create their own versions (or seek out the best in their town). 

But don't take my word for it all; here's the official book description.

Scanwiches takes the sandwich and spreads it out for all to see. There's nothing quaint or humble about its presentation. From full-frontal, cross sections of monsters like the Dagwood and club, to minute, geometric tea sandwiches whose construction looks more like minimalist art than culinary creation, Scanwiches presents unabashed food porn that satiates even the most severe sandwich fetish. A supernova of swirling bread, cheese, meat, and lettuce, suspended in a black, vacuous space, and reproduced at actual size, each sandwich lays imposing, exposed, and tantalizing. Complimented by text revealing the origins and development of each sandwich throughout history, you'll learn to love and lust after these lowbrow delicacies in a whole new way.

From Scanwiches by Jon Chonko, published by powerHouse Books.But why should it be written up on a cake and dessert themed website? Because while there aren't many dessert sandwiches, there are enough to make it of interest to the dessert lover. Profiles on the fluffernutter and on sweet tea sandwiches captured my interest in particular, and I think they would interest you, too. In fact, the tea sandwich has spawned the idea for my next entry on Serious Eats (picture preview below!).

Buy the book Scanwiches here.

Sweet to Eat: Chocolate Salted Caramel Lollipops Recipe from Sweet Confections by Nina Wanat

Photo by White On Rice CoupleSo, the other day I received a review copy of this book. It had a gorgeous cover, and an alluring title: Sweet Confections: Beautiful Candy to Make at Home. The book was written by Nina Wanat, whom I have never met but would like to, for several reasons, including:


  1. She grew up in New Jersey (like me!)
  2. She is the founder of Bonbonbar Confections in San Francisco. OMG!
  3. She has a sweet blog called Sweet Napa.
  4. This book totally rules. It's user-friendly, has gorgeous pictures by the folks who run the website White on Rice. My apologies for messing with their lovely photo above.


here's a sneak peek at my favorite recipe from the book so far: Chocolate Salted Caramel Lollipops!

Chocolate Salted Caramel Lollipops

Makes, like, 20.

 Equipment

  • Lollipop molds or silicone mat and baking sheet
  • 1-quart saucepan
  • Heatproof silicone spatula
  • 2-quart saucepan
  • Candy Thermometer
  • Large spoon
  • Lollipop Sticks

Ingredients

  • 1 tablespoon corn syrup 
  • 1 tablespoon butter
  • 3/4 tablespoon kosher salt
  • 1/2 cup cream
  • 1 cup sugar
  • 1.5 ounces chocolate, chopped
  • Flaky sea salt, for garnish

Procedure

  1. If you don't have lollipop molds, place a silicone mat on a baking sheet.
  2. Boil the corn syrup, butter, and kosher salt, and cream in a 1-quart saucepan over medium heat. Meanwhile, caramelize the sugar over medium-high heat with a heatproof spatula in a 2-quart saucepan. When the sugar is caramelized, immediately reduce the heat to low, and add the cream mixture, scraping the pan. Stir over medium-high heat until the mixture is smooth. Add the chocolate. Cook to 274 degrees F, stirring slowly but constantly.
  3. Remove from heat and quickly drop the syrup from the tip of a large spoon into the cavities of the lollipop molds, if using. Alternatively, drop the syrup onto the silicone mat so that it forms 2-inch discs, placed to lave space for the sticks. Place a lollipop stick in the center of each disc, and twist it 180 degrees so that it is fully covered by the syrup. Sprinkle the coarse salt on top, crushing it between your fingers as you sprinkle it so it is not too jagged. Let cool completely. Peel off the lollipops, and store in an airtight container.

30 Uses for Leftover Birthday Cake

Fact: when you have over 30 birthday cakes, you're bound to have some leftovers. And after my BYOC (Bring Your Own Cake) birthday party to celebrate my recent 30th birthday, I found myself with over 36 types of cake. What to do to maximize the leftovers in such a situation? Luckily, I had a few ideas. Here they are, in case you ever find yourself in such a situation:

  1. Enjoy it the morning after, straight from the fridge or freezer. It's not elegant, but it has its charms.
  2. Birthday Cake Bread Pudding.
  3. Leave it at the bus stop in a tupperware container with a note for someone to find it. I'd eat that if I found it at a bus stop.
  4. Birthday Cake French Toast.
  5. If it's cupcakes...Bake 'em in MORE cupcakes!
  6. Chocolate Covered Cake on a Stick. Hey, they do it with cheesecake and Key Lime pie!
  7. Use one of these tricks to bring it back to life.
  8. Cake Crumb Cookies. I'd never heard of them til today!
  9. If one of them was a cheesecake, make a Grilled Cheesecake.
  10. Make trifle.
  11. More specifically, make a "Russian Cake" or "Creole Truffle". 
  12. Share it with the public (that's what I do at my store!).
  13. BIRTHDAY CAKE SHAKE!
  14. Crumble it up and use it as an ice cream topping or mix-in.
  15. Use it as a cinnamon roll filling! Like this recipe, but with cake instead of cookie dough.
  16. Slice it into thin slivers and use it to line a pie plate. Prepare a batch of your favorite no-bake pudding or cream pie filling, and pour it into the cake-sliver "crust". Possible flavor combinations: Hummingbird cake with banana pudding filling.
  17. Crumble it and make cake pops, adding a little extra frosting or butter if needed to make the filling hold together; coat with melted chocolate or candy coating as in this recipe.
  18. Similar, but with booze: make rum balls.
  19. Make Birthday Cake Soup.
  20. Make "chocolate salami". No, I am not kidding. And no, I didn't invent it, but I'm glad it exists.
  21. Use two thin slices as the bookends to an especially decadent ice cream sandwich.
  22. Make a cake-plate sampler and share it with your next-door neighbors. Extra points if you give it to a neighbor you've never met before.
  23. Make cake croutons, the perfect topping for candy salad!
  24. Use it (cake only, no frosting) to line a tart or pie pan before baking (it will keep things from sticking).
  25. Make a charlotte, using sliced birthday cake in place of bread or ladyfingers.
  26. Crumble up an entire slice and bake into a batch of brownies. You'll be rewarded with crunchy bits and swirls of buttercreamy frosting. 
  27. Top it with jam and eat instead of toast for breakfast. Healthy!
  28. Birthday cake cereal. Cut it into half-inch cubes and put in a bowl. Pour milk over it and eat with a spoon. Better than granola!
  29. Cube it and entomb it in an awful but awesome-looking jell-o mold.
  30. Deep-fry it. On a stick, if desired.