Tapioca Pudding with Coffee Syrup and Caramelized Tapioca

Lucky you, dear readers! What we've got here is a guest recipe and excerpt from the fantastic new book Brazilian Food by Thiago Castanho and Luciana Bianchi

This is a really lovely book, with photos as vibrant as what I imagine Brazil to be (having never been, it's all imagination for me!). The recipes are accessible, flavorful, and interesting--and exotic. It's a cookbook to dream on, and I think it would make a nice holiday gift!

And, well. Even if none of that intrigued you, the fact is this: the cover features rainbows.

 Note: the photo and recipe in this post are used with permission from Brazilian Food by Thiago Castanho & Luciana Bianchi, Firefly Books 2014, $39.95 hardcover.

‘Bolo podre’ com calda de café e tapioca caramelizada 

Tapioca pudding with coffee syrup and caramelized tapioca 

This is a traditional pudding of the Amazon region. It does not contain wheat but granulated tapioca flakes, usually moistened with coconut milk. We eat it in the morning or late afternoon, but it is always accompanied by a cup of freshly brewed coffee. 

Serves 10 

* 2 vanilla beans   

1/2 cup (50 g) unsweetened, finely shredded dried coconut 

* 2 cups (500 ml) whole milk  

* scant 1 cup (200 ml) sweetened condensed milk  

* scant 1/2 cup (100 ml) unsweetened coconut milk 

* 1 cup (120 g) farinha de tapioca (granulated tapioca) or Farinha de Tapioca substitute (see page 82)  

* oil, for greasing  

Coffee syrup   

* 2 ¾  oz (80 g) rapadura or unleveled . cup (80 g) dark brown sugar 

* 1 cup (250 ml) hot espresso coffee 

Caramelized tapioca 

* unleveled . ¾ cup (100 g) farinha de tapioca (granulated tapioca) or Farinha de Tapioca substitute (see page 82) 

* unleveled . ¼ cup (60 g) superfine sugar 

1. Cut the vanilla beans in half lengthwise, and scrape out the seeds with the tip of a knife. Put the seeds, bean pods, shredded coconut, and all the milks in a saucepan. Place over medium heat, and cook, stirring constantly, until the mixture reaches scalding point. Discard the vanilla bean pods. 

2. Put the farinha de tapioca in a large bowl, and add the hot milk mixture. Stir well. Pour the pudding batter into a generously oiled 12 x 4.-inch (30 x 11 cm) loaf pan, and refrigerate it for 3 hours, or until it is firm. 

3. To make the coffee syrup, combine the rapadura and . cup (60 ml) of water in a saucepan. Heat for 2 minutes, stirring until the rapadura has dissolved. Add the coffee and remove from the heat. 

4. For the caramelized tapioca, combine the farinha de tapioca and sugar in a saucepan, and heat gently, stirring constantly, to melt the sugar. Cook until the caramel is a light golden brown. Pour the mixture into a nonstick baking pan and let cool. Store in an airtight container. 

5. Transfer the chilled cake to a serving board, and sprinkle with the caramelized tapioca. Serve in slices, accompanied by a drizzle of coffee syrup. 

Tips from Thiago: When pouring the pudding batter into the pan, press it down gently to pack it together and prevent it from falling apart when it is removed from the pan. 

Sugar Cookie Dough Cups from Dessert Mash-Ups

I felt a shiver of excitement upon receiving a review copy of the new book Dessert Mashups by Dorothy Kern of Crazy For Crust (a site well worth checking out if you ask me). Before I even opened the book, I already loved the concept. Upon opening it, I just got more excited: s'mores cakes, cheesecake cookie dough truffles, carrot cake-coffee cake...the tasty mashups prove that if some is good, more is amazing (something I have long suspected).

Basically, I'm going to tell you that if you liked my first book, CakeSpy Presents Sweet Treats for a Sugar-Filled Life, then you absolutely need to buy Dessert Mashups

In case I haven't made myself clear enough, I'll bring the point home with an excerpt from the book, for sugar cookie dough cups. This excerpt, including headnote and photo, is reprinted with permission from Ulysses Press. Thanks dudes!

Sugar Cookie Dough Cups

My father-in-law was a sugar-cookie fanatic. Every Christmas I’d make our family sugar cookies and I’d have to make him his own extra batch so he wouldn’t eat all of ours (and he would have!). Over the years I started making lots of other sugar-cookie treats, from bars to candy, to give him for every holiday and birthday. I made these in his memory, and I know that he would have loved them (and eaten them all without gaining an ounce).

  • Yield 12
  • Prep Time 45 minutes
  • Chill Time 1 hour 15 minutes

Ingredients

  • 1⁄4 cup (1⁄2 stick) unsalted butter, softened
  • 1⁄2 cup granulated sugar
  • 1⁄2 teaspoon vanilla extract
  • 2 teaspoons whole milk
  • 1⁄2 cup all-purpose flour
  • 12 to 16 ounces vanilla-flavored melting chocolate
  • Sprinkles (optional)

Procedure

  1. In the bowl of a stand mixer fitted with the paddle attachment or with a hand mixer in a large bowl, cream together the butter and sugar. Beat in the vanilla, milk, and flour.
  2. Form the dough into a disk. Place between two sheets of waxed paper on a cutting board. Roll out to 1⁄4 inch thick. I like to peel the waxed paper off the top, then flip the dough over and peel it off the bottom after every few rolls so that it doesn’t stick. Refrigerate for at least 15 minutes.
  3. Using a 2-inch round cookie cutter, cut 24 circles of dough, rerolling as necessary. Place half the dough rounds on top of the other half, for a total of 12. Refrigerate until ready to assemble cups.
  4. Melt the melting chocolate according to the package directions. (See Candy Dipping Tips.)
  5. Line a standard 12-cup muffin pan with paper liners. Spoon about 1 tablespoon of melting chocolate into the bottom of each liner, enough to coat the bottom. Tap the pan to settle the candy and release any air bubbles.
  6. Place one cookie dough round in each muffin liner. Top with
1 to 2 tablespoons more melting chocolate, spreading as necessary to make sure that the two edges of chocolate meet. Tap the pan again to release air bubbles. Top with sprinkles. Refrigerate until set, about 1 hour. Store in an airtight container in the refrigerator for up to one week. These can also be frozen.
  7. Tip: These are a big dose of sweet! To make them more bite-size, use a mini muffin pan, with mini muffin liners and a 1-inch round cookie cutter. You can also make these with your favorite flavor of cookie dough. Just substitute 1 tablespoon of milk for each egg called for in the recipe to make an eggless cookie dough, and you can omit any leavening that is called for. Use vanilla or chocolate candy melts, depending on your cookie dough flavor.

Someone come over my house, because I feel like I could eat the whole batch!

Batter Chatter: Interview with Baker-Author Gesine Bullock-Prado

Are you a baker? Do you think you're pretty cool? Well, think again. Because Gesine Bullock-Prado wrote the book on cool baking. Actually, she's written several: My Life from Scratch: A Sweet Journey of Starting Over, One Cake at a TimeSugar Baby: Confections, Candies, Cakes & Other Delicious Recipes for Cooking with Sugar; Pie It Forward: Pies, Tarts, Tortes, Galettes, and Other Pastries Reinvented; and now, Bake It Like You Mean It: Gorgeous Cakes from Inside Out. I mean, seriously. You should take a few minutes here to buy all of them.

I baked something last week from the most recent book, and man, did it ever go over well. You'll have to wait a few days for that post, because I've been busy painting cupcakes and unicorns. But in the meantime I will show you a picture of one of the cakes from the book that my friend Peabody made. I hope she doesn't mind me sharing her picture, especially since I didn't ask. But seriously, isn't this amazing?Image: Peabody

Yes, this cake, baked by Peabody, is one of the recipes featured in Bake It Like You Mean It.

Now, if you, like me, are curious to know more about the baking prodigy behind this creative deliciousness, well, you're in luck. Because Gesine was kind enough to answer a few questions so we could all get to know her better. This should whet your appetite til I can post that recipe!

Interview with Gesine Bullock-Prado

What's the best thing to happen to you in the last 48 hours?  The Dartmouth Women's Tennis team sent me a long sleeved team t-shirt to thank me for making them a cake while they were on the road, competing in LA.  I was away from home too, baking in California for the Bake It publicity tour, and I was already in the groove so I pumped out a checkerboard cake to fuel them away from home.  I really wasn't doing it for the cozy t-shirt, I swear.

What are your thoughts on cake for breakfast?  My thoughts are,"yes please."  And let's not forget that muffins, everyone's favorite morning comestible, are really just cake in paper Spanx.

Can you suggest a polite way to extract myself from conversations with people once they've said "I don't like dessert"?  "I have the number of a wonderful therapist who can help you with that."

Do you have any superstitions?  They usually follow along the lines of the rules of "Fight Club."  So I can't talk about them.

Zombie apocalypse! You only have time to grab three objects from your home before running. What are they?  The husband (I often treat him as an object because he's so pretty), the dogs (they count as a single unit and I might stuff them when they pass, so I'm counting them as objects too) and my flock of chickens and water fowl (also counting them as a single unit and see my dog answer re stuffing).

WITHOUT GOOGLING IT: what is cream of tartar, anyway?  If it's a something to do with pastry AND wine, I'll likely know the answer.  Cream of tartar happens to be and acid derived from a sediment left over from delicious wine fermentation,   I also am a meringue fiend and am friends with all acids that help in denaturing egg whites.  Do I get some wine for knowing the answer?


What quality to you most admire in a person?  Kindness

What is your personal mission statement?  Bake it like you mean it.  I'm not kidding.  I've been using it as a mantra for a kagillion years and it took me that long to realize that I could recycle it for use as a book title.  

What is your favorite US city for eating?  Vermont.  I's not a city but our entire population doesn't match the census numbers in a NYC borough so I think it counts.  I think we should rename the state Cheese City.

If you could choose any person living or dead to bake a cake or treat for, who would it be and why?  Mark Twain.  He loved his pie.  While he was spending an extended period of time in the UK, he wrote fantastic letters to his housekeeper back in the states just listing all the pies he wanted to eat when he got back home.

What's the best gift you've ever given?  A Zojirushi Fuzzy Logic rice maker along with a bundle of Japanese Pub Food cookbooks to my husband.  This was a few years ago and I'm still getting great food out of him on a weekly basis.  

Since you live in Vermont...can you tell me a story about creemees? They are delicious and not meant for the lactose intolerant.  I tolerate lactose beautifully so my stories don't include any danger or hijinks.  

If you were able to go back in time and give your 13-year old self a message, what would it be?  Buy stock in Microsoft & Apple.  


- - - - -

Don't you love her? Buy the book now: Bake It Like You Mean It: Gorgeous Cakes from Inside Out

Biscuit Time: Warren Brown's Basic Biscuit Recipe

Warren Brown biscuit recipe

It's possible that there's a bread product that I love more than biscuits. It's just that none come to my mind at the moment.

As a lover and (in my opinion, connaisseur) of the biscuit, I was delighted to see a recipe for them in Warren Brown's new book, CakeLove in the Morning: Recipes for Muffins, Scones, Pancakes, Waffles, Biscuits, Frittatas, and Other Breakfast Treats.

Warren Brown Cakelove in the morning

Now, you know I love Warren Brown and his cakes. And this is a rather pretty new book. For instance, I love the idea that this cake could be considered a brunch food, and can't stop looking at it.

Warren Brown Cakelove in the morning

But back to the biscuits.

As for Warren's recipe: I love his biscuits. When I baked them I didn't get incredible rise on them, but I am going to warrant a guess that this is largely because I was baking at a high altitude (currently in Santa Fe!). Warren Brown's Biscuit Recipe

Nonetheless, these biscuits are fo' sho' very tasty. Nice and buttery and flavorful. A nice canvas for flavored butters, sugar butter topping, or a great base for shortcake. 

Warren Brown's Biscuit Recipe Warren Brown's Biscuit Recipe

Here's the recipe.

Warren Brown's Basic Biscuit Recipe (printable version here)

Makes 10 to 12

  • 13 ounces (about 2.5 cups) all-purpose flour
  • 1/4 cup sugar
  • 2 teaspoons cream of tartar
  • 1 teaspon baking soda
  • 1 teaspoon sea salt
  • 4 ounces (1 stick) unsalted butter, very cold
  • 1 1/2 cups half and half
  • 3/4 stick butter melted (optional--for brushing tops)

Procedure

  1. Preheat the oven to 375 degrees F and place a rack in the middle position. Line two baking sheets with parchment paper.
  2. In the bowl of a stand mixer fitted with the paddle attachment, combein the flour, sugar, cream of tartar, baking soda, and salt. Mix for 30 seconds on low speed.
  3. Cut the cold butter into small pieces and add them to the flour mixture with the mixer on low speed. Continue mixing until the mixture holds together when pinched, about 30 seconds. 
  4. Drizzle in the half and half until the dough is a wet, slightly pasty mass. You may not need all the liquid.
  5. Turn out the dough on to a floured work surface. Dust your hands well with flour. Lightly knead by hand and shape the dough into a disc 1/2 to 3/4 inches thick.
  6. With a 2 to 3 inch biscuit cutter (I used the floured rim of a drinking glass), cut as many biscuits as the dough will provide. Gently re-form any scraps into biscuits without cutting. Brish the tops with melted butter, if desired (do it!), and place them on the prepared baking sheets.
  7. Bake for 12 to 15 minutes, or until the biscuits are lightly browned on the bottom. Allow to cool for 5 minutes on the baking sheet before serving. Store in an airtight container and reheat in the toaster oven (or in the oven).

Sugarlicious: A Blog Tour and Giveaway

It's official: we have a tie.

Not that there was a contest, of course, but I have to concede that when it comes to Most Adorable Book Ever, I think that  my book now has to share the title with Sugarlicious , the newest release by Meaghan Mountford of The Decorated Cookie and Edible Crafts Gossip. I'm happy to share the title, though, because it truly is delicious, and the author is totally sweet.

Here's some info about the book:

Sugarlicious is filled with over 200 colorful pages of ideas for decorating cute and clever sweets, including cookies, marshmallows, cupcakes, cakes, cake pops, petits fours and candy clay. You’ll learn to put sweets on sticks, color icing and frosting, pipe with a decorating bag, make fondant decorations, use edible writers and icing sheets, paint and stamp with food coloring, decorate with candies and sprinkles, and so much more. Froggy cupcakes, milkshake cake pops, mustache and bow tie cookie pops, sparkly marshmallows, a lawn ornament cake and pretty painted petits fours are just a tiny sampling of what’s inside.

And here's some proof of the cuteness:

Sugarlicious by Meaghan Mountford Sugarlicious by Meaghan Mountford Sugarlicious by Meaghan Mountford

And you can win a copy, along with other awesome stuff! The prize is a copy of Sugarlicious and the prize pack (photo attached), which includes a Sugarlicious apron, hot pink oven mitt, spatula, post-it notes, and a little recipe booklet. 

How do you enter? It's so easy. You just leave a comment on this post and tell me about either the cutest dessert you've ever made OR eaten! You get entered TWICE if you post a link to a recipe or photo of it!

The winner will be chosen at random next Saturday, February 18; due to shipping fees, we are only able to offer this giveaway to US and Canadian entrants. If you can't wait to see if you won, you can buy Sugarlicious here. Good luck!

Batter Chatter: Interview with Christy Beaver, Co-Author of Mini Pies

Mini Empire Bakery pies

Curious about the life of a pie-maker and cookbook writer? Here's an interview with Christy Beaver, co-author of Mini Pies: Adorable and Delicious Recipes for Your Favorite Treats (you can find a recipe from the book here!):

So. Your book is out. How does it feel? It's surreal. I can't imagine how new parents feel, because I was totally overwhlemed with joy holding a cookbook.

What was the hardest part about developing recipes for a book? once you get past the standard flavors, developing creative flavors that push the boundries (just enough but not too much) was a fun challenge.

I have a friend (really, I do) who doesn't like Pumpkin Pie. I know, I know. What other pies might you suggest for Thanksgiving? I agree with Morgan (read her interview here). And the savory sweet potato might work for them.

What is your personal favorite recipe in the book? Aunt Jimma's chocolate pie. Its SO freakin' good and totally worth the effort. My second favorite is Verry Berry.

If your partner, Morgan, is expanding Mini Empire to the east coast, and you have a book now, does that mean it's a Maxi-Empire now? It will always be mini and adorbale. That way no one will see it coming when we take over the world.

Any advice for people who want to pitch / write a cookbook, now that you've had the experience? It's a lot of work, and totally worth it. You have to find a balance between being emotionally invested in your project and not bursting into tears once the editor gets ahold of it and changes everything.

What's next? More cookbooks, hopefully. :) We want to write one for mini cupcakes and one for scookies.

Batter Chatter: Interview with Morgan Greeseth, Co-Author of Mini Pies

Mini Empire Bakery pies

Curious about the life of a pie-maker and cookbook writer? Here's an interview with Morgan Greenseth, co-author of Mini Pies: Adorable and Delicious Recipes for Your Favorite Treats (you can find a recipe from the book here!):

So. Your book is out. How does it feel? It feels amazing and surreal to finally hold the book in my own hands.

What was the hardest part about developing recipes for a book? Not gaining 10 lbs from testing all the pies! Luckily we had many volunteers to sample our batches and give feedback.

I have a friend (really, I do) who doesn't like Pumpkin Pie. I know, I know. What other pies might you suggest for Thanksgiving? Bourbon pecan works wonders, and many have stated that they haven't liked Bourbon Pecan until they tried ours. Sweet potato is a good alternate as well. Otherwise, chocolate pie because chocolate is delicious at any occasion.

What is your personal favorite recipe in the book? Very berry, hands down. The first time I tried it, I exclaimed "Holy crap this is good!" Well, more like "hum mum mmm mm uh mmd " because my mouth was full, but I had to let it out.

How did Susanne become such an expert on lemon meringue? I'm intrigued by the recipe intro. Susanne is my mother, and as they say, mothers know best. I grew up with this pie and it was the only pie I liked for years.

If Morgan is expanding Mini Empire to the east coast, and you have a book now, does that mean it's a Maxi-Empire? Although our empire has reached a vast audience, our operation is still as bite-sized as our treats ;)

Any advice for people who want to pitch / write a cookbook, now that you've had the experience? We were fortunate enough to have been asked to write the cookbook, so we don't have experience with pitching. But for those who want to write, I'd say three tips: 1. Make sure you have friends who'll test your treats. 2. Failed recipes are good things. They're help you create an even better recipe. 3. Mothers and grandmothers give some of the best baking advice.

What's next? We have a few secret things in the works and possibly a mini pie kit. 

Buy the book: Mini Pies: Adorable and Delicious Recipes for Your Favorite Treats.

Walnut Macarons with Maple Bacon Bourbon Filling Recipe

Image: Les Petits MacaronsLet's talk about macarons, those fancy little French sandwich cookies.

In general, my thoughts are that they taste so much better when someone else makes them (especially if that someone is Pierre Herme, for instance); however, the newly-released book Les Petits Macarons: Colorful French Confections to Make at Home might just be the book to change my mind. The recipes at first glance seem long and daunting, but really, they're just full of informative tips and are ultimately quite user-friendly. The book covers various methods of macaron-making in great detail, so you can choose your own adventure--sweet! Plus, they have all sorts of fun flavor combinations in their recipes--here follows a recipe, which is very international as it employs the Italian Meringue method of macaron-making and contains all-American bacon in the filling: Walnut Macarons with Maple Bacon Bourbon filling. As the French would say, "Le nom".

Walnut Macarons with Maple Bacon Bourbon Filling

Makes 40 macaron sandwiches

For the macarons

  • 1 1/4 cups walnut flour
  • 3/4 cup confectioners' sugar
  • 1/2 cup aged egg whites from 4 eggs
  • 1/2 teaspoon cream of tartar
  • 3/4 cup granulated sugar

For the filling

  • 12 ounces bacon, sliced thinly
  • 2 tablespoons freshly squeezed and strained orange juice
  • 2 tablespoons maple syrup
  • 1 tablespoon bourbon
  • pinch freshly ground pepper

Procedure

  1. Place the flour, confectioners' sugar, and salt in the bowl of a food processor; pulse 4 times for 3 seconds each to combine. Scrape the bowl in between pulses with a spatula. Sift with a fine-mesh strainer onto a sheet of waxed paper.
  2. In the bowl of an electric mixer fitted with the whisk attachment, whisk the egg whites and cream of tartar on medium speed until soft peaks form, about 2 minutes.
  3. While the egg whites are whipping, heat the granulated sugar and 1/4 cup water in a small saucepan over medium-high heat. Stir to dissolve sugar. If sugar crystals stick to the edges of the pan, use a small pastry brush dipped in water to remove them. Cook until the sugar reaches 235 F (use a candy thermometer). 
  4. When the candy reaches 235 degrees F, quickly and steadily pour the syrup down the side of the mixer bowl, with the mixer running on medium speed. Rest the lip of the saucepan on the side of the bowl so the sugar does not hit the whisk attachment and splatter all over. Continue whisking until stiff peaks form and the meringue is lukewarm and glossy, about 4 minutes. Do not overwhip the meringue or the "feet" won't form correctly (although they will still taste good, so don't fuss too much!). Turn the bowl upside down to check that you have reached the right stage: the meringue should not slip in the bowl.
  5. Place the sifted dry ingredients into the bowl and push them toward the sides to form a well in the center of the bowl. Spoon the lukewarm meringue into the center. With a rubber spatula, stir the meringue from the center out in a circular motion, as if you were making a pasta dough. The meringue will pick up the dry ingredients from the inside to the outside of the bowl; this process should take about 1 minute.
  6. Spoon the batter in a pastry bag fitted with a 1/2 inch round tip (or, simply cut a 1/2 inch opening in the bag). Fill the bag halfway, leaving the rest of the meringue in the bowl while piping; cover it with plastic wrap while a batch is in the oven. If you overfill the bag, you'll not be able to squeeze it hard enough to pipe even shells. Twist the top of the bag to close.
  7. Pipe into quarter-sized mounds, about 1/4 inch high, on a silicone or parchment-lined sheet, with 1 1/2 inches around each. Bake at 200 degrees F for about 15 minutes; increase temperature to 350 degrees F and bake for 9 more minutes, or until the shells feel firm and just come off of the paper or silicone. repeat until all of the batter is used.
  8. Once all of the macarons are baked and cooling, prepare your filling. Line a large plate with paper towels. Cook the bacon in batches in a saute pan over medium-high heat until it is crispy, 8-10 minutes. Remove the strips to the lined plate and let cool enough to handle, then chop finely.
  9. Cook the orange juice, maple syrup, bourbon, and bacon in a wide saute pan over medium heat until warm, about 2 minutes, stirring frequently to ensure that nothing sticks to the pan. Remove from heat, and immediately spoon the filing onto 40 macaron shells, evenly dividing it. Top with another shell, twisting slightly to secure the filling, and serve warm or at room temperature.


Sweet to Eat: Chocolate Salted Caramel Lollipops Recipe from Sweet Confections by Nina Wanat

Photo by White On Rice CoupleSo, the other day I received a review copy of this book. It had a gorgeous cover, and an alluring title: Sweet Confections: Beautiful Candy to Make at Home. The book was written by Nina Wanat, whom I have never met but would like to, for several reasons, including:


  1. She grew up in New Jersey (like me!)
  2. She is the founder of Bonbonbar Confections in San Francisco. OMG!
  3. She has a sweet blog called Sweet Napa.
  4. This book totally rules. It's user-friendly, has gorgeous pictures by the folks who run the website White on Rice. My apologies for messing with their lovely photo above.


here's a sneak peek at my favorite recipe from the book so far: Chocolate Salted Caramel Lollipops!

Chocolate Salted Caramel Lollipops

Makes, like, 20.

 Equipment

  • Lollipop molds or silicone mat and baking sheet
  • 1-quart saucepan
  • Heatproof silicone spatula
  • 2-quart saucepan
  • Candy Thermometer
  • Large spoon
  • Lollipop Sticks

Ingredients

  • 1 tablespoon corn syrup 
  • 1 tablespoon butter
  • 3/4 tablespoon kosher salt
  • 1/2 cup cream
  • 1 cup sugar
  • 1.5 ounces chocolate, chopped
  • Flaky sea salt, for garnish

Procedure

  1. If you don't have lollipop molds, place a silicone mat on a baking sheet.
  2. Boil the corn syrup, butter, and kosher salt, and cream in a 1-quart saucepan over medium heat. Meanwhile, caramelize the sugar over medium-high heat with a heatproof spatula in a 2-quart saucepan. When the sugar is caramelized, immediately reduce the heat to low, and add the cream mixture, scraping the pan. Stir over medium-high heat until the mixture is smooth. Add the chocolate. Cook to 274 degrees F, stirring slowly but constantly.
  3. Remove from heat and quickly drop the syrup from the tip of a large spoon into the cavities of the lollipop molds, if using. Alternatively, drop the syrup onto the silicone mat so that it forms 2-inch discs, placed to lave space for the sticks. Place a lollipop stick in the center of each disc, and twist it 180 degrees so that it is fully covered by the syrup. Sprinkle the coarse salt on top, crushing it between your fingers as you sprinkle it so it is not too jagged. Let cool completely. Peel off the lollipops, and store in an airtight container.

Carnival Cookies Recipe from Super Natural Every Day

I will tell you the truth. When I first encountered the recipe for Carnival Cookies in the lovely and amazing cookbook Super Natural Every Day: Well-loved Recipes from My Natural Foods Kitchen by Heidi Swanson, the first thing that captured my attention was the name. Carnivals are fun! But as I scanned the ingredients, I became alarmed: "these sound sort of healthy." But then, the more I lingered on the entire list, I thought "gosh, these sound fairly delicious, in spite of some alarmingly healthy-sounding ingredients!".

And you know what? I was rewarded when I tried them out in my own kitchen. They tasted vaguely granola-y, but not in a bad way. In a decadent way. But...here's the thing. (Duh) I forgot to photograph these beauties before bringing them to an event, but you can find some pretty pictures here.

Carnival Cookies

Ingredients

  • 1 1/2 cups well-mashed bananas
  • 1 teaspoon pure vanilla extract
  • 1/4 cup barely warmed (not solid) extra-virgin coconut oil
  • 1 1/2 cups rolled oats
  • 1/2 cup almond meal
  • 1 teaspoon aluminum free baking powder
  • 1/2 teaspoon ground cinnamon
  • 1/2 teaspoon fine-grain sea salt
  • 2/3 cup shelled whole peanuts
  • 1 cup dark chocolate chips
  • 1 1/2 cups popped corn

Procedure 

  1. Preheat oven to 350 with racks in the top and bottom third of the oven. Line two baking sheets with parchment paper.
  2. In a large bowl, combine the bananas, vanilla, and coconut oil. Set aside. In another bowl, whisk together the oats, almond meal, baking powder, cinnamon, and salt. Add the dry ingredients to the wet, stirring until combined. Fold in the chocolate, then the peanuts, and lastly the popped corn. The dough is looser than a standard cookie dough, but don't worry.
  3. Firmly shape balls with your hands, about 1 heaping tablespoon each, and place them about 1 inch apart on the prepared baking sheets.
  4. Bake 14-17 minutes, swapping the baking sheets from top to bottom once along the way, until the bottoms are deeply golden. Remove from the oven and allow the cookies to cool on a wire rack. Makes 24 cookies. 

Gobba Gobba Hey: Matcha Gobs with Lemongrass-Ginger Filling Recipe from a Sweet New Gob Cookbook

Photo: Gobba Gobba HeyTrue Story. Recently I received an email from an esteemed publisher you may know of called Bloomsbury, asking if I'd be interested in a review copy of their new release, entitled Gobba Gobba Hey: A Gob Cookbook. It was written by Steve Gdula, who owns a gob (um, whoopie pie) business by the same name in San Francisco.

As a lover of the Whoopie Pie or Gob (it's a geographical thing), even though I wouldn't call them "the new cupcake", I was beyond delighted to receive this sweet book in the mail, and even more delighted when I found the writing style to be engaging, the business backstory to be interesting, and the recipes to be delectable.

But one of my favorites from the book? Matcha Green Tea Gobs with Lemongrass-Ginger Filling. NOM!

And they were kind enough to allow me to reprint the recipe here. Lucky you! here goes:

Matcha Green Tea Gobs with Lemongrass-Ginger Filling

Recipe courtesy Gobba Gobba Hey

For the batter

  • 4 cups all purpose flour
  • 1/4 cup highest quality Matcha Green Tea powder
  • 1/2 teaspoon baking powder
  • 1.5 teaspoons baking soda
  • 1 teaspoon salt
  • 2 cups sugar, sifted
  • 8 tablespoons butter, softened, cut into 1/2 inch cubes
  • 2 eggs 
  • 1 teaspoon vanilla extract
  • 1 cup buttermilk, at room temperature
  • 2 tablespoons sour cream

For the filling

  • 8 tablespoons unsalted butter, softened, cut into 1/2 inch cubes
  • 12 tablespoons cream cheese, cut in 1/2 inch cubes
  • 1 teaspoon vanilla extract
  • 1-2 teaspoons fresh lemon juice
  • 3-4 tablespoons lemongrass-ginger syrup (steps to make below)
  • 2 cups confectioners' sugar, sifted

For the lemongrass-ginger syrup

  • 1 cup sugar
  • 2-inch pieces fresh ginger, sliced into four or five rounds, skin peeled
  • 1/2 cup lemongrass (about 3 stalks), outer husk and bottom tip removed, sliced in rounds
  • 1/2 cup water
  • juice of 1 lemon
  • 1/2 cup loosely packed Rau Ram leaves (optional)

Procedure

  1. Make the cookies. Preheat the oven to 350 F. Line three 8x13-inch cookie sheets with parchment paper.
  2. In a large bowl, sift together the flour, matcha powder, baking powder, baking  soda, and salt. Whisk together until they're evenly green in color.
  3. In another large bowl, cream the sugar and butter with a mixer on medium speed. Add the egg yolks to the creamed ingredients and mix on medium. Add the egg whites and vanilla, and mix on medium-high until the mixture looks like a dense pudding.
  4. Alternate adding the dry ingredients and the buttermilk to the egg mixture, mixing on medium speed after each addition. Then add the sour cream, and mix well. 
  5. Using a tablespoon or pastry bag, drop 1 1/2 inch rounds of batter on the prepared cookie sheets, leaving 1 inch between each round. Bake 8 minutes, or until the gob domes have risen. Remove the gobs to a wire rack to cool.
  6. Make the filling, part 1. First, make the lemongrass-ginger syrup which you'll set to the side. Place the sugar, ginger, and water in a saucepan. Bring the liquid to a boil over medium heat, stirring to dissolve the sugar. Add the lemon juice and the rau ram leaves, if using, to the syrup, and stir well. Remove the pan from heat and set aside, covered, to let the syrup steep for at least 20 minutes. Strain out the lemongrass, rau ram leaves, and ginger and lemon seeds and pulp, and reserve the syrup for the gob filling. This mixture will keep, tightly covered, in the fridge for up to a week with the rau ram, 2 weeks without it.
  7. Make the filling, part 2. Cream together the butter and cream cheese with a mixer on medium speed.
  8. Add the vanilla, 1 teaspoon lemon juice, 3 tablespoons of the lemongrass-ginger syrup, and confectioners' sugar; beat on medium high, scraping down the bowl as needed to reincorporate the ingredients. Taste and add another teaspoon of lemon juice or another tablespoon of lemongrass-ginger syrup if you'd like.
  9. To frost your gobs (I love saying that), flip the baked gob domes over on a cookie sheet and match up similarly shaped and sized domes. Add 1 tablespoon of filling to the flat side of an overturned dome, then place another dome on top, sandwich-style. Allow the gobs to fully set by refrigerating them on a baking sheet for at least 1 hour. Wrap the gobs in plastic wrap to keep them from drying out.

Street Eats: Chocolate Pudding and Cookies Recipe from Food Trucks by Heather Shouse

Image credit: sugarcave.com

Street food is one of the most exciting emerging sectors of the foodie landscape, creating impromptu dining experiences made possible by following trucks on Twitter or Facebook to find out where they are, and then lining up on the street to get some of the (often unique) food being served up.

It was only a matter of time before a book came out dedicated to the subject, and Food Trucks: Dispatches and Recipes from the Best Kitchens on Wheels is a fun and timely ode to The New Street Food. It is full of stories and recipes, mostly savory, but a small handful of sweet ones.

The one that I zeroed in on, though? Yellow Submarine in Miami, Florida--because they had the most compelling dessert recipe, for Chocolate Pudding and Cookies. It's sort of like my favorite Banana Nilla Wafer pudding, but with chocolate pudding and no bananas.

Angela's Chocolate Pudding and Cookies

8-12 servings

  • 2 boxes (3.5 oz) chocolate pudding (cook and serve)
  • 4 cups cold milk
  • 1 can Nestle table cream
  • 1 can condensed milk
  • 2 (3.15 oz) packages Goya Maria cookies (mexican butter cookies) 
  1. Make the pudding according the package instructions. Let the pudding rest for 2-3 minutes, then add the table cream and condensed milk, mixing very well.
  2. Into a large, round glass bowl, pour enough of the chocolate mixture to cover the bottom of the container. Add a layer of the Maria cookies, then top with a layer of the pudding; repeat until the cookies and chocolate mixture are used up. Let the treat rest in the fridge for 2 hours, then spoon out on to plates and serve.


Tate's-Off: A Tasteoff Featuring Homemade Vs. Purchased Tate's Chocolate Chip Cookies

For your consideration: Tate's Bake Shop, in Southhampton, NY. As their website invites, 

If you're in the Hamptons and walk around the charming little Atlantic coast town of Southampton, you'll see a celadon green Victorian structure with white shutters, framed in flowers, that seems to attract people like bees to a hive. It's Tate's Bake Shop, the fairytale culmination of a dream that got started when 11-year-old Kathleen King began baking cookies to sell at her family's farm stand not far out of town.

Sounds pretty idyllic, huh? But wait, there's more: in addition to having a full-fledged retail store, retail mail order business and wholesale division, they also have a cookbook, released a couple of years ago: Tate's Bake Shop Cookbook: The Best Recipes from Southampton's Favorite Bakery for Homestyle Cookies, Cakes, Pies, Muffins, and Breads

And even more recently, they sent me a parcel of samples, containing aforementioned cookbook, as well as a variety of mail-order cookies (in three flavors: macadamia, oatmeal raisin, and their bestselling item, chocolate chip cookies). Now, of course I am thankful for these goodies--I mean, who doesn't love free stuff? But at the same time, every time I receive something like this, the mischievous side of me can't help but cry out to be heard.

And so I decided to put these cookies to the test by doing a taste-off: Tate's Versus Tate's. I made a batch of their bestselling item--the chocolate chip cookies--and then my friend Danny and I did a taste-test of the mail-order version versus the homemade version. Which would win?

Now, I realize that I probably had the home-team advantage here: my cookies would be slightly fresher, warmer, and we both would have known that someone superbly cute had made them. So to level the playing field, I did make sure to fully cool the cookies before serving, and then to lightly warm both specimens on the still-warm oven before serving. The results?

Appearance:

Tate's Mail Order: More perfectly formed than the homemade version, and the chocolate chips must have been different, because they were slightly flatter in this version.

Tate's Homemade: Slightly irregular, but not displeasing in appearance. Also the centers were slightly lighter, probably because if anything I err toward slight underbaking.

Texture:

Tate's Mail Order: Very crunchy--crackery, even.

Tate's Homemade: Crunchy on the outside and mostly through, but lightly chewy in the center even when cooled.

Taste:

Tate's Mail Order: Dry, but not stale--still very buttery, and redolent of brown sugar and deep chocolate flavor.

Tate's Homemade: More moist, even when cooled and crunchy. Pleasingly salty, and although they used less chocolate than the original recipe, they still tasted like they had more chocolate chips. Perhaps uneven distribution? Or perhaps the fact that although they had cooled, they still retained that chocolatey glow of taste from the oven permeations?

All said and done: While it was clear that these were variations of the same cookie, the homemade version definitely won. Obviously, even though I tried to level the playing field, one thing holds true: just-baked cookies always win. There's a certain something that comes from home baking that can't be beat. Nonetheless, I feel as if it might have been a slightly different outcome had we just scored the Tate's mail-order ones on the same day they had been baked.

Final word: Unless you're in the tri-state area and can go to the source, buy the book and make 'em yourself.

Tate's Chocolate Chip Cookies

  • 2 cups all purpose flour
  • 1 teaspoon baking soda
  • 1 teaspoon salt
  • 1 cup salted butter
  • 3/4 cup sugar
  • 3/4 cup dark brown sugar, firmly packed
  • 1 teaspoon water
  • 1 teaspoon vanilla (I used Rodelle--they recently sent me some as a sample and I am very impressed!)
  • 2 large eggs
  • 2 cups semisweet chocolate chips

Procedure

  1. Preheat oven to 350. Grease or line two baking sheets with parchment or Silpat.
  2. In a large bowl, stir together the flour, baking soda, and salt.
  3. In another large bowl, cream the butter and sugars. Add the water and vanilla. Mix the ingredients just until combined.
  4. Add the eggs and mix them lightly. Stir in the flour mixture. Fold in the chocolate chips. Don't overmix the dough.
  5. Drop the cookies 2 inches apart onto the prepared cookie sheets using two tablespoons or an ice cream scoop.
  6. Bake for 12 minutes or until the edges and centers are brown. Remove the cookies to a wire rack to cool.

Batter Chatter: Interview with Alice Medrich, Author of Chewy Gooey Crispy Crunchy

I'll tell you the truth: I don't get starstruck easily. Oh, Brad Pitt's walking by? "He's shorter than I thought" will probably be my reaction (no offense, Angie).

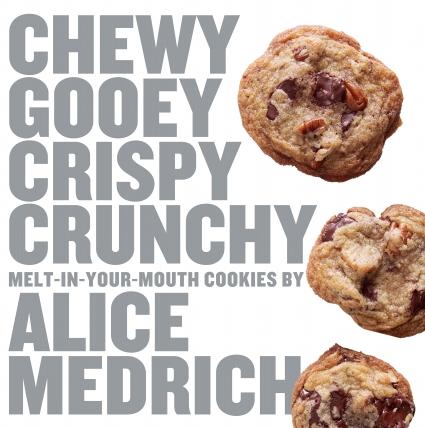
However, it's a different story entirely when I encounter an expert baker and all-around kitchen hero like Alice Medrich. I kind of swoon. Like, OMG! Owner of Cocolat, a dessert shop in San Francisco! She worked at Chez Panisse! She's written 7 cookbooks! And it gets even more exciting with the prospect of actually hanging out with her tomorrow, at a fancy Cookies and Cocktails cookie swap at Cupcake Royale, hosted by Kim Ricketts book events!  Luckily, I kept my cool for long enough to pick her brain about her newest book, Chewy Gooey Crispy Crunchy Melt-in-Your-Mouth Cookies (officially a big deal as one of my top picks of 2010)--here's what I learned:

CakeSpy: I am making the black bottom pecan praline bars for your upcoming event with Kim Ricketts book events in Seattle. Not that it's a competition, but I really want mine to disappear first--any tips?

Alice Medrich, photographed by Dave LauridsenAlice Medrich: Yes, I think you might do well with Scharffen Berger chocolate. 

CS: Hey! I was reading through your book acknowledgments and noticed one of your recipe testers was Jenny Richards. Is that my beloved Jenny, from Seattle?

AM: Yes! I gave her some things I especially wanted to be reviewed.

CS: Soooo....for you, is it chewy, gooey crispy or crunchy?

AM: I love, love, love crispy. But I am also a chocolate lover, so I love the gooey brownies too. And I love crunchy.

CS: What is the difference between crispy and crunchy?

AM: There is a fine line between crispy and crunchy--it was a little tricky to draw it for for the book, but I tried. For me, crispy is thin and makes a certain type of high pitched cracking sound when you bite into it. And crunchy is thick, and it's noisy, but the sound is a lower tone. I consider biscotti to be crunchy, and little thin tuiles, for example, to be crispy.

CS: What do cookies mean to you?

AM: Little flavorful sweet bites that because they're small you're tempted to eat more than one, two, three...

CS: Why do this type of cookbook, and why now?

AM: The reason for doing this book was to create a collection for our current times, which means a collection of cookies that have all the classics we gravitate to--the brownies, the chocolate chip cookies, the snickerdoodles--but that also has some new and modern flavors as well as variations of those cookies, with an emphasis on flavor.

I've also felt for a long time that cookies have been left behind. We're doing all of these exciting things with food--salt is being used in new ways, and herbs and spices, not so much in a fusion way but with a sense of adventure. And so I did want to bring a sense of adventure to cookies--you'll see cookies with exotic herbs and spices, or with salt and pepper, or with options to experiment. An example is the meneina, which I discovered via a Facebook friend. I found it so fragrant and yummy, and it was a lot of fun to develop; also the carrot masala macaroons, which I invented, which were very fun. It takes very little effort to make a cookie into an adventure.

CS: You've had a flour re-awakening, in a few ways. You've switched from bleached to unbleached flour, as well as started to experiment with gluten-free baking. Tell me more. 

AM: I did switch over to unbleached flour, because I believe it's a better ingredient, a purer ingredient and flavor and aroma from the oven. I loved working on the gluten free part too, which was great fun because it's fun to experiment with new ingredients. I didn't want to work with preconceived notions, so I went into the kitchen and tried to come to my own conclusions with what worked.

CS: Your book has a lot of cookies what include grains, or are low-fat, or gluten-free. How do you get your tasters to get over the "healthy cookie" stigma?

AM: I love that question. When I do something that is supposedly "healthy"--whether it's low fat or gluten-free or or whether it's got whole grains, my first concern is "does it taste delicious?". I'm not looking for "pretty good for gluten-free, or low-fat, etc." And it should be delicious enough for you to serve without qualification. In other words, If I make gluten-free cookies and serve them, I will say nothing--unless of course it is of dietary importance to a guest. I may tell them afterward. 

CS: What quality you detest in a cookie?

AM: In a gluten-free cookie, the taste of raw starch; overdone sweetness and fat in others. It has to go together to make it worth my eating. I don't want to eat sugar and fat calories that don't taste good. For me, a cookie shouldn't be primarily sweet--of course it will be sweet, but it should have a flavor that comes forward.

CS: Tell me about some of the recipes that were particularly interesting to develop in the book.

AM: One of the areas I had a lot of fun with in the book is I found a new way of adding flavor to macaroons; I tried peanut butter, and freeze-dried bananas, and they were incredible. It is interesting--you have to have a light hand with the folding, and it does affect hte texture of the meringue, but it makes it more melt-in-your-mouth, and it's just a whole different way with meringues. And they're also naturally gluten-free, so it's great for people who aren't eating wheat.

CS: If you could give the bakers of America one piece of advice, what would it be?

AM: Get comfortable with measuring by weights--not digging the baking cup in the flour canister to measure. People's measurements are far more varied than you'd think. Get a kitchen scale. They require fewer utensils, less cleanup. I think we would get more consistent results from anything that is baked that has flour--they take away the guesswork about measuring flour correctly--and ultimately we would end up with far better quality.

CS: Tell me about an amazing cookie experience--one of pure pleasure.

AM: . It happened a while back, and I wrote about it in my last book--the spice-dusted brownies. It was a day when I had brownies in the oven, and while they were baking I was working on another recipe where I was grating nutmeg on a microplane zester. Then the brownies were done, and I took them out and across the room, I started smelling the brownies, and I went to taste a tiny corner with nutmeg all over my fingers, and I got a sort of nose of fragrant nutmeg, and then this pure hit of bitterswet chocolate, and it made me realize  that what I wanted to do was serve those brownies with that grated nutmeg just beforeso that they could have that same experience. That layered spicy aroma and the pure chocolate, and you still have the nutmeg in your nose a little biut, but you have that lasting tasting of chocolate in your mouth. And it's different than adding the nutmeg in the brownie--it deconstructs the experience. I do the same with cinnamon. It makes it a full sensory experience.

Oh, baby. With that sensuous story of delicious brownies, I'm signing out and getting into the kitchen to bake! You can buy her book here , and if you're in Seattle, you might still be able to snag a ticket to the event if you're lucky: find out more here.