30 Uses for Leftover Birthday Cake

Fact: when you have over 30 birthday cakes, you're bound to have some leftovers. And after my BYOC (Bring Your Own Cake) birthday party to celebrate my recent 30th birthday, I found myself with over 36 types of cake. What to do to maximize the leftovers in such a situation? Luckily, I had a few ideas. Here they are, in case you ever find yourself in such a situation:

  1. Enjoy it the morning after, straight from the fridge or freezer. It's not elegant, but it has its charms.
  2. Birthday Cake Bread Pudding.
  3. Leave it at the bus stop in a tupperware container with a note for someone to find it. I'd eat that if I found it at a bus stop.
  4. Birthday Cake French Toast.
  5. If it's cupcakes...Bake 'em in MORE cupcakes!
  6. Chocolate Covered Cake on a Stick. Hey, they do it with cheesecake and Key Lime pie!
  7. Use one of these tricks to bring it back to life.
  8. Cake Crumb Cookies. I'd never heard of them til today!
  9. If one of them was a cheesecake, make a Grilled Cheesecake.
  10. Make trifle.
  11. More specifically, make a "Russian Cake" or "Creole Truffle". 
  12. Share it with the public (that's what I do at my store!).
  13. BIRTHDAY CAKE SHAKE!
  14. Crumble it up and use it as an ice cream topping or mix-in.
  15. Use it as a cinnamon roll filling! Like this recipe, but with cake instead of cookie dough.
  16. Slice it into thin slivers and use it to line a pie plate. Prepare a batch of your favorite no-bake pudding or cream pie filling, and pour it into the cake-sliver "crust". Possible flavor combinations: Hummingbird cake with banana pudding filling.
  17. Crumble it and make cake pops, adding a little extra frosting or butter if needed to make the filling hold together; coat with melted chocolate or candy coating as in this recipe.
  18. Similar, but with booze: make rum balls.
  19. Make Birthday Cake Soup.
  20. Make "chocolate salami". No, I am not kidding. And no, I didn't invent it, but I'm glad it exists.
  21. Use two thin slices as the bookends to an especially decadent ice cream sandwich.
  22. Make a cake-plate sampler and share it with your next-door neighbors. Extra points if you give it to a neighbor you've never met before.
  23. Make cake croutons, the perfect topping for candy salad!
  24. Use it (cake only, no frosting) to line a tart or pie pan before baking (it will keep things from sticking).
  25. Make a charlotte, using sliced birthday cake in place of bread or ladyfingers.
  26. Crumble up an entire slice and bake into a batch of brownies. You'll be rewarded with crunchy bits and swirls of buttercreamy frosting. 
  27. Top it with jam and eat instead of toast for breakfast. Healthy!
  28. Birthday cake cereal. Cut it into half-inch cubes and put in a bowl. Pour milk over it and eat with a spoon. Better than granola!
  29. Cube it and entomb it in an awful but awesome-looking jell-o mold.
  30. Deep-fry it. On a stick, if desired.


Guest Post: How To Make Gelatin Bows by Nellie Cakes

CakeSpy Note: This is a guest post from Nellie Cakes, a blog written by Nell, a mom who taught herself how to bake so her daughter could have way cooler cupcakes on her birthday than anyone else in school. 

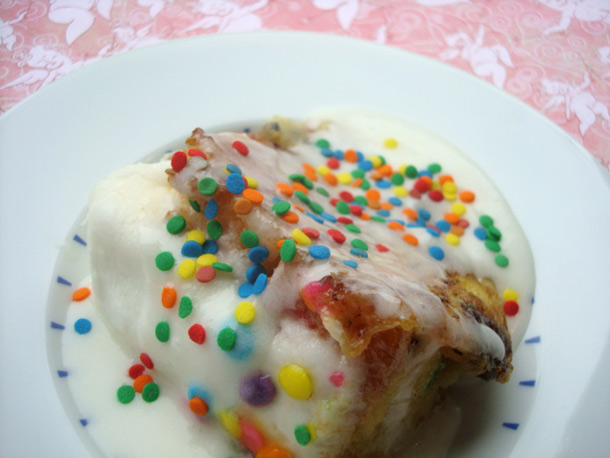
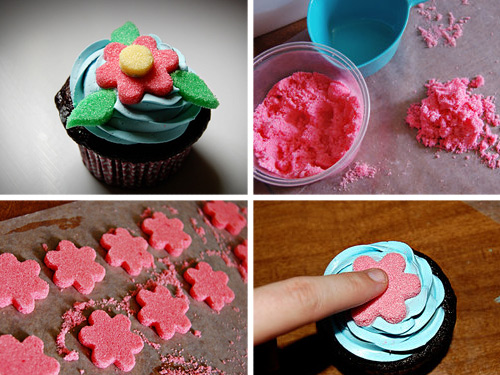
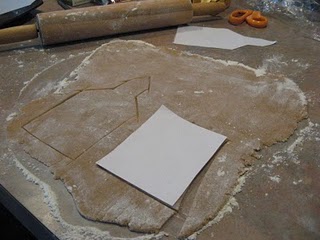
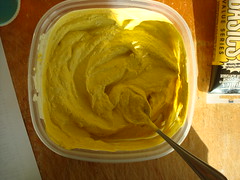
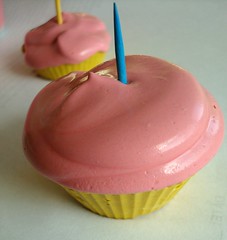
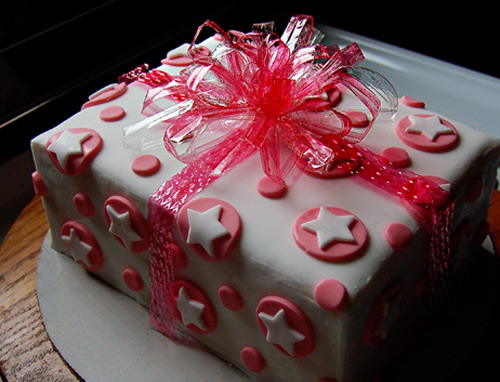
First thing: look at the cake on the top left of the above picture. Now, disregard the cake for a minute, and check out that bow on top! How pretty is that? And guess what! It’s completely edible.  Here’s a closer look at it:

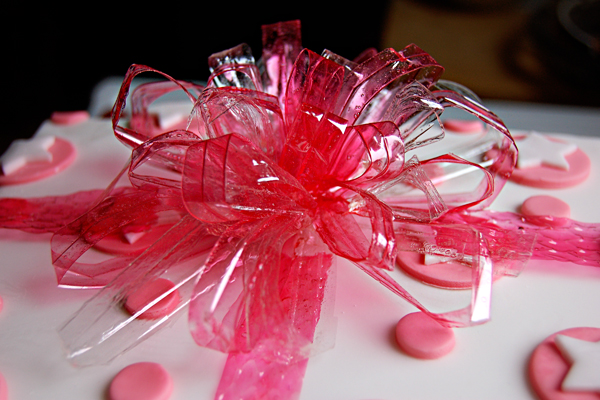
It doesn’t actually taste like much of anything, but it won’t detract from the taste of the cake either, if you decide to slice right on through it. (Which would probably be pretty tough to do.)

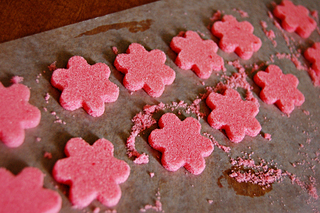
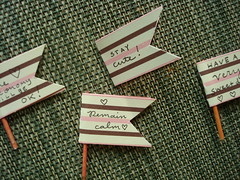
Bows aren’t the only thing you can make with this method either! (Flowers and butterflies would look gorgeous too, no?)

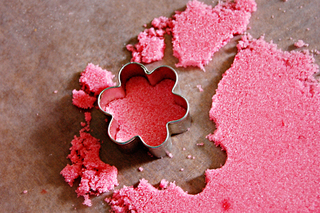
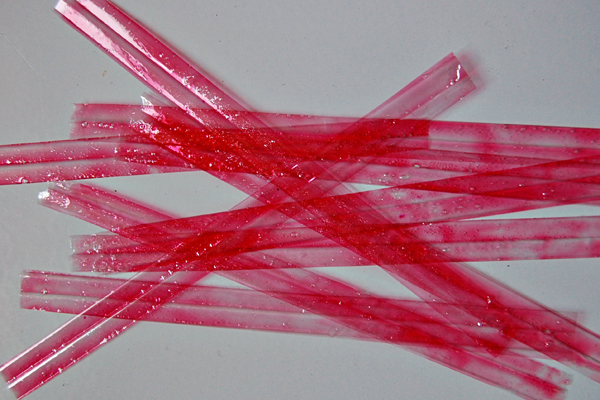
There’s another cool thing about it too! You can use the scraps from your project to make your own home-made edible glitter for all your other pretty desserts! To do that, just take the clippings that you’d normally throw away after you finished the project and cut them into tiny pieces. When I held my clippings next to the glitter I bought, I couldn’t tell the difference at all!

You’ll have to plan a little ahead of time if you want it to be ready for that cake you made because it takes about twelve hours for it to completely dry, plus the assembly time.

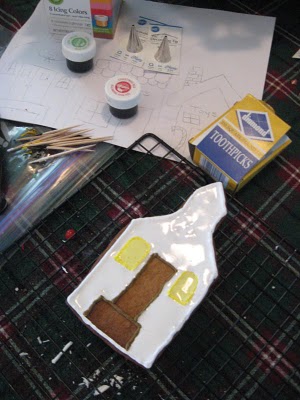
Ok, here’s what you need:

  • Unflavored gelatin (like Knox)
  • Water
  • Food coloring
  • A clean paint brush
  • A non-stick surface, like a pattern board for fondant. (I used Duff Goldman’s Texture Tiles, which were at Michaels for $5)
  • Scissors

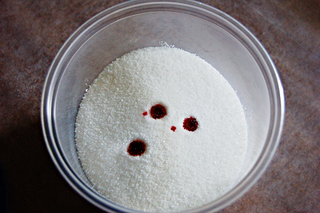
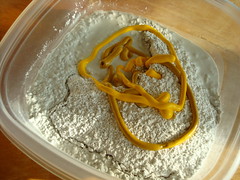
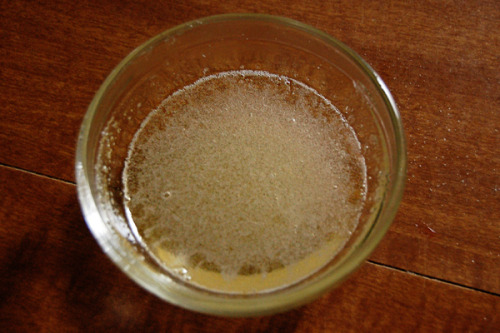
Take one packet of the gelatin (about one tablespoon) and put it in a small bowl with 2 ½ tablespoons of water. Give it enough time to soak up the water completely, about five minutes.

After that’s done, put it in the microwave for about five seconds. Gelatin melts at really low temperatures, so that’s all you’ll need to liquefy it. When you pull it out, it should look like this:

Let it cool for 5 to 10 minutes. When it cools to the right point, a layer of… well, scum, will form on the top. Take a stick of some kind and lift that layer off. If it won’t stay on the stick, let it cool for a few more minutes and try again. It should come off mostly in one piece. Discard that part. Once that’s done, it should look like this:
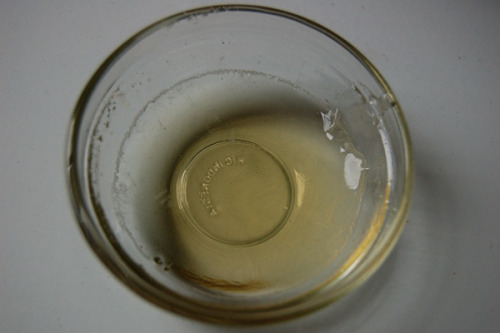
Nice and clear.

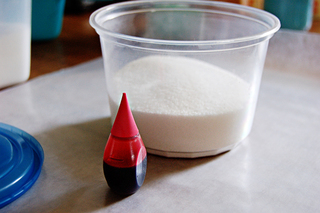
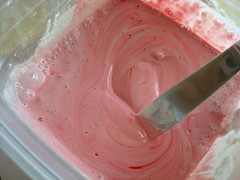
By this time, it will probably be too thick to do anything with, so throw it back in the microwave for another five seconds. When it comes out, add the food coloring and mix it around. To make the pink/red in the bow, I only put one drop of regular liquid food coloring in there. If you want it to be more intense, you could always add more. You can also paint the dried gelatin afterward, with a mixture of high proof vodka and food coloring, so if it dries a lighter color than you anticipated, it’s not a total loss. If you do paint it, the gelatin will warp when it gets wet. Make sure you have two non stick surfaces you can sandwich it between, and put a book or something on top until it dries again.

Once you have it the right color, dip your paint brush in the gelatin and paint it onto the non-stick surface, like this:

I made mine pretty thin, stretching the gelatin to cover two and a half boards, which worked out perfectly for the bow, which measured about five inches across. If you want the bow to be bigger or smaller, you can alter the amount. 

My original surface had a simple pattern on it, so it came off pretty easily. Be careful with patterns that are deeper. They’ll cause the gelatin to pool in certain spots, which will make it pretty difficult to peel off the board without cracking it.

Now you wait. It will begin to harden up pretty quickly, but it takes about 12 hours to fully dry. You’ll know it’s dry because you’ll hear it popping off the board. The first time this happened, I walked all over the house trying to figure out what that crackling noise was. I figured it out about a half an hour into the search. I felt like a moron.

The second time I made this, I made sure to paint it on at night so it would be dry the next morning.

Now that it’s all dry (and weirdly plastic like), slowly pull it off the board. It’s amazingly strong, so you don’t have to worry too much about ripping or cracking it.

Take out a pair of clean scissors (you could even use fancy craft scissors) and clean up the edges so it’s a nice rectangle. Then, cut the rectangles into strips. Mine were about half an inch thick. Like so:

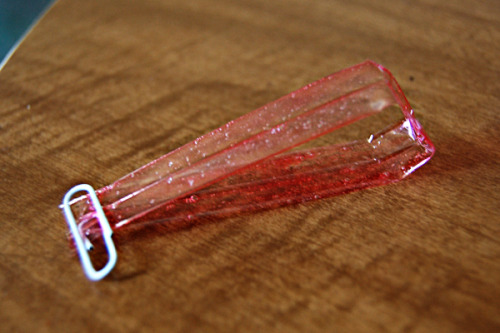
This is where it gets a little trickier. Take the strip and bend it in half, trying not to crease it anywhere. You kind of have to fidget with it to get it right. Once it looks good, warm up some more of the gelatin (if you have some left over. If you don’t, make a tiny bit more) and dip the opposite end of your paint brush in it, and put a dot of the gelatin where you want the edges of the bow to attach. Just pretend it’s Elmer’s glue. You might have to hold it there for a little while until it stays stuck, of you could use paper clips like I did:

 While those are drying, trim a little bit off the ends of the strips you have left, and make smaller loops. And then do it again with even smaller loops. While you wait for those to dry, you can begin assembling the larger ones, if you feel they’re stable enough. Use some of the gelatin to glue the edges together, forming a star with the loops, kind of like this:

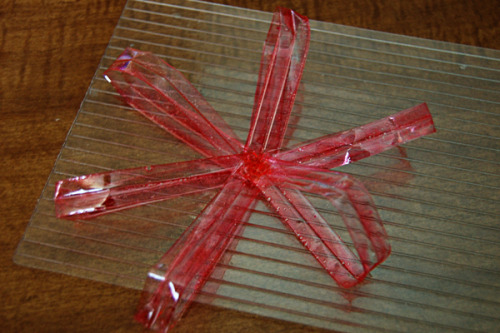
Make sure you glue everything together on top of your non-stick surface, or you’ll end up chiseling gelatin off your table. (Not that I’d know first hand or anything…)

Once that’s stable, add in the smaller ones on top of the first row, but still in between them so it looks well spaced. Repeat. You kind of have to mess around with it to see what looks best. Keep adding the loops until you feel like it’s nice and full. Also, make sure to give yourself time between each major addition, so it doesn’t all fall apart on you.

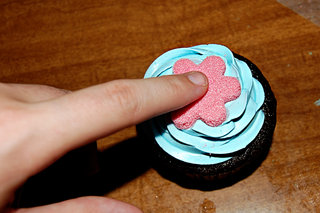
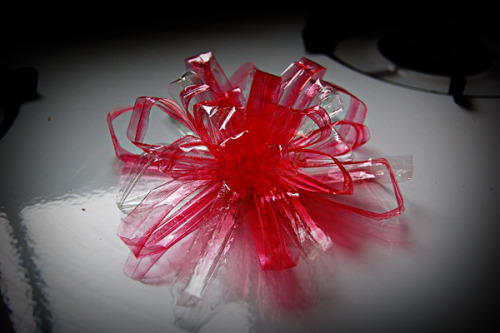
Let it dry over night.When it’s totally dry, you’d be surprised how durable it is! Now you can put it on top of a cake! I used a couple dabs of corn syrup to make it stick.

Here’s a picture of the finished bow before it went on the cake:

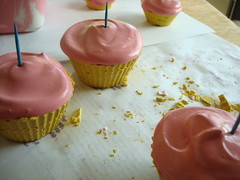
...and here's the cake again.

Hope you enjoyed this tutorial! For more awesome, visit Nellie Cakes!

Guest Post: How To Make Homemade Sugar Decorations by Nellie Cakes

CakeSpy Note: This is a guest post from Nellie Cakes, a blog written by Nell, a mom who taught herself how to bake so her daughter could have way cooler cupcakes on her birthday than anyone else in school. 

I was originally going to write about how to make your own sanding sugar, which is cool in and of itself, but while I was coloring the sugar for the photos I was going to post I got inspired and decided to make some home made sugar decorations too (finished product pictured top left).

The cupcake is plain old chocolate, the icing is Swiss Meringue buttercream and the flower is completely made out of sugar. It’s a cute little thing, isn’t it? I’ve also decorated a cake with sugar stars and an owl.

To make your own colored sugar, you’ll need a cup of regular granulated sugar, some liquid food coloring and a very tight sealing container. I’m not messing around on this point. If it’s not super air tight you’re going to end up with sugar all over your kitchen and ants may or may not invade your home and eat your kitchen down to the floor beams. If this does happen, I will not be held responsible!

All of your stuff should resemble this:

If your stuff doesn’t resemble this stuff, you have already screwed up too badly to go on. Disregard the rest of the post if you can’t put some sugar in a container.

Next, put a few drops of whatever color you’d like into the bowl. I decided on pink for the flowers, but you can make them any color you’d like. Or you don’t have to make flowers at all. I guess it just depends on what cookie cutters you have. Or what food coloring. Anyway, it should look like this now:

Start out with only a few drops because it’s harder to lighten the sugar than it is to darken it. If you try to lighten it you’ll have a more speckeld effect.

I have to warn you, your colored sugar isn’t going to look like the store bought kind. That stuff has something in it to make it shiney. This stuff will be a little less sparkly, but still very pretty. It works out though, because when you make the sugar decorations, using the store bought stuff makes it harder to get a clean edge on your design. The crystals on the store bought stuff are bigger, which is a pain when you try to put the cookie cutter through it.

Once you have a few drops in, close up the lid nice and tight. You might even want to put the container in a zip lock bag just to be safe. After you’ve made sure it’s on lock down, shake theshit out of it. Really go crazy! The harder you shake it the faster the color will disperse. You have to change the dirrection of your shaking every so often too. The goal of the shaking is to break the ball of wet sugar into a bunch of tiny pieces so the color can be mixed around. Is your arm tired yet? Does it look like this?

If it looks like this, you’re not done. You can either close it back up and shake the shit out of it some more, or you can take a fork and break up the little balls of food coloring, then close it up and shake it some more. When it’s finally finished, it will look like this:

But less wet. The wet comes later.

Isn’t that pretty? I used about 8 drops of the neon grocery store food coloring for this pink.

Now that you have your pretty sugar, it’s time to make the decorations. Get out your trusty 1/2 teaspoon measuring spoon, some wax paper, something nice and flat (I’m using the bottom of my 1 cup measuring spoon), and tiny cookie cutters of your choice (or random house hold objects like a bottle cap for a circle).

Measure out 1/2 a teaspoon of water for each cup of sugar you colored and pour it into the container. Close it up and shake the shit out of it again. All of the same rules apply. You still want to break that ball of sugar up so the moisture spreads itself around. Once you’re done, it should feel like wet sand. Squish some of it between your fingers. If it holds a shape, you’re good. If it doesn’t, try adding a tiny bit more water, drop by drop and then reshake it until it does.

Once you have some wet sugar, lay out a big piece of wax paper and dump some of the sugar on top of it. Take the flat thing you have and push it down so you have a layer that’s about 1/4 inch. If it’s thicker, that’s ok too. You just want it to feel like it’s packed down.

Take your cookie cutter and press it into the sugar like you’re cutting out cookies but don’t lift it back out! Instead, keep the cookie cutter flat on the surface and drag it to the side, like so:

Keep it on the waxed paper, and start a line of sugar cut outs as far away from your mound of sugar as possible to allow yourself more room. Once you get however many you will need, make a few more. You will end up breaking some, I promise. I know you guys know what a line of these will look like, but here’s a picture of them anyway.

Aren’t they pretty? I made some leaves and yellow dots for the centers, but the flowers look cute without all that too. Here are my leaves and dots:

Once you have a billion of these things cut out, let them sit there for a few hours. The longer the sit there, untouched, the sturdier they’ll be. I left mine over night. If you don’t end up breaking a few of these like I did, they’d make super cute sugar cubes for a little girl’s tea party or a baby shower.

If you made them a really dark color, they will make your coffee look funny. One time, I made WAY too much blue sugar so my husband was forced to put it in his coffee. It looked really gross when it dissolved. Coffee should never look that way.

Anyway, after they’re all set and hard, just push them into the icing on your cake or cupcake, like this:

For the yellow dots, I used a little bit of the icing (not too much! You don’t want it to squish out the sides!) and glued them onto the flowers:

I stuck a couple of the leaves in there, and ta da! Pretty, completely edible decorations! I like how they look home made and perfect at the same time.

Good luck! I’d love to see pictures if you end up making some! You can email them here (and I’ll probably end up posting them)! Happy decorating, and I wish you the best with the herd of ants.

Spy Lessons: Danny's Tutorial on How to Eat French Toast More Awesomely

If you've ever been to brunch at Calamity Jane's in Seattle, you know that while it's not officially on the menu, the Orange Almond French Toast is pretty much always offered as a special.

And boy, is it ever special. Here's a description of it:

Macrina's Colombe Pasquale bread dipped in Drambuie French Toast batter then grilled, served with a dollop of whipped cream, maple syrup and a dusting of powdered sugar.

That's right: even if it's written in comic sans, it still looks good. But here's something you may not have considered: how will you eat it?

Well, as Danny is about to demonstrate, there is a proper method to apply when devouring to maximize deliciousness. Here goes:

Step 1: Look. At. This.

Step 2: Unwrap butter. Place a small dollop on each slice of toast, so that by the time you butter the last slice, the butter on the first slice is melty.

Step 3: Spread butter on each slice. That's right.

Step 4: In a confident and assertive manner, pour the syrup in a crisscrossing motion from end to end of the French toast fan, to ensure even and full coverage.

Step 5: Spoon or fork a dollop of whipped cream over each slice.

Step 6: Admire handiwork (see picture, top of post).

Step 7: Dig in.

Step 8: You did it!

Step 9:Awesome overload: time to go to sleep, or maybe die, but pleasurably so.

Feel free to apply these steps for awesomeness at your favorite breakfast or brunch establishment, with substitutions as needed based on ingredients. 

Calamity Jane's, 5701 Airport Way South, Seattle; online here.

Calamity Jane's on Urbanspoon

Cutting Up: Tips on How to Cut Bar Cookies

Recently, New West Knife Works sent me a product sample of their most excellent Fusionwood Petty Knife. Now, the first thing I noticed is that it's really a beautiful knife--and they had kindly sent me the "Jessica" style, you know, since that's my name. I knew this was going to be the knife for cutting bar cookies.

But having a great knife in hand isn't worth much if you don't actually know the correct method--and this raises the question--wha is the correct method for cutting bar cookies?

With fancy knife in hand, I set out to find out. Here are some of the valuable tips I have found:

One tip, which I have found through trial and error, is that bar cookies are always easier to remove from the pan if you line it with parchment paper and leave a bit extra trailing up the side of the pan so that you have a "tab" to pull up after baking. No matter how well you may grease the pan, it's always easier to pull up the parchment from the sides, especially for the first few slices, which are notoriously hard to remove.

A tip I found on What's Cooking America is that to make cutting easier once brownies have cooled, score the bars right out of the oven--I recently tried this with a batch of the Baked brownie recipe, and it worked like a charm.

However, you want to wait until the bars have cooled entirely to cut them all the way through. Sometimes I will even let bars chill in the fridge for a half hour or so to get more firm so they don't come apart when cut.

When it comes to actually cutting, make long cuts the length of the pan with your knife--don't make a sawing motion, but rather move the knife in a line until it has made a clean cut. Between cuts, clean knife by dipping it in hot water and wiping with a clean, dry kitchen towel.

For easier serving, remove a corner piece first--this will give you an in to the rest of the goodness in the pan.

As for the knife? Some suggest serrated, but I always like a smooth finish, and think that investing in a nice knife is a good investment--and the New West one has become my go-to knife for cutting bars.

The Splendid Tableau: A Cookie Tableau Adventure from Cake Gumshoe Megan

Cookie Tableau

CakeSpy Note: This is a post from Cake Gumshoe Megan, who gets in over her head every Christmas...

Despite the fact cake is actually my drug of choice, every year at Christmas I become a cookie dervish. I tell myself it's because I'm developing the repertoire I will be known for later in life, but I think it's really just because I finally have an excuse to bake and bake and bake and no one will ask me what I'm going to do with all of those cookies.

Seventeen or so dozen cookies later (gingerbread, sugar, springerle, candy cane cookies, brownies, chocolate raspberry drizzle, chocolate peanut butter chunk, stained glass, macaroons and chocolate butter snowflakes, if anyone was interested), I turned my attention to a cookie tableau. Reading a Theresa Layman book on gingerbread gave me the idea for a tableau, but I decided to make mine out of sugar cookies and have an undersea theme. I have a very good friend who has been so supportive in pretty much every area of my life, and I knew he'd appreciate something edible for the holidays.

What I didn't know was that Mother Nature was conspiring against me.

The blizzard that dumped two feet of snow on the mid-Atlantic forced me to fly home for Christmas two days early and sent my tableau plans sprawling. The Christmas rush forced me to give a non-edible present to my friend, but I still wanted to make a tableau, so I shifted my sights to a gingerbread winter scene.

A trip to Michael's yielded gel paste food coloring and a foray into Wegmans' bulk candy aisle gave me all the decorations I needed (and plenty to snack on). I ended up using Spree, Jelly Belly jelly beans and candy canes.

I would recommend a little planning with this since my lack of design had me dithering in the candy aisle for longer than absolutely necessary, but if you're at all like me, you can totally do this by the seat of your pants too.

First I used a lebkuchen recipe from Festive Baking by Sarah Kelly Iaia. This is my go-to gingerbread recipe. It uses honey instead of molasses, so you can taste the spices rather than the syrup. I used one whole recipe total in making the background and then the buildings and little gingerbread man. I drew templates free-hand and cut them out with a paring knife.


Baking them in an unfamiliar oven yielded slightly crispy edges, but those were neatly covered by royal icing.


From there I just decorated the buildings as my imagination dictated and space on the background allowed. I did make one mistake which couldn't be fixed due to lack of time. I added too much water to my yellow piping icing, so the windows to the church weren't fully flooded. Some of the "icing" soaked into the cookie.


I also wouldn't recommend taking shortcuts with the icing as I did with the sky. Rather than make a whole new batch of royal icing, pipe a border and then flood, I just flooded the whole thing, which led to rather messy edges. I wasn't too worried about thin coverage in the middle since the buildings were going to cover most of it.

I made a few sugarwork decorations and let everything dry for two days. A little Karo syrup glue to attach the buildings to the background, and I was finished. The final size was about 8 1/2 by 11 inches.


I really enjoyed myself despite a total lack of architectural and drawing skills, and I definitely plan to make another one soon. This time I will have a much more detailed plan beforehand!

Cake Quandary: What To Do With Leftover Almond Paste

Delicious Almond Paste!
How many times has this happened to you: a delicious recipe calls for not quite a full can of almond paste, and now you're left with a strange amount, not quite enough to make a full recipe of something, but enough that you feel like you want to use it for something. Is it fated to wither away in your fridge? Not necessarily. Here are several suggestions (from readers and around the internet) for utilizing a small amount of almond paste:

  • Roll it into little balls, the size of your thumb fingernail, then roll in either cinnamon or cocoa for rich, addictive little morsels.
  • Mix it with equal parts of mascarpone and spread on toast or an english muffin.
  • Spread it onto a piece of foil, lightly toast it in an oven or toaster oven. Crumble and sprinkle over the top of an amaretto cocktail with crushed ice.
  • Soften it and swirl into brownies or cupcakes for a light, nutty flavor.
  • Put it on the bottom of an apple pie, just on top of the lower crust. Or do a free-form galette. Yummy heaven. (via chou_in )
  • Dip it in chocolate and eat it whole. (via loveandoliveoil)
  • Use it like marzipan to form into small creatures! (via scifi_girl21 )
  • Add it to pancakes in the morning, either in the batter with a little almond extract or as a topping with a little chocolate.
  • Mix it with chopped almonds and chunky chocolate and put in puff pastry.
  • Add it to any cookie dough recipe-- it would enhance flavor without changing consistency.  (via jenniferkateab )
  • Use it to turn a plain butter cake into an almond cake. Cream the almond paste with the butter (add in small increments) for 3 minutes and then proceed with the recipe as directed. (via lapastrychef )

Sweet Art: A Tutorial on How To Make Fake Cupcakes

People Like You. Really.
Whether you're taking these to the streets as part of a sweet art installation or just want to decorate a room, these cupcakes are not delicious, but they sure are sweet. Keep in mind that this is more of a field guide; feel free to make alterations to suit them to your fancy.

Here's how we made ours:

You will need:

  • Plaster of Paris (available at most hardware stores or Target-type places with a hardware or home section)
  • Water
  • Paint to dye the plaster (we used crafter acrylic paint--the type that is less thick)
  • Cupcake cups (we used the silicone kind, but the paper kind work as well)


Making Fake CakesMaking Fake Cakes
For the cake part: Mix plaster and water (usually 1 part each, but adjust to a pourable but thick consistency). You can mix up whatever quantity you'd like; generally we will do about 3-4 cups' worth at a time; with 4 ounce cupcake-cups, this will make about 8 or so cupcakes. Add a small bit of water-soluble paint (like a watery acrylic or gouache) in the color that you want the bottom part to be, and mix until the color is to the point you like it. Pour into the cups til they level off at the top.


Making Fake CakesFake Cakes

Let these dry for an hour or so. It's ok to move on when they are hard, even if they are still slightly clammy to the touch.


Making Fake FrostingFake Cakes
For the frosting: Do the same plaster mix, but with whatever color you'd like for the frosting (we like pink best--so red paint). You can do slightly less, maybe 2/3 the amount that you used for the cake. Make this "batter" a little bit thicker though (by adding a little more plaster) so that it won't drip off of the sides when applied.
Fake Cupcakes
Using a spoon, gently put a spoonful on top of each cupcake, adding another spoonful to get a gentle "tiered" effect on the frosting, which will kind of melt into a pleasing cupcake frosting-y shape.

Sweet Sentiments
Optional for if you'd like to add messages: While still wet, insert toothpicks into center of frosting so that it will dry with the toothpick in. You can have the flags attached now or attach them later.

Let them set overnight or until they're hard and dry.

Now you're ready to place them on the street--or maybe just give them to friends--but whereever they end up, they're bound to make the world a little sweeter!


Seriously Sweet: How to make a Candy Salad!

Sweet Salad

As part of the Cakespy entry in the Foodbuzz “24 Meals, 24 Cities, 24 Blog Posts” worldwide blogging event, we made just about the sweetest salad ever--here's how to make your own!

We used Merckens Green candy wafers, which can be purchased at cakesnthings.com. Originally we thought that using a leaf mold might work for lettuce (you can see some of them on the bottom layer of the salad), but we discovered this method that worked even better:

Step 1: Melt 'em: You may find that one method works better for you than another. We melted them in the microwave, but many swear by the double-boiler method. Check out the different options here.

Step 2: Spread out a long sheet of plastic wrap (12 inches long or so). On one half of the plastic wrap, spread a 1/3 inch thick layer of the melted confection.

Step 3: Fold the unused portion of the plastic wrap over the candy, and smooth down to a desired thickness (not too thin or it will break!).

Step 4: Wrinkle the still-warm candy gently with your fingers, to give little wrinkles and ripples like on lettuce leaves.

Step 5: Let cool for 20-30 minutes or until solid.

Step 6: Gently uncover. Pieces may break off at the ends, but this is ok--lettuce is abnormally shaped after all!

Garnish as desired (with cake cubes for "croutons", red cookies for tomatoes, etc)

How to make a candy salad