The magic never ends here, and this is your proof: magical cups made of peanut butter--the perfect vessel for peanut butter chocolate mousse!
You'll find the entire recipe and tutorial in all its glory on Peanut Butter and Company's website.

Your Custom Text Here

The magic never ends here, and this is your proof: magical cups made of peanut butter--the perfect vessel for peanut butter chocolate mousse!
You'll find the entire recipe and tutorial in all its glory on Peanut Butter and Company's website.

Look at this: a sweet treat that is also officially dude food!
Darryl Pozzanghera of Rochester, New York came up with this clever recipe, which includes cookies sandwiched with an easy ice cream-esque dairy filling. It's noted in the headnote that "Gluten-free frosty treats are ready and waiting. A sweet stash in your freezer creates instant smiles and cool satisfaction." I'm definitely ready!
Ingredients
Procedure
About this post: Note: the Pillsbury Bake-Off is coming in November! Check out my coverage of the 45th and 46th Bake-Off events, and follow the recipes posted so far by clicking the bakeoff tag below.
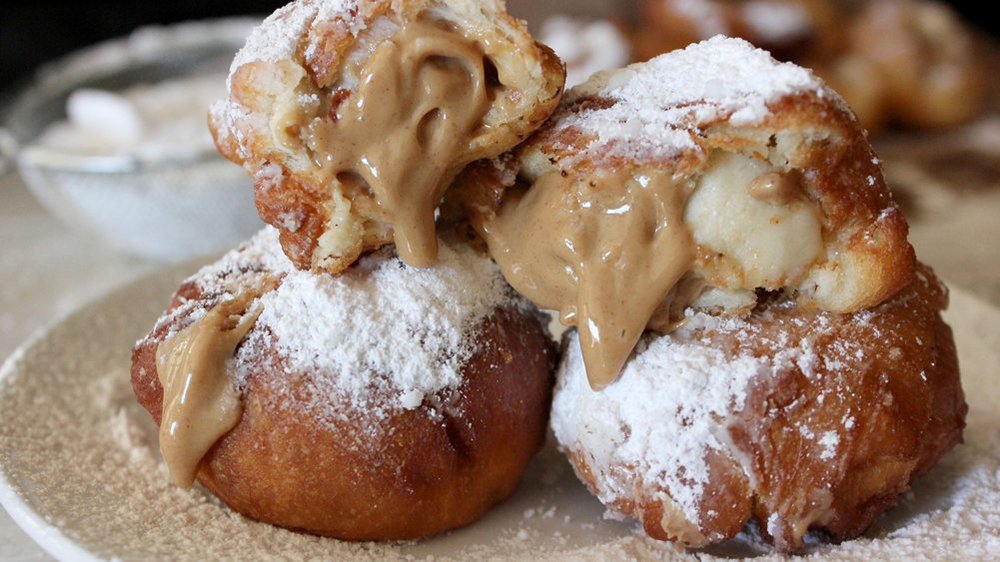
Photo via Pillsbury
Some days are easy; some are hard.
I've found, though, that a a sweet treat can do wonders in terms of turning the latter into the former. Case in point: this fine specimen, called "Fried Peanut Butter Crescent Bombs". Talk about an explosion of om nom nom: these are basically like peanut butter filled croissants, deep fried and coated in sugar. That's a day-maker if I've ever heard of one.
While this recipe very much fits in my world view, I can only wish it was mine: it was part of a roundup Pillsbury sent me a roundup of their "State Fair-inspired" recipes. This isn't the only bit of wonder in that collection: it also includes such classics as churros on a stick to deep-fried candy bars to pizza cones. OMG!
But I'm sure you're ready to move on to the bombs, so here's the recipe. I hope you enjoy it as much as I did!
Courtesy of Pillsbury
Prep time: 15 min / Total time: 35 min
Procedure
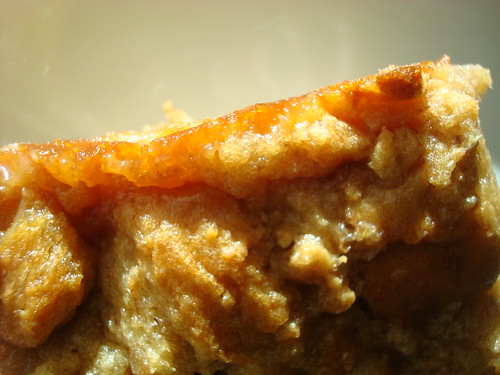
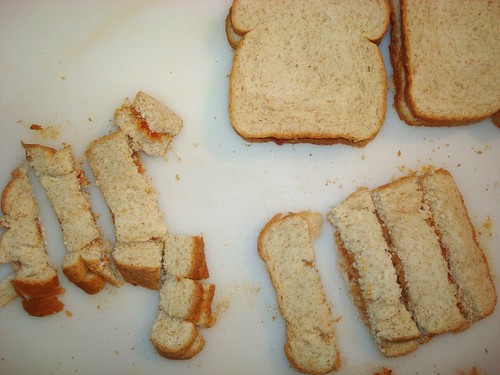
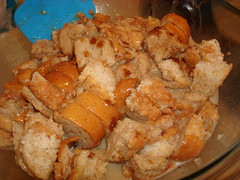
Should you ever find yourself with a stockpile of five or so extra peanut butter sandwiches, have I ever got the recipe for you.
It's bread pudding, but with a big difference: instead of using plain old stupid bread, you're using peanut butter and jelly sandwiches, cut into cubes, soaked in a luxuriant custard mixture and baked to golden perfection.
Seriously. Your glass of milk is going to slap away peanut butter and jelly sandwiches forever after this, demanding this pudding instead.
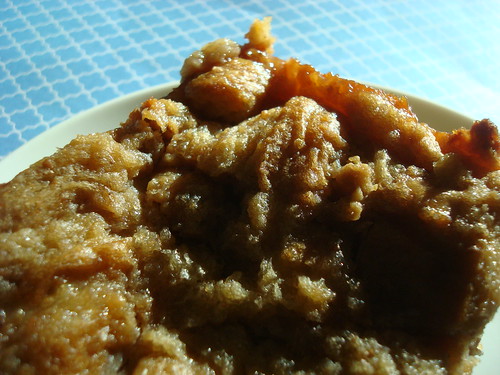
The center is just solid enough to stay firm when sliced, but turns into a wondrous custardy, creamy, peanut buttery goo in your mouth, ribboned with sweet strawberry jelly. 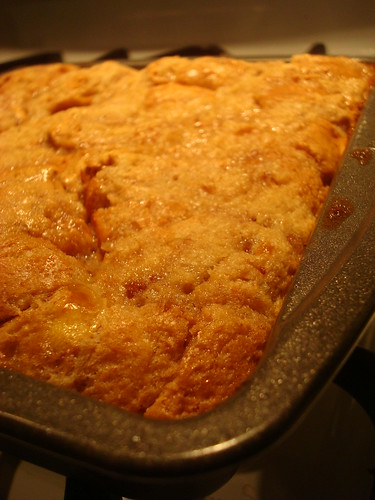
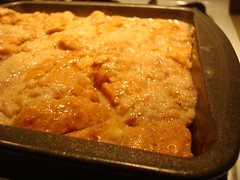
The top is lightly crispy and golden, and portions of jelly on the top and sides sort of caramelize into a slightly crackly but oh so pleasing candy-like consistency. All of the combinations of flavors and textures coming together, plus the nostalgia aspect of peanut butter and jelly sandwiches but the joy of a grown-up recipe, makes for a highly pleasing dessert.

You're welcome. Now, here's how you make it at home.
Peanut Butter and Jelly Sandwich Bread Pudding
Makes 9 servings
Procedure
 Everyone knows that chips and salsa are a delicious precursor to a Mexican meal. But what about giving them a sweet and spicy and rich peanut butter makeover to continue the party post-dinner?
It’s time to introduce Peanut Butter Dessert Chips with Fruit Salsa, a dish wherein plain flour tortillas are brushed with a decadent peanut butter, brown sugar and butter mixture and baked until crispy, then served with jam or preserves. It’s a snap to prepare and makes for some sweetly addictive eating.
 There was a time, in my childhood, during which my parents chose to go without a microwave. I know--hippies!
As a result, I became exceedingly adept at cooking everything with the toaster--for instance, putting foil on top of the toaster oven and heating up microwave pizza using the heat rising from inside of the toaster. Totally not a fire hazard at all.
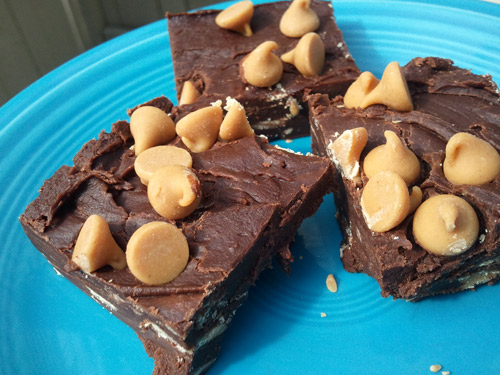
These days, now that I have a microwave of my very own, I really want you to know that I appreciate its presence very much and strive to honor it whenever possible. And what bigger tribute to la belle microwave than making delicious microwave fudge? This is a riff on a recipe I found on Allrecipes.com, but I made the executive decision to use half and half instead of milk (good idea) and to add a healthy dose of peanut butter chips for added rich deliciousness. Here's how you make some microwave magic at home:
 Microwave Chocolate Peanut Butter Chip Fudge
Procedure
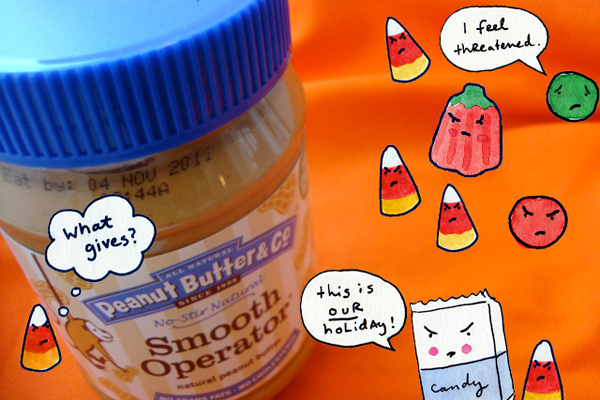
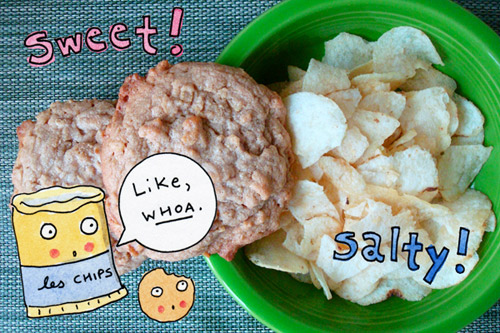 Looking for cookies to serve during your July 4 festivities? Bake this cookie that creates an explosion of flavors in your mouth, of the sweet-savory kind. The sweet drop cookies are nicely contrasted by the saltiness of the chips, but get a fascinating flavor dimension from the nutty Smooth Operator peanut butter. One bite and even doubters will be singing a new story.
Note: I found that you can also get extra flavor-points by using The Bee’s Knees peanut butter, which adds pleasing mellow end-note from the honey mingling with the brown sugar.
For the full entry and recipe, visit Peanut Butter & Co's website!

Oh, I’m sorry. Are you still eating regular pasta, like a jerk?
Time to get with the program: I’m talking chocolate pasta. It’s readily available online, and it’s well worth the investment.
But even an inherently perfect product like this can stand to become slightly awesomer, and so I propose Chocolate Pasta served with peanut butter cookie “meatballs” and a rich, crunchy peanut butter buttercream sauce. It may not be pretty, but it tastes like heaven on a plate. In fact, the only thing that might make it better is a thick slice of buttered pound cake on the side.
Lastly, this makes a swell April Fools’ dessert for someone or some people you love to have fun with
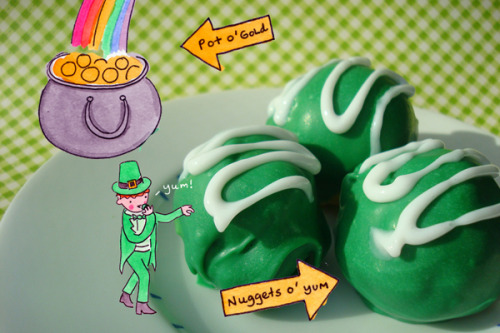 As any leprechaun knows, the journey to the end of the rainbow can be pretty long and arduous. And while the treasure at the end of the line is totally sweet in the figurative sense, the fact is, gold does little to satisfy the physical appetite.
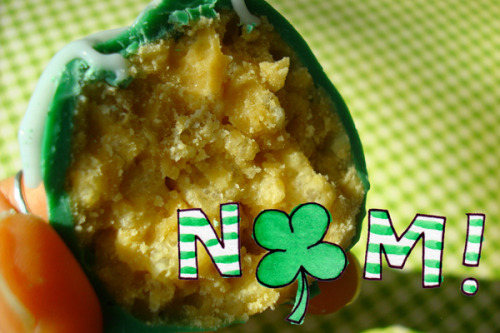 These truffles, however, comprised of a sweet filling with crispy cereal and creamy, rich peanut butter and generously coated with festive green candy coating, are worth their weight in gold when it comes to a satisfying St. Patrick’s Day snack–delicious for humans and leprechauns alike.
For the full entry, more photos and the recipe, visit Peanut Butter & Co.!
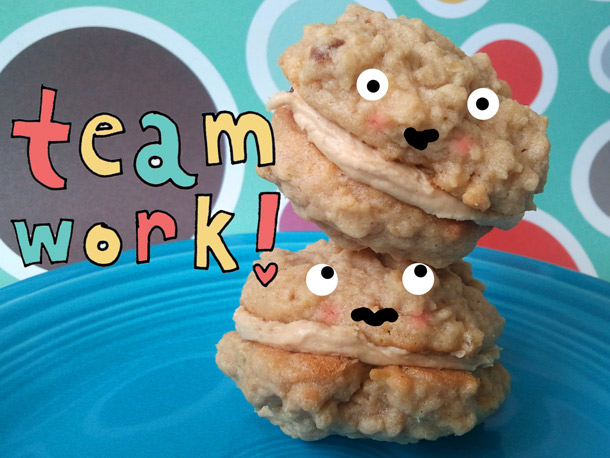 Girl Scouts can teach you everything you will ever need to know about teamwork. How, exactly? Just look to the cookie. I'm talking, of course, about Do-Si-Dos (sometimes called Peanut Butter Sandwiches), where peanut butter and oatmeal cookie work together to make one beautiful baked good. And—even better—they're served in sandwich form, which means that you get to eat two at once, with frosting. Could there possibly be a more warm and fuzzy hand-holding experience of a cookie?
This homemade version, adapted from Frugal Antics of a Harried Homemaker, comes out a bit fatter and more moist than the original (not such a bad thing, right?), but the flavor is fairly spot-on: sweet, nutty, lightly salty, and very buttery. That is to say, dangerously addictive.
Not keen on the peanut butter and oatmeal pairing? Try your hand at homemade Thin Mints, Tagalongs, or Samoas instead!
 I know, I know. You probably went into the sweetest sort of sugar shock when I posted those Homemade Samoas Girl Scout Cookies.
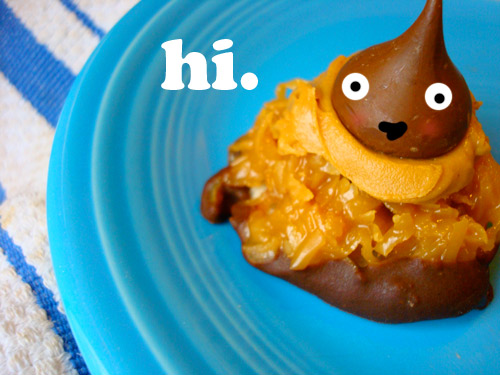
But I want to know that there's a way to make them even awesomer.
It's true. And it involves peanut butter.
While appointing my Samoas with chocolate on top, out of the corner of my eye a jar of peanut butter caught my eye, and a little lightbulb went off in my head.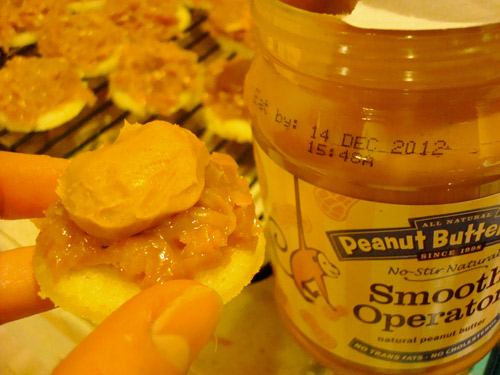
And I'm happy to report that yes, adding a dollop of peanut butter to the coconut-topped Samoas, and then finishing it off with a Hershey's kiss or big dollop of chocolate topping is extremely delicious.
Want to try it yourself? Simply follow the recipe I posted on Serious Eats, but after topping the cookies with your coconut mixture, add a teaspoon of peanut butter and then top with either hershey's kisses or a dollop of the chocolate topping called for in the recipe. Easy as pie! I mean, cookie?
 CakeSpy Note: Did you know that I'm an all-star? Well, an all-star blogger, anyway, for the lovely and amazing Peanut Butter and Co.! Here's a peek at my latest recipe entry, for Cranberry Pecan Pie in a Maple Peanut Butter Crust!
Don’t get me wrong–Thanksgiving has a lot going for it food-wise. But sadly, the traditional offerings are extremely lacking in rich, delicious peanut butter.
But what if–just what if–you combined classic Thanksgiving flavors with a peanut butter cookie crust?
I wanted to find out, and so I prepared a thick Mighty Maple peanut butter cookie crust, which I then filled with a mixture of tart, unsweetened cranberries and crunch pecans, all topped with a thick, brown sugary, pecan pie-inspired filling. The result? Total magic: the tartness of the cranberries is perfectly balanced by the richness of the peanut butter and pecans, and the maple and sugar contribute plenty of sweetness. It’s a flavor combination to be thankful for, indeed.
For the full entry and recipe, visit the All-Star Recipe Blog on Peanut Butter and Co.!
CakeSpy Note: You knew I did recipes for Peanut Butter & Co., right? Here's my latest one.
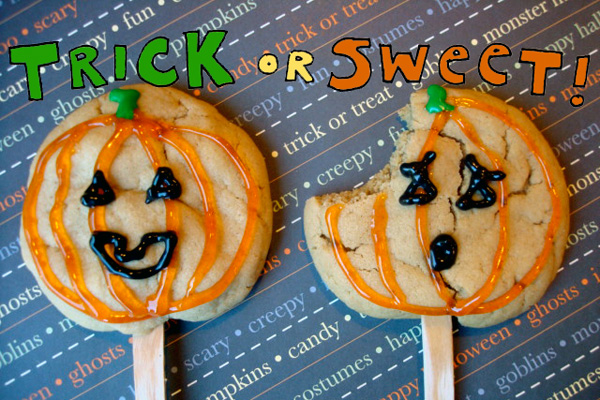
There are probably foods out there that aren’t improved by being served on a stick, but none come to mind at the moment.
But which one is the most fun to serve around Halloween? My vote goes to these peanut butter cookies on a stick. They’re part trick, decorated to look like pumpkins–but they’re even more treat, with a rich, cakey texture and rich, peanut buttery flavor that is far more delicious than any fun-size candy bar could ever hope to be.
 When I encountered the recipe for Dulce de Leche Cheesecake bars in last month's issue of Bon Appetit, my eyes got really big and I think I probably said something like "Whoa".
After a brief moment of despair at having no graham crackers or cream cheese in the house, I found myself wondering "could this work with peanut butter and Reese's Puffs cereal instead?". And so I made said substitutions, and found myself with a pretty tasty treat. They could have chilled longer to set, but friends had no problem dealing with the dulce de leche ooze.
Dulce de Leche Peanut Butter Chocolate Bars
Ingredients
Crust
Filling
Glaze
Procedure
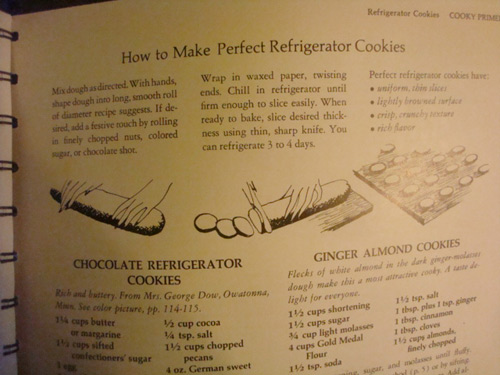
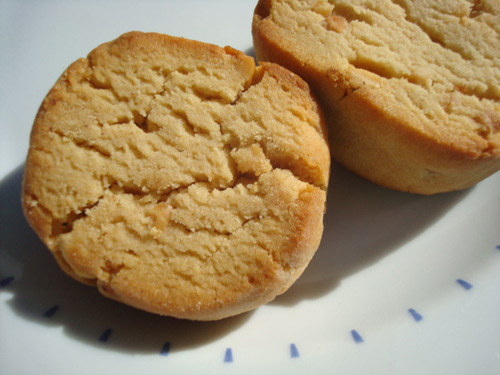 You probably don't think of peanut butter cookies as a slice-and-bake refrigerator cookie, but you should.
I was immediately intrigued when I discovered this recipe in my beloved Betty Crocker's Cooky Book. And, upon testing out the recipe, ultimately rewarded. These cookies have all of the sweet-and-salty flavor that make peanut butter cookies so deliciously addictive, but with a subtle, mellow dimension from the honey, and a more delicate texture than their classic counterpart. The verdict? These fat, chewy, and lightly crumbly cookies are beyond welcome to co-exist peacefully with the flattened-by-fork tines variety in my cookie jar.
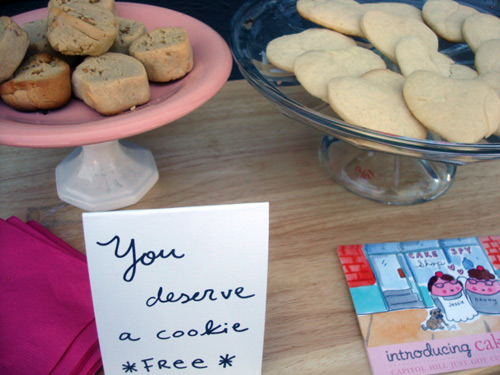
And based on how quickly they disappeared when I put them out at my shop, I'd say that the public agrees. Well, either that, or people will eat anything when it's free.
Note: The original recipe calls for 2/3 cup peanut butter and 1/2 cup chopped peanuts. I split the difference and used a cup-and-a-bit extra of chunky peanut butter--this kind, if you're curious. Also, I used more baking powder than specified in the original recipe.
 Honey Peanut Butter Refrigerator Cookies
Adapted from Betty Crocker's Cooky Book
- Makes about 30 cookies -
Ingredients
Procedure
 Being a good baker is one thing, but being a baker worthy of stalking is completely another.
I'm talking, of course, about David Lebovitz, who introduces the recipe for Peanut Butter Cookies in his new book, Ready for Dessert: My Best Recipes, in this way:
Shortly after my first book came out, my phone rang one night a little after 10:30 p.m. A reader had tracked me down to let me know, with urgency, that she loved these cookies, but that they took 10 minutes to bake in her oven instead of the 9 minutes indicated in the recipe.
When in doubt, err on the side of underbaking so your peanut butter cookies remain moist. Take them out when they are still a bit soft, as they'll continue to firm up a bit after cooling. This time, I've given a bit more latitude to the timing so as to avoid any late-night baking-related emergency phone calls.
Though he never quite says it, the message is pretty clear: this baking rock star has serious stalkers--er, groupies.
But were these cookies really stalker-worthy? I had to see for myself.
I've only made one change from the recipe as printed in the book: instead of using regular creamy peanut butter, I've used Peanut Butter and Company's Dark Chocolate Dreams, figuring that if anything, chocolate will make the recipe even better.
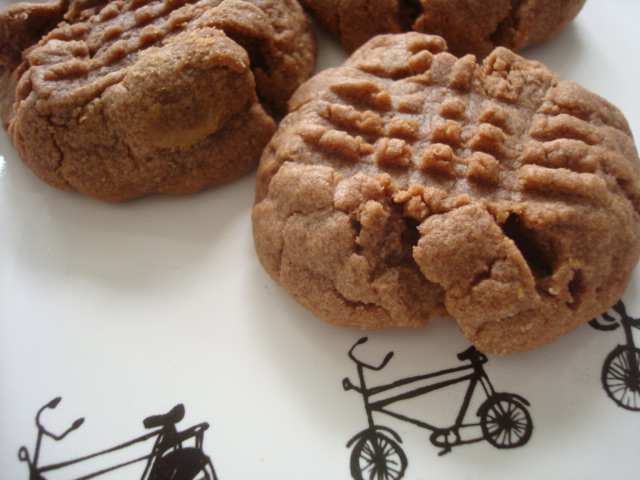 The result? A cookie that is very much the dictionary definition of what a peanut butter cookie should be: moist at the center, lightly crumbly just around the edges, with every bite rich in peanut buttery (accent on the butter) goodness.
These cookies will disappear quickly. Worthy of the worship? Well, let's just say you're gonna need the sugar-and-protein burst of energy to stand outside of Mr. Lebovitz's Parisian pad, clutching boombox a la Lloyd Dobler. Just remember whose idea it was to add the chocolate, sweeties.
 Peanut Butter Cookies Worth Stalking
Adapted from Ready for Dessert: My Best Recipes
Makes about 30 cookies
Ingredients
Procedure
Want more? You can buy the most excellent book here , or for more recipes and "An American in Paris" type lore, visit David's website and follow him on Twitter!