Cake Mix With Beer for National Chocolate Cake Day.

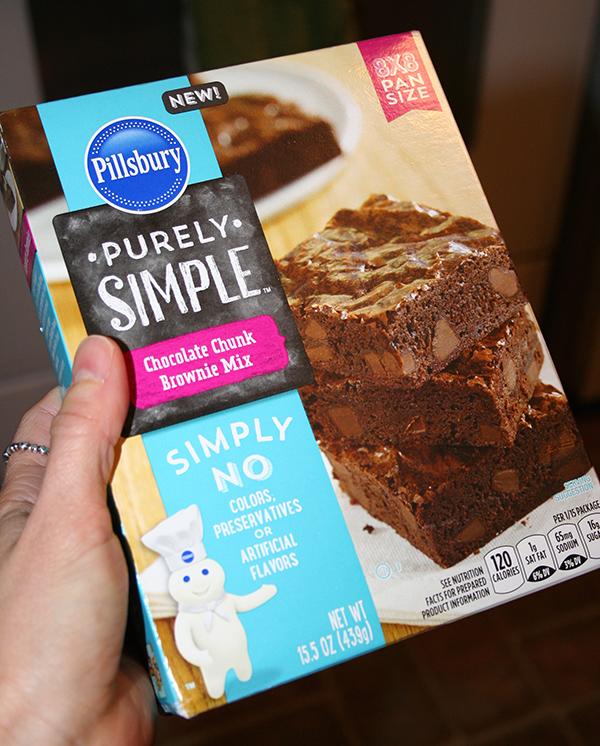
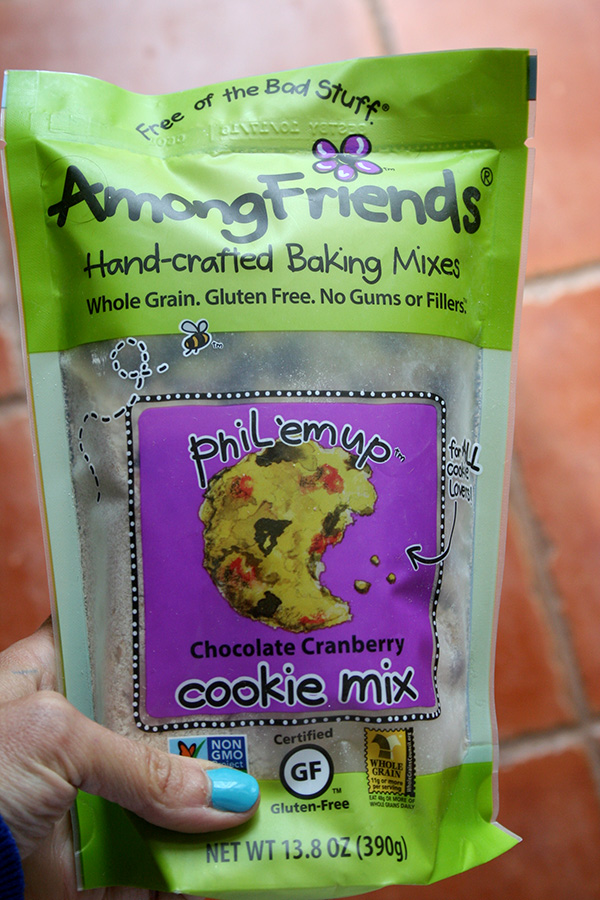
This is a chocolate cake mix. And a beer. What happens when you bake them up together?

Well, it being that tomorrow (1/27) is National Chocolate Cake Day, and that I have been snow-bound in the house for the last few days, I decided to bring on #whathappenswednesday a little early to find out.

This type of experiment seems like a really good idea when you're stuck in the snow.

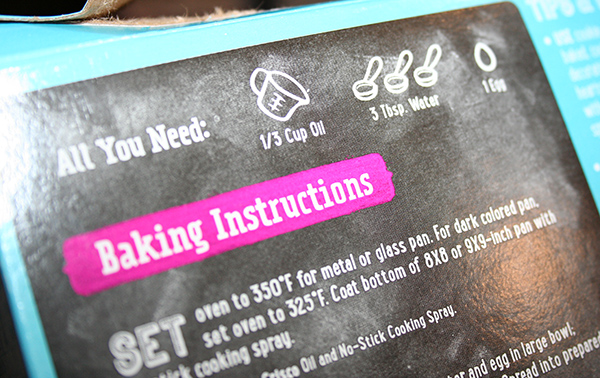
So I preheated the oven to 350, per the box instructions.

But instead of the requested added ingredients (1/4 cup oil; 1 cup water; 3 eggs) I altered it a little bit and added a bottle (12 ounces) of dark beer, 1/2 cup oil, and 2 eggs.

wetingredientscakebeer2016.jpg

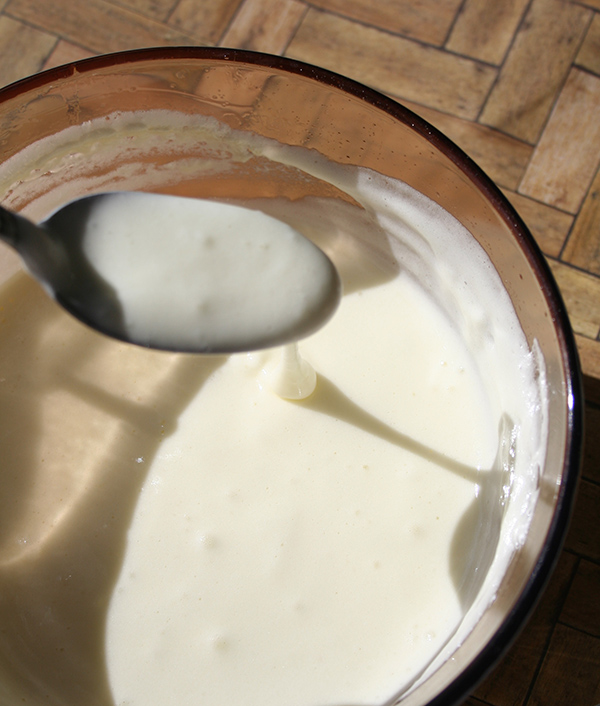
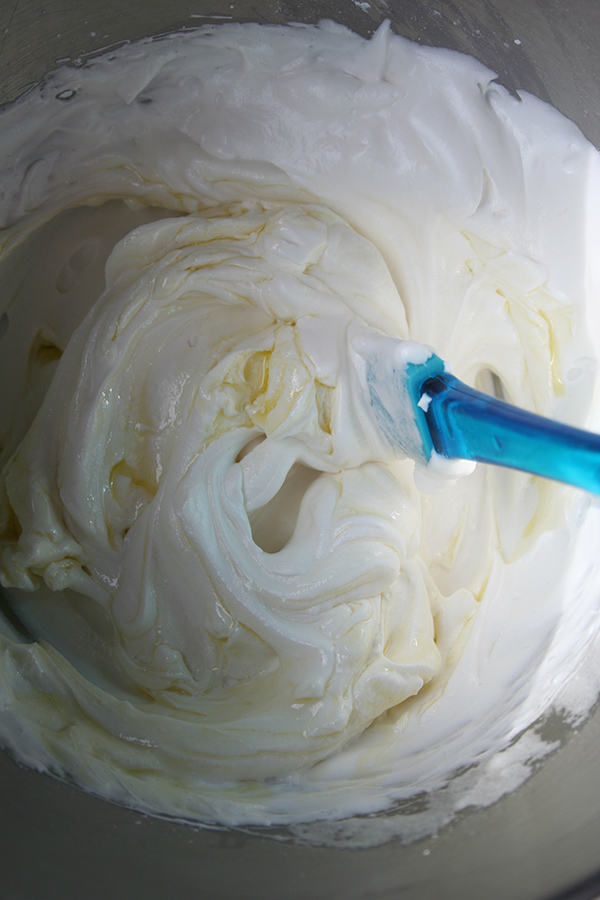
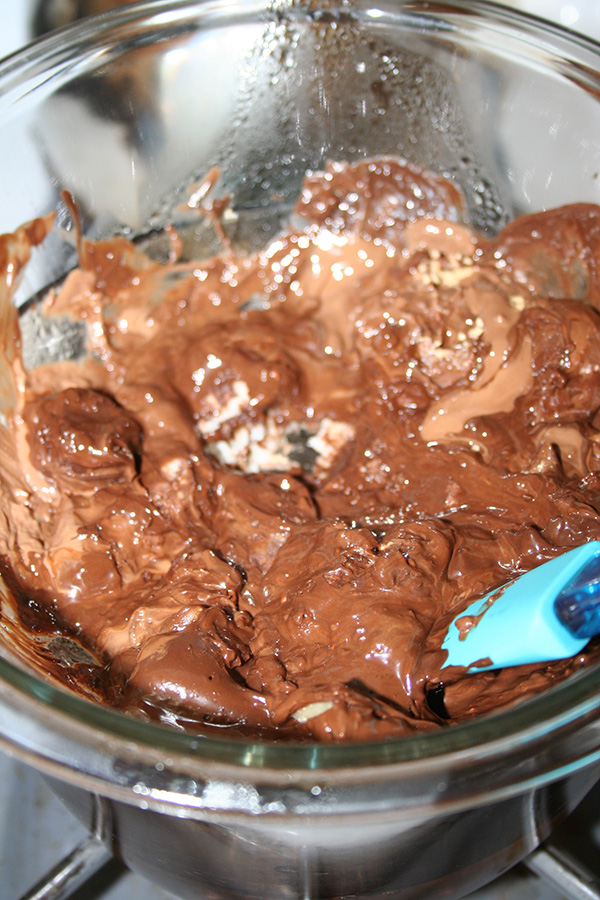
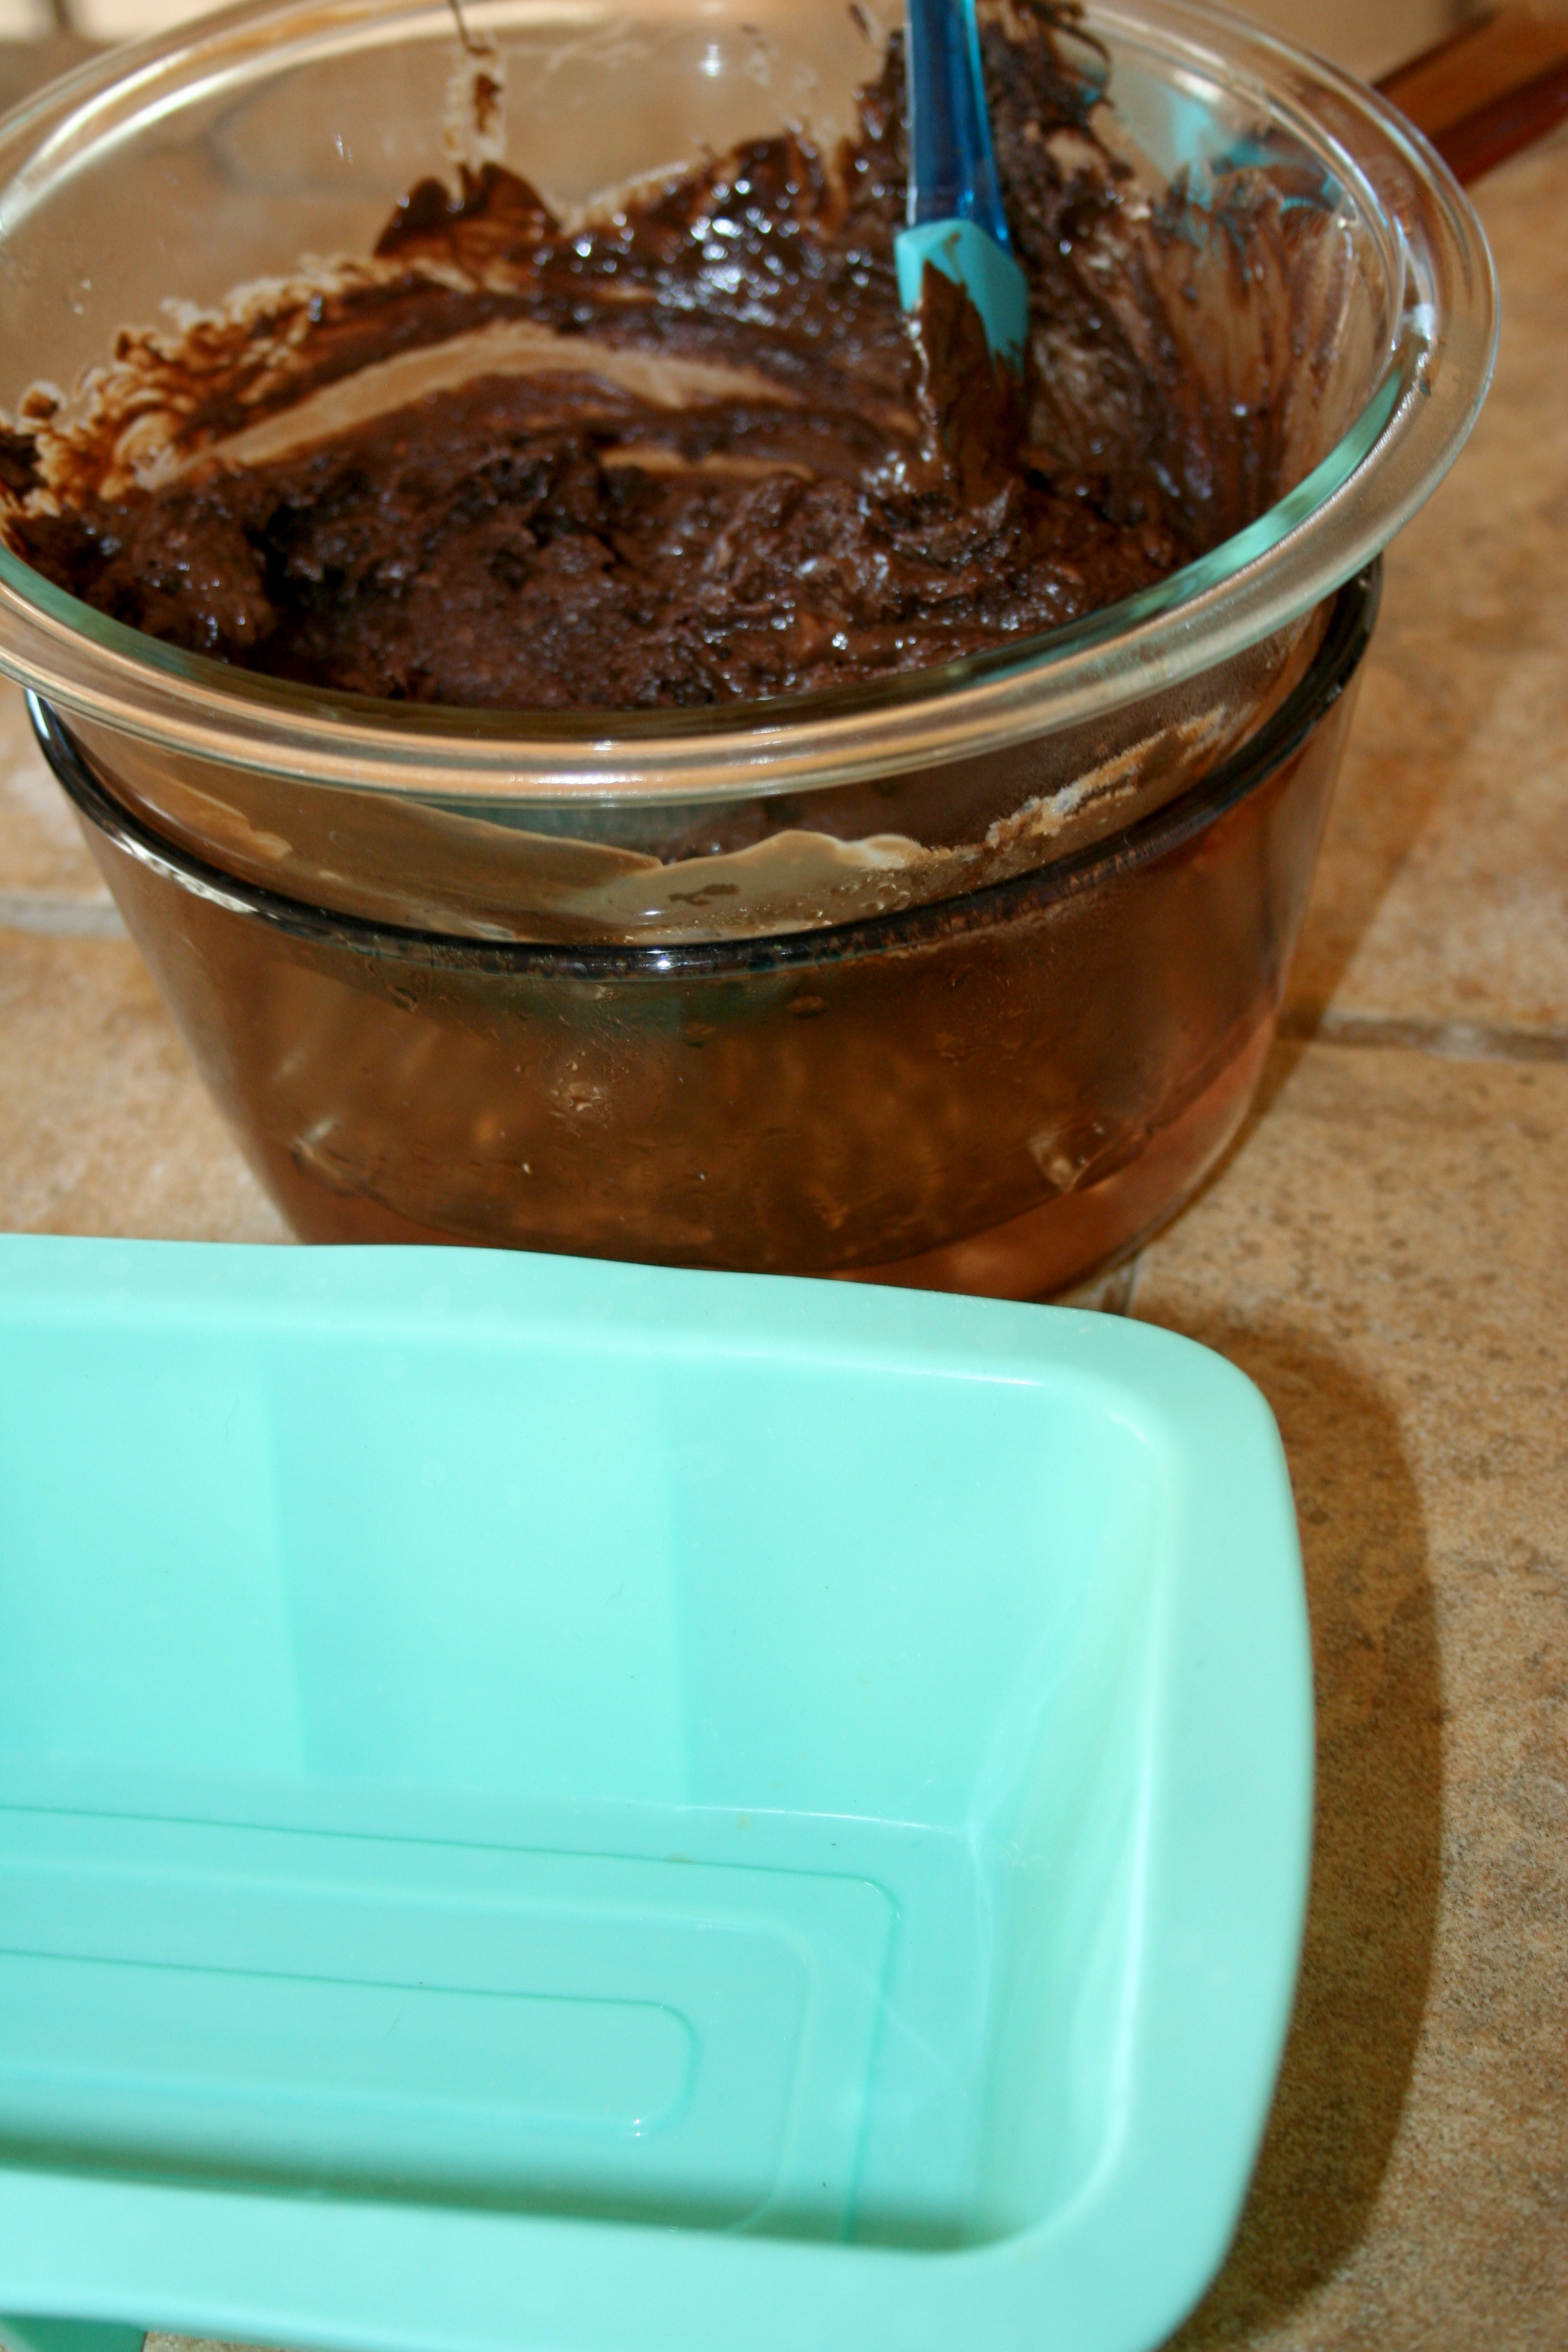
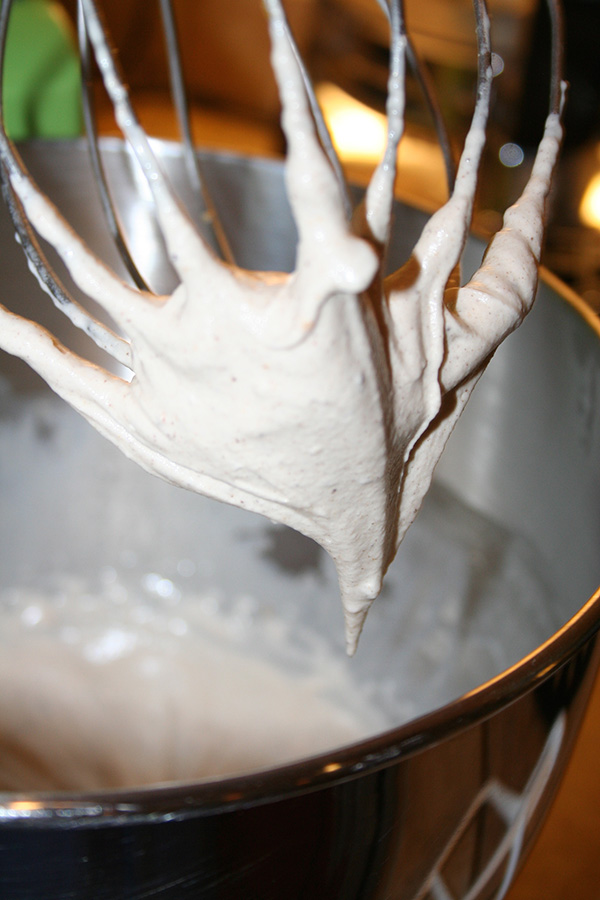
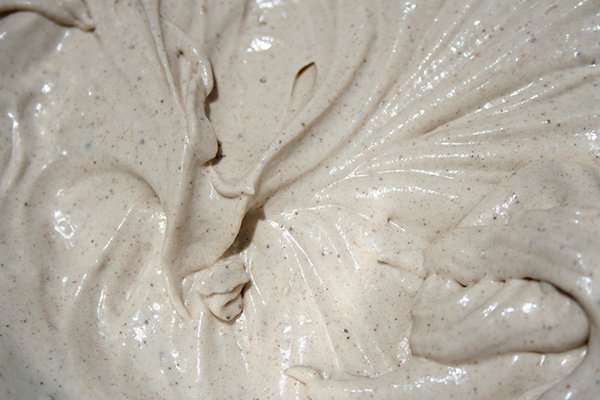
I mixed it all up with a fork (that is a tip I got from my older sister; mixing cake mix with a fork is so much better than with a wooden spoon! Once the eggs are broken up and mixed, you can switch back to a wooden spoon). 

withfork.jpg

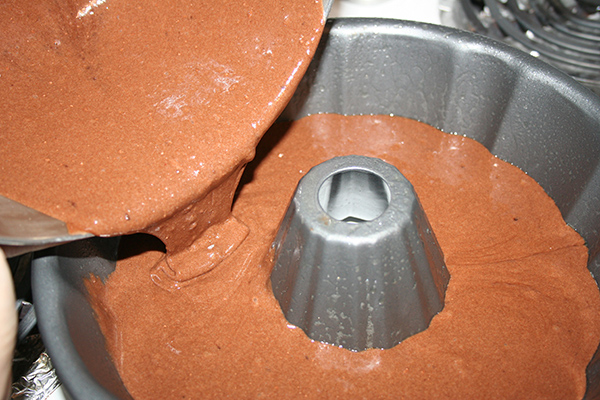
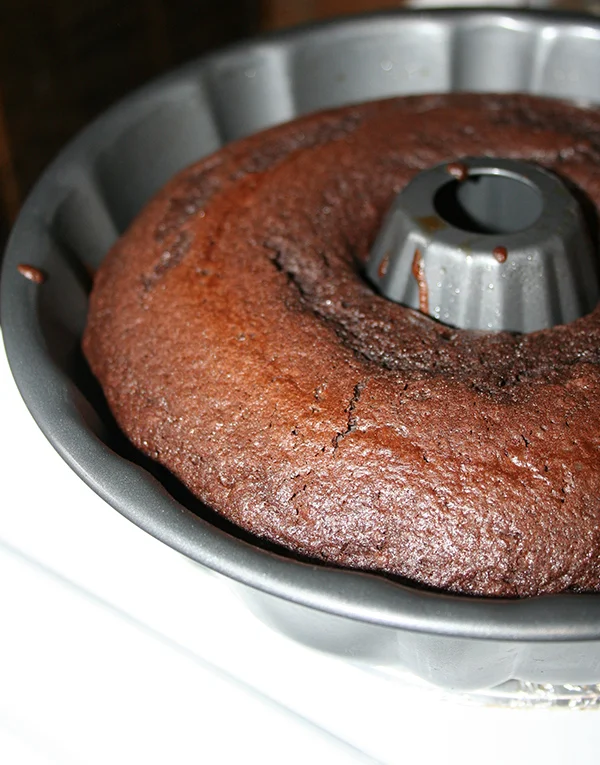
I decided to make it in a bundt pan because, well, I recently acquired a new one and there were instructions for bundt baking on the cake mix instructions.

I baked it for 39 minutes, which was the low end of what the mix suggested.

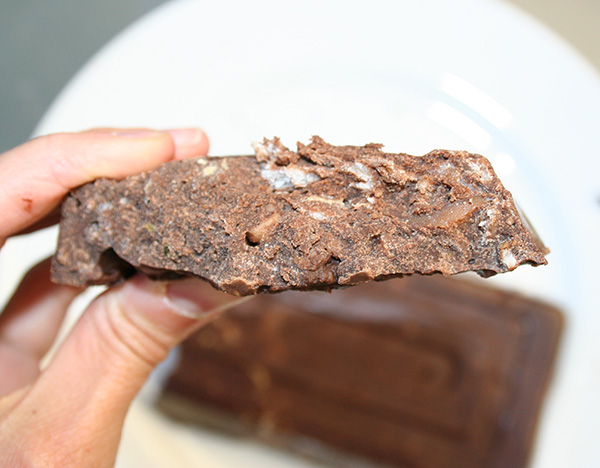
I have to say, it came out smelling--and looking--pretty darned good. 

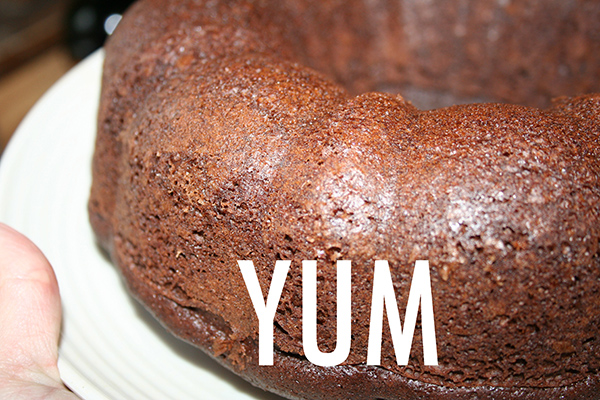
But how did it taste?

This cake was unique. I was really glad I chose a chocolate cake mix to work with this dark, hoppy beer, because I think that if I had used, say, a yellow cake, the beer would have imparted a bitterness on the cake that would not have worked (probably a lighter beer would have worked with a lighter cake, though). However, I think chocolate is sturdy and robust enough to work with the bitterness of a dark beer, so that instead of being weird, it becomes complex. 

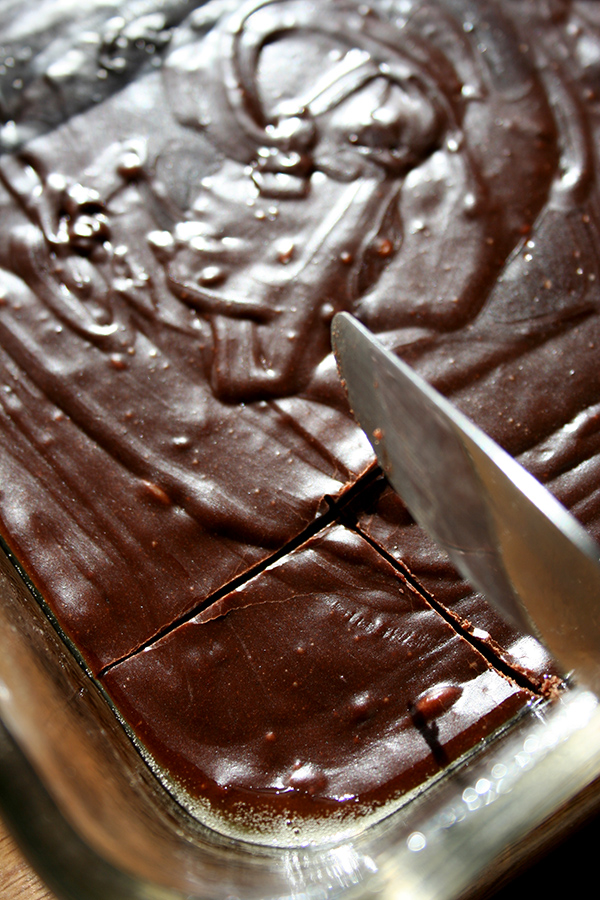
I ended up using the same ganache I used to top my chocolate cream filled bundt cake. 

All things considered: using beer in a cake mix works very well.

The flavor is definitely not for everyone (especially kids - not only because of the alcohol, but because the flavor is a little too complex) but it sure is interesting. I think that the dark, hoppy beer made it especially complex--perhaps a smoother stout beer would have worked better (I already know Guinness works great in cake!). But overall, if you love beer and you love chocolate cake, this is worth trying. 

If you want to try this, here's what you do:

  1. Grab a cake mix (for a regular layer cake, not a pound cake or anything out of the norm), and then grab a beer that you think will work, flavor-wise, with the flavor of the cake. No, I am not sure what beer pairs best with funfetti. 
  2. Ignore the additions called for in the recipe, and mix the powder with 1 twelve-ounce beer, 1/2 cup of oil, and 2 eggs.
  3. Bake for the time suggested on the box, and follow instructions for unmolding and cooling. Frost (of course) and enjoy!

Have you ever baked with beer? 

What Happens When You Make Buttercrunch Without Corn Syrup?

January 20: National Cheese Lover's Day. National Coffee Break Day. And...National Buttercrunch Day!

Well, I'm going to stick with the latter, and enjoy it with the one right before it. Or maybe I could garnish cheesecake with buttercrunch and enjoy it with coffee and have a food holiday trifecta?

Nah, I think I will stick with the buttercrunch since I've never made it before. 

Have you ever made buttercrunch? Do you know what it is? Are you annoyed that I keep on saying the name? 

To the uninitiated, buttercrunch (I LOVE THE NAME and will not stop saying it btw) is a confection featuring a hard caramel candy coated on the top and bottom with chocolate and nuts. Sometimes the nuts will be almonds, sometimes pecans, whatever. You get the general idea, though: this is good stuff. I associate it with confectionery stores that sell chocolate bark and truffles by the pound - not necessarily the precious chocolate shops of the modern age, but the types of places like my family favorite, Jean Louise Chocolates in Spring Lake!

But most recipes for it call for corn syrup. I don't really like to use corn syrup, not because I am morally opposed to it but because I don't make enough recipes that call for it to warrant having it around, and as I was looking through recipes, I didn't want to make an extra trip to the store. So, I wondered, what would happen if I made it without corn syrup?

So, I substituted honey instead of corn syrup. What would happen? 

I wasn't sure if omitting the corn syrup would make the candy grittier in texture, or if it wouldn't set up properly, but I wanted to find out. 

Here's the recipe, along with photos of the process. For a printable recipe, click here

Homemade buttercrunch without corn syrup

Ingredients

  • 1 cup (16 tablespoons) unsalted butter
  • 1 1/2 cups light brown sugar, packed
  • 1/2 teaspoon salt
  • 3 tablespoons water
  • 1 tablespoon honey
  • 2 cups pecans, finely cut, toasted
  • 2 1/2 cups bittersweet chocolate, finely cut  

Fit a candy thermometer on the side of a large, heavy bottomed saucepan. Place the butter in a large saucepan. Heat on low until melted. Add the sugar, salt, water, and honey. (this is normally when you'd be using the corn syrup, usually; I added the honey).

Raise the heat to medium. It will come to a boil. Once it does, keep a close eye on the temperature. Keep the mixture bubbling until it reaches 290 degrees F. Since this will take a little while (like 10-15 minutes), you can perform the next steps concurrently. (I performed these steps concurrently with plenty of time). At this point, it was still hard to tell if there would be any difference. 

Melt the chocolate in a double boiler or in the microwave.

Lightly grease a half-sheet bake pan or the inside of a casserole pan. Line with a strip of parchment paper to use as a handle later. Scatter half of the nuts on top, and then gently spread half of the chocolate on top, trying to keep the mixture from tearing up the nuts. 

By now, your candy mixture is probably nearing 290 degrees F, so let's go back to it.

Once the mixture reaches between 290 and 295 degrees F, remove from heat and immediately pour on top of the nut/chocolate mixture. try to pour in such a way that the candy mixture evenly coats the chocolate in a single coat. It will begin to "set" quickly. That is OK.

Gently spread the remaining chocolate on top. Gently! Scatter the rest of the nuts on top. You can gently press the nuts holding a sheet of parchment paper to adhere them to the chocolate. 

Let the mixture set. Once the chocolate appears to be getting firm, but not waiting until it gets hard, use a spatula to loosen the candy from the pan. Once loosened, let the mixture set in the pan. Once set, cut into shards to serve. This is a little messy because I should have waited longer to cut, but gosh-darn, it was delicious. 

The finished candy had a texture that was perhaps slightly less smooth than some buttercrunch candies I have tried, but perfectly firmed, and the flavor was spot on. The honey offered a nice mellowness to the sweetness. I would absolutely make buttercrunch this way again!

UPDATE: Here's a picture of the butter crunch after it had set and I broke it into chunks! Yum City, population ME.

buttercrunchpile2016.jpg

Enjoy! 

Can You Make Swiss Meringue Buttercream in Small Batches?

Have you ever made Swiss Meringue Buttercream?

If not, I do suggest it, because this egg white-augmented buttercream has a fantastic flavor, and agreeable texture which is well suited for covering or filling cakes and piping into designs. And it also holds its shape, so while it doesn't have extreme super powers, it won't lose its shape or melt quite as quickly as a pain old American buttercream would in hot or humid conditions.

So who reading has made Swiss meringue buttercream?

I'd be willing to bet that some of you have, but a lot of you haven't, because it seems confusing and really hard. It also seems very high-stakes, because if you've perused recipes online, they all seem to yield a ridiculous amount of buttercream--on a recent search, I saw recipe yields of 9 cups, 10 cups, and so on. I suppose this is because it's often used to frost wedding cakes, which would require a larger quantity. But what if you only one to frost one cake, and don't need a vat of Swiss meringue buttercream in your house? 

That led to the big question for me: what would happen if I tried to make small-batch Swiss meringue?

Sounded like a #whathappenswednesday experiment to me. I decided to halve or possibly third a recipe and find out. 

While many recipes looked appetizing, it was Ron-Ben Israel's that kept my attention, primarily because the quantities were perfect for reducing: it called for 9 egg whites, 1 1/2 cups sugar, and 6 sticks of butter. I used just a third of each of those ingredients: 3 large egg whites, 1/2 cup sugar, and 2 sticks of butter (and a dash of salt, added in - my addition). 

I followed the recipe if not the quantities to the letter, first lightly cooking the egg whites and sugar...

beating the mixture until it cooled and formed soft peaks and then firm peaks...

and then adding butter. 

The only weird part of the recipe was when I added the butter and the mixture looked all mangled and ugly for a few minutes. But I was assured by the recipe (and by other sources) that this was normal with a regular batch, too. I kept beating and the buttercream smoothed out and made a great topping for this cake. 

So, the answer is YES! It is possible to make Swiss meringue buttercream in small batches. Here's how.

Small-batch Swiss Meringue Buttercream

Adapted from Ron-Ben Israel - printable version here

  • 3 large egg whites, room temperature
  • 1/2 cup sugar
  • 2 sticks unsalted butter, softened but still cool, cut into 1/2-inch pieces 
  • pinch salt

Place the egg whites and the sugar in a large metal mixing bowl (I used a bowl which would fit in my stand mixer for an easy transition) set above a pot of simmering water. With the water simmering all the while, whisk the mixture until the sugar melts (no grittiness!) and the mixture becomes warm and very thin in consistency, like a just slightly thick pouring consistency. 

Remove the bowl from heat, and whisk on high speed until stiff peaks form (I transferred the bowl to the stand mixer and did this in minutes). 

Now, add the butter and salt, and mix on low speed. The butter is going to look weird and lumpy at first. Don't panic.

Keep mixing. The mixture will start to look curdled and wrong. DO NOT PANIC.

Keep on mixing! Once you don't see any big lumps of butter, you can increase the mixing speed to medium-high. Eventually (it can take a few minutes), the mixture will become smooth and silky in texture. From here, you can add in flavorings, or add a touch of milk if needed to thin the buttercream. I like a fairly thick buttercream, so I left it pretty thick.

If you're not using this buttercream right away, you can refrigerate it. Re-beat before using to maintain the smoothness. Also re-beat if it begins to look lumpy as you're icing your cake. 

Have you ever made Swiss meringue buttercream?

What Happens When You Cook Brownie Mix on the Stovetop?

Hi, hi, hi. Happy What Happens Wednesday! This week I decided to investigate something that has been on my mind for a while: what would happen if you made a boxed baking mix on the stovetop, rather than baking it?

webbrowniemixtopper.jpg

Happily, I had just been sent a box of nice little goodies from Smuckers / Pillsbury, and this box of brownie mix was inside. I'm sure this isn't what they intended when they sent it to me, but since it was the closest box mix at the time, it was the one I chose to use for my experiment.

In terms of ingredients, I didn't mess with the mix at all. I used the mix and the requested additional ingredients, in the quantities called for on the box.

But instead of mixing them in a bowl, I combined them in a large saucepan and began to cook. 

Not really sure what I was looking for here, I set the heat on medium-low and stirred constantly to avoid scorching. The mixture seemed sort of pudding-like, but not pudding-like, at the same time. Isn't that just the most informative description you've ever heard?

Well, I let the mixture heat for 10 minutes or so, and I stopped when I noticed the mixture was beginning to stick to the bottom and bubble. I figured I had probably killed whatever bacteria might be lurking in the egg, right?

The mixture was a thick liquid--not thick enough to roll into balls, so I decided to pour it into a greased 8x8-inch pan, as if I were baking the brownies. But instead of putting it in the oven, I put it in the fridge overnight, to set.

In the morning, was I ever surprised: the mixture had set firm, and looked remarkably like fudge, with a nice, glossy finish on top. 

It sliced like a dream, easily and smoothly. Sort of like fudge, but very short squares of fudge.

But let me tell you the most important part: this brownie-fudge stuff was completely delicious.

It's like it compressed all of the good parts of a brownie into a compact, dense form, with the texture of fudge. I deplore cakey brownies, the fudgier the better, so for me, this was a complete win. 

The brownie-fudge began to get soft a few minutes after being removed from the fridge, so to serve it, I divided the squares into little cupcake liners so things wouldn't get too messy. As long as it is left refrigerated, it will remain firm. 

Everyone who tried this brownie-fudge stuff was delighted, and nobody has reported that they died, so I figure that either it was quick and painless or I did in fact cook the egg enough. 

So there you have it! This experiment made me really excited to see how the same method might work with a boxed cake mix; next time, I will pasteurize the eggs first so that I don't have to worry about that part. 

Have you ever cooked a boxed mix in an unconventional way?

What Happens When You Eat the Cookie That You Forgot Was in Your Coat Pocket Since Last Year?

It's #whathappenswednesday, and today's is very important stuff. I brought out my winter coat for the season, only to discover a vintage cookie in the pocket. I asked on Facebook if I should eat it and everyone said yes, so I gave it a try. What does a year-old cookie taste like? Find out:

Wherein CakeSpy tastes a cookie that she found in her coat pocket from last winter.

What Happens When You Forget to Add Sugar to Your Cookie Recipe?

I'll be straight-up about this: I did not intend to write an experiment post about this. What I intended was to make delicious cookies.

Let me set the scene. I have worked really hard to develop a delicious recipe for chocolate filled dark chocolate cookies. And I have succeeded. I have succeeded so well, in fact, that I want to make another batch, to share with my neighbors. I am already preparing myself for the copious compliments I'm about to receive for these babies. I mean, just look at how the previous batch had turned out: 

So here I am, mentally congratulating myself as I apply white and dark chocolate drizzle on top of the latest batch. And then I happen to look over to the other side of the counter, and I see a half-cup of sugar, prettily measured out and looking ready for business. I look at it stupidly for a moment, thinking "why is there sugar on the counter?". 

And then it dawns on me: that sugar was supposed to be in the cookie dough. The cookie dough that I just formed into rounds and put in the oven and baked and let cool and decorate. The beautiful cookies which, apparently, contained no sugar. 

I won't lie: I said one or five curse words right about here. 

But I also began to feel curious. Because the dough had felt just fine while I had molded it into balls, and it looked and smelled fine when I took the cookies out of the oven. They seemed the same as I decorated them. I wondered: how might these cookies taste? 

I will confess I felt a touch of hope. I wondered if because there was only a half cup of sugar--not that much, right?--and because the cookies contained cocoa, and because they were filled with chocolate, and because I'd drizzled them with copious amounts of white and dark chocolate, maybe, just maybe, they'd taste OK. 

I decided to give them a try. 

Before I tell you how they tasted, let me tell you a little bit more about how the cookie experience went when the recipe was made properly, with sugar.

They are delicious. They are rich, moist, deep-dark-chocolatey, just a touch crumbly, and when warm, gooey with chocolate. They are good stuff. 

How would they compare when made without sugar?

Well, it wasn't a good sign when I picked up the cookie and the slight pressure of my fingers poising it toward my mouth to take a bite basically caused it to explode. 

I was tempted to cry. The little chocolate filling goo that you can see toward the bottom left quadrant of the crumbs seemed to be wailing to me "I'm still delicious!".

I tried again with the chunk of cookie you see on the top right above. This time, I pretended that the cookie was a teeny tiny unicorn with bones made of glass, and tried to handle it as gently as I would such a magical creature. This time, it didn't break, but you'll have to trust me in that this operation required such care and concentration that I felt like I would need a nap afterward.

I took a bite. 

Well, the good news is that the cookie wasn't terrible. The chocolate filling, coating, and cocoa in the dough made the melange of ingredients taste vaguely cookie-like. 

But all the same, it was all wrong. The lack of sweetness in the cookie itself made it taste like a sandy, cocoa-scented pie dough. It was sort of interesting, but not really delicious or the type of thing that invited you to eat more. 

Listen, I am not an actual scientist, I am just an enthusiastic amateur dessert experimenter. And obviously, this is just one cookie recipe, so it doesn't speak to what will happen to every cookie recipe when sugar is omitted. 


To sum up the experience of cookies made without sugar:

Here's what I can tell you about what happened to this chocolate cookie recipe when no sugar was present.

1. The cookies were not sweet.

Well, obviously. The chocolate filling and topping were sweet, but they weren't enough to mask the lack of sweetness in the cookies themselves.

 But it was a strange experience because the cookies looked right, and a powerful reminder that we eat with our eyes first. Because these cookies looked like they were going to taste good, and because I had the flavor memory of the previous batch, it was a shock to have the flavor not match what my mind was anticipating. 

2. The cookies were extremely fragile.

The cookies were SO fragile! They exploded with the slightest application of pressure, and you'll have to trust me when I say that I am not heavy-handed when holding cookies. 

3. The cookies didn't brown quite the same. 

While this wasn't immediately evident because the cookies were already dark to begin with, and it is probably hard to see in photos, upon closer inspection, the cookies hadn't browned quite the same as the batch made with sugar. With the sans sugar variety, what had happened was less toasty edges, and more like an all-over matte finish. 

4. The cookies were not delicious.

Nope. They tasted weird. As previously mentioned, the cookie itself tasted like a sort of cocoa-scented pie crust. I would not suggest making these cookies (or any) without sugar if called for in the recipe. However--and here's the optimistic part of this accidental experiment--the flavor DID make me curious about incorporating cocoa into a pie crust, or maybe making an unsweetened chocolate cracker for an avant-garde cheese plate. So maybe you'll see more experimentation in the future!

So, as to how I could sum up the results? Don't forget to add sugar to your cookies. It is an ingredient that helps them bake right and makes them delicious.

Have you ever forgotten to add sugar to a recipe?

What Happens When You Still Have Leftover Pie after Thanksgiving?

What if it's Wednesday now, and you still have leftover pie from Thanksgiving? Well, it is probably sort of stale, but that doesn't mean it has to go to waste, because it will still be delicious if you make it into a milkshake.

What happens when you put your leftover pie into a milkshake?

I won't keep you in suspense: very, very, very delicious things happen when you have leftover pie and you make the decision to transform it into a shake. 

A pie shake is pretty much the best way ever to revive slightly stale pie. Blending it to delicious oblivion in a sea of ice cream makes it an extra-special treat, and as a bonus, people who haven't seen you make it but only see you drinking something blended will probably believe that you're drinking a smoothie. Joke's on them!

Realistically, I realize that it's unlikely at this point that you still have pie left over from Thanksgiving. But pies and treats are around the rest of the season, and in plentitude, so I really want you to have this option.

Check out the full post featuring a pie shake recipe.

What Happens Wednesday: Little Debbie Edition

Sensitive readers, avert your eyes. Because this #whathappenswednesday focuses on abuse. The abuse of Little Debbie Snack Cakes.

Longtime readers may remember this "Little Debbie Death Match", which poses the question "what happens when you torture Little Debbie cakes to see which one survives the longest?". These snack cakes are run over by cars, boiled in water, and put through other horrifying tests.

New readers, enjoy my twisted brain.

Read the entire experiment here!

What Happens When You Make Buttercream with Olive Oil?

Friends, this #whathappenswednesday is close to my heart, because it was a project that had me overcoming adversity in a romantic comedy, everything-but-the-montage, sort of way.

So, I was assigned to come up with some recipes for Colavita a while back, and I thought "hey, wouldn't an olive oil buttercream be badass?". So I pitched it and they said yes, do it!

Then I started testing recipes, and immediately began to regret my pitch.

Turns out, making olive oil buttercream isn't so easy.

If you just try to make buttercream but with olive oil instead of butter, you get a very pleasant result, but it will never ever become as fluffy as buttercream. It remains a glaze, no matter how much sugar you add. 

But I was not willing to abandon my idea for making a fluffy, cake-worthy buttercream with olive oil. So my mind went in a meringue buttercream direction. What about if I made seven minute frosting, but with olive oil added to the sugar and water mixture that is boiled?

It started out promising, but when I added the olive oil the fluffy frosting collapsed. I think it was because the oil retained its heat differently than the water. Bummer!

I tried a second batch of seven minute frosting style buttercream, but this time I froze the olive oil. I figured I could add it in to the hot sugar-water mixture so that it wouldn't make it too hot.

However, once it hit the mixer, it catapulted right back out, and hit me in the eye. Or it would have, if I hadn't been wearing glasses. It was actually kind of hilarious. 

But it didn't have the desired effect. The frosting once again turned to goo. Tasty goo, but still.

Finally, I thought to myself, how about keeping it mega simple, and just making a simple, no-cook meringue buttercream? 

So I pasteurized my eggs, then separated the whites and yolks (egg whites only for this recipe). I whipped up the egg whites until they held soft peaks, then I added some sugar and vanilla. I whipped until it had firm peaks. It was looking good. 

Then, I took the bowl off of the mixer and folded in olive oil. GENTLY. I experimented, and found that 4 tablespoons (1/4 cup) was the max that could be added before the buttercream began to fizzle. But that was certainly enough to give the buttercream a rich, delectable flavor! 

The only catch is that the buttercream does need to be used immediately. It will fall after a while. However, if you use it right away to frost a cake or cupcakes, it will retain its shape fairly well (as opposed to having to stir it, which will deflate it, and then spread it). But we can work around that, right?

So finally, it was a success! 


So what happens when you make buttercream with olive oil? You are in for a wild ride.

OH, and PS. I went through a ton of egg whites making this recipe, so I wrote this post about how to use up four egg yolks. Just in case you want to give this recipe a try--you'll be able to use the whole eggs!

You can find the finished recipe on the Colavita website.

I think you'll enjoy it!

Have you ever made buttercream with olive oil? 

Holi-Baking With Friends: Glazed Cranberry Chocolate Scones

I have three key things to tell you about this recipe. 1: these scones are not what you think. 2: This is one of the easiest recipes you will ever make. 3. I am brilliant. I'll explain, in order.

1: These scones are not what you think.

While they might look like they were freshly baked by an Irish grandma, these scones actually start out with an unexpected base: cookie mix. That's right: I have "doctored" Among Friends Baking Mixes' (the sponsor of this post) "Phil Em Up" Chocolate Cranberry cookie mix. With a little kitchen wizardry, I repurposed this cookie mix to make delicious scones, which just so happen to be gluten-free. 

2: This is one of the easiest recipes you will ever make.

All you have to do to make these scones is this: combine the cookie mix with Greek yogurt. What?!? Yep. It really is that easy.

Simply mix until it has come together into a cohesive dough, shape into a circle, score into triangles, and bake them up. In less than 20 minutes, you'll have delicious scones. 

3: I am brilliant. 

I am brilliant! This is so simple and so effective. But as is often the case, the route which led to this simple perfection was a bit more complex.  I experimented with more traditional scone-making methods including folding in cold butter and cream, but the dough was so moist that I had no choice but to put it in a pan and bake it up. It came out delightfully as a sort of cookie pie, but as scones, this was not a success.

It wasn't until the third try that I thought about how fluffy baked goods made with Greek yogurt can be. So I experimented with adding a little at a time to the cookie mix, until I found the perfect consistency. I definitely patted myself on the back for the simplicity yet complete effectiveness of simply adding yogurt. 

Now, with a recipe this healthy, and this simple, you have time to think about a topping. I have two suggestions.

One is a confectioners' sugar glaze, which adds additional moisture and sweetness.

Another is a chocolate drizzle. I don't have to explain why this is a good idea, do I?

Or, you could glaze and then drizzle. Why not? It's the holidays. 

This recipe is awesome for a Thanksgiving weekend breakfast, or really any time you want to make a breakfast treat in a hurry. They're a wonderful teatime treat, too. The scones freeze very well, too--they will keep for up to a month in the freezer, so you can make a batch and then freeze, and have breakfast all week long. 

Glazed Cranberry Chocolate Scones 

Makes 8 - Printable recipe here 

Ingredients:

Optional toppings: 2 ounces melted chocolate, or a confectioners' sugar glaze composed of 2 cups confectioners' sugar mixed with enough cream or milk to thin.

Preheat the oven to 375 degrees. Line a baking sheet with parchment paper, or a silicone mat.

In a large bowl, combine the cookie mix and 1/4 cup of the yogurt. Work the mixture together with a wooden spoon or impeccably clean hands until it becomes a cohesive mass that is moist but can be handled without being too sticky. You may or may not need the additional 2 tablespoons of yogurt. I'm leaving this option open because I know that different brands of yogurt can vary slightly in consistency. 

Form the mixture into an approximately 8 inch circle. Using a bench scraper or a sharp knife, cut into 8 equal portions, but don't separate them on the sheet. 

webshapeincircle.jpg

Bake in the preheated oven for 12-16 minutes, or until browned to your liking.

Remove from the oven, and transfer the sheet to a wire rack to cool. If you like your scones plain, you're done! Since they have chocolate, do not let your pug have any bites. 

If you like some glaze, set up the scones on a wire rack with something below to catch any drips. Whip up either a confectioners' sugar glaze or melt 2 ounces of chocolate, and drizzle or glaze your heart out.

Have you ever made a "doctored" cake or cookie mix recipe? 

What Happens When You Make Pie Crust with Melted Butter?

The question is this: what happens when you make pie crust with melted butter? But before I tell you what happens, let me explain a bit. 

Listen. I find the generally finicky, fear-filled approach to making pie crust to be totally annoying.

There are so many rules. Your butter MUST be chilled! Your water MUST be ice-cold! Do NOT overwork the dough! It's no wonder that so many people beeline to the pre-made pie crust in the frozen aisle of the grocery store.

Often, when people tell me they are scared of making pie crust, I ask them this question: "what's the worst that could happen?". Well...ok. You add too much water and the pie crust is a little mushy. You don't work the flour in enough and it's hard to roll. You overwork the dough and it's a little tough. Honestly, these things aren't so bad, and the fact that it is a homemade pie crust, even with minor flaws, makes it a leg above anything you would buy.

So my advice is this: just make the pie crust. Even you mess it up when measured to pastry chef's standards, it will probably still be good enough to delight your family and friends. 

This pie dough? Made with melted butter.

This pie dough? Made with melted butter.

In my desire to rage against the pie dough fear machine, I began to wonder: what would be the worst thing that could happen if I used non-chilled butter? In fact, what if I just used melted butter? 

So, I gave it a try. Here was my approach. 

The recipe

I decided to stick with my favorite pie dough recipe from King Arthur Flour. I knew that there would have to be some alterations, since melted butter couldn't be squished with the fingers. 

As for the water in the recipe, I decided to stick with just room temperature water since using ice water didn't seem important when the melted butter was already warm. 

How it went down:

I started by assembling the flour and salt in a large bowl, and then melted the butter in a saucepan. 

Is there anything finer than butter gently melting on the stovetop?

When it melted, I added it to the dry mixture and stirred. It became very apparent very early on that I wasn't going to need the water called for in the recipe--the melted butter was more than sufficient in saturating the dry ingredients. So I didn't add the water.

The mixture was sort of like a cookie dough, and it smelled heavenly. 

Rolling it wasn't really an option, so I pressed it into the pan. Interestingly, while this recipe is usually sufficient for two pie crusts, this version was more like 1 1/2 pie crusts. So I pressed as much as I needed in the pie plate, and reserved the rest. 

I placed the pie plate in the fridge for a while, because I didn't want it to be warm when I added the filling. It was malleable enough to be fluted.

Meantime, I knew exactly what to do with that leftover portion of pie dough: try out roly polies!

I've often said that roly polies are the best part of pie. I was anxious to see if it worked with the melted butter crust.

Well, these portions of dough really didn't like to be rolled like regular pie dough, so I separated the dough into little logs. I spread each with sugar and cinnamon, and then rolled them up. Rolling them was not easy--the texture was like shortbread and they cracked. But with some patience I worked them into submission. They looked sort of messy, but serviceable.

I baked them at 400 degrees for 10 minutes; this is how they looked.

They were very delicate and crumbly, but they tasted great. 

Now, I was ready to get back to the pie. I prepped a pumpkin pie filling (recipe for that coming soon) and poured it in the shell. Then I baked it as normal.

Once baked, the crust looked beautiful. It was lightly browned. The filling was set. It all looked lovely.

It was a pie that required chilling before serving, but after a while, it was ready to be sliced.

Right away, I noticed that the melted butter crust was more firm than a typical pie crust, and required a sharp knife to slice. But it did slice cleanly. 

The crust itself was crispier than a typical pie dough, not soft and yielding in spite of the fact that the filling was quite moist. The taste was fairly similar to a regular pie crust, which makes sense because the ingredients were pretty much the same...but the texture was very different.

I would actually say that the texture was almost cracker-like. However, I never found it to be too hard. I think that were the crust pre-baked and then filled, it might have been too crispy and hard, but with the baked filling it never veered into "break your teeth" territory. 

Personally, I think I still prefer the texture of the more traditional, tender pie crust. But I am glad that I tried it the melted butter way, because it was definitely not a recipe failure. It was just a different texture. I think that it could actually be considered a success if some sugar was added to give the crust a bit more cookie-like appeal. 

So listen to this, those with fear of making pie crust: even if you made your pie crust with totally melted butter, the pie crust still tastes pretty good with the right toppings. 

So pie-crust fearers, hopefully that can take some of the fear out of the process! Basically, I broke all of the rules of making pie crust and it still turned out OK. I think that means that even if you mess up a little bit, your results are going to be just fine for where you are in your baking journey. 

Melted butter pie crust 

Printable version here

  • 2 1/2 cups all purpose flour
  • 1 teaspoon salt
  • 2 sticks unsalted butter, melted 
  • (water omitted)

In a large bowl, sift the flour and salt together. Set to the side.

Melt the butter in a saucepan. Once melted, pour on top of the dry ingredients.

Stir until totally combined. It will come together into a cookie dough like mixture.

Press the mixture into a greased (that's important here) 9-inch pie plate. You will likely have some left over, but not quite enough for a second crust. Use this to make roly polies as detailed in the post, and baking them at 400 degrees for about 10 minutes.

Once your pie dough is pressed into the plate, continue with your pie recipe as usual. 

Have you ever experimented with pie crust?

What Happens When You Melt an Entire Box of Chocolates Together?

What happens when you melt the entire contents of a box of chocolates all together? 

Well, I can tell you that, but before I do, let's converse a little.

Forrest Gump famously (and maybe a little annoyingly) said "life is like a box of chocolates...you never know which one you're going to get."

I disagree. I think that life is more like the entire contents of a box of chocolates melted together. It's messy, it's sweet, it's gooey, it's complicated, and you get little tastes of this or that depending on which direction you go. 

With that having been said, let's see what in the world does happen when you melt the entire contents of a box of chocolates all together.

What happens when you melt an entire box of chocolates together?

The motivation for this experiment was fairly simple. I returned from a trip where I had been gifted a box of chocolates, only to find that during transit the chocolates had partially melted and mangled. Many had rolled out of their little segments and had stuck to the top of the box. While on the one hand this was a massive bummer, it did pique my curiosity, and it got me wondering if all of the flavors would mingle if they were all melted together. 

From there, it didn't take long for me to fire up a DIY double boiler (composed of a heatproof bowl atop a saucepan of simmering water) on the stovetop to see what I could see. 

So, I placed the entire contents of the chocolate box in the top of my DIY double boiler.

And I turned on the heat. Things started to get melty quickly.

Some bits, like coconut and nougat, proved resistant to melting. I turned the heat very low; gradually, most of the stubborn bits finally yielded and melted. But some parts retained little lumps of these firmer bits of confections. 

Once it was all melted, I realized I really hadn't thought this out fully. Where would I put the chocolate? 

Well, luckily I had a silicone loaf pan nearby. This loaf pan has proven pretty much useless for making actual cakes because of its wobbly sides, but it was perfect for spreading and patting down the melange of melty mixed chocolates.

After a few hours, it had set and I inverted it. 

It looked like a caricature-huge candy bar. 

I braced myself and took a bite.

OK, so this was just about the weirdest chocolate eating experience I've ever had. The only way to describe it is kind of gross, so sorry in advance. 

Have you ever been sick and thrown up, and as the food comes up you can taste individual foods, but you also taste the sum of them together? 

Eating this chocolate was sort of like that, but without the awful throwing up part. But you could taste hints of different chocolates from the usual collection - a bit of coconut, a touch of caramel, and oh, was that a bit of raspberry buttercream? - but then it's also simultaneously all mixed together. It was a very odd taste sensation.

Sorry to say, friends, but the result was not extremely crave-worthy.

Everyone at my house had a novelty bite like a good sport, but nobody opted to eat more of it, and after a few days, I tossed the monstrosity.

But the benefit is this: now we know what happens when an entire box of chocolates is melted together. So you, dear readers, can review this and decide if it's ever something you want to do (probably not).

Have you ever done something creative with a box of chocolates?

Can Carrot Peel Be Candied?

It's #whathappenswednesday! And today, I'd like to address an important issue: why does candied citrus peel get all the glory? After all, there's a whole world of other foods out there that are just dying to be candied. For instance, carrot peel. 

So what would happen if you used the same candy-ing method used for citrus, but for carrot shavings? This was a question on my mind when I was making carrot cake recently and had plenty of time to think about this and that while grating carrots for the recipe.

A minimal amount of online research informed me that I wasn't the first one to wonder this, and in fact, according to some actual respected food websites, it is a Bona Fide Thing.

Not one to simply rely on what I read on the internet, though (especially when clear pictures aren't available!), I needed to see for myself. And so after I finished grating carrots for my cake, I swapped tools and used a peeler to shave some carrots and see what would happen when they were candied.  

So I played around with an Epicurious recipe, and in under two hours, I had myself a nice big ol' batch of candied carrot peel.

You know how the idea of carrot cake, when you really think about it, sounds strange? But how it's so ingrained in society that you kind of hear it and think "oh, that's normal"?  It's the same way with candied carrot peel. It sounds odd at first, but once you taste it, it just makes sense. The natural sweetness of the carrots is simply augmented by sugar, and the texture becomes very interesting in this crispy, candied format. You know, this would actually be a good snack just on its own.

I did enjoy some just as a snack...but mostly I used the candied carrot to decorate a carrot cake (natch) and it won me many new friends.

So what happens when you candy carrot peel? You'll dismiss the idea that citrus is the only produce that can be candied, that's what!

How to candy carrot peel - step by step!

Based on a recipe from  Epicurious - printable version here

2 to 3 medium carrots
1 cup water
1 cup sugar

Supplies:

a medium saucepan; a vegetable peeler; two baking trays and parchment paper or silicone mats to line

Procedure

Start by peeling the carrots. Try to get as wide, flat, and fat portions of peel as you possibly can. I tried to peel as much of the carrots as I could. Set the carrot peels to the side. 

In a medium saucepan, bring the water and sugar to a boil. The sugar should have dissolved. 

Add the carrot peel, and simmer the mixture for 15 minutes.

Strain the mixture (the carrot peel will be limp and moist). Let it hang out for a few minutes while you preheat your oven.

Oh yeah! The oven. Preheat it to 225 degrees F, please.

While the oven preheats go ahead and line your baking pans with parchment or silicone liners. Arrange the carrot peel on the sheets, so that the pieces are not touching. Bake for about 30 minutes.

At this point, you can remove the peel from the oven and shape it a bit, if you like. I found, however, that I really enjoyed the whimsy of the more free-form shapes, so I mostly left them that way. 

Return the carrot peel to the oven and bake for another 30 to 40 minutes, or until firm and lightly crisp. Let cool completely on your baking sheet before using. 

Have you ever made a candied fruit or vegetable?

What Happens When You Melt an Entire Bag Worth of Candy Corn in the Oven?

Here's the answer to a question you might never even have known you had: what happens when you melt the contents of an entire bag of candy corn in the oven? 

I can tell you what happens, because I did it the other day. 

The short answer is this.

But if you'd like a little more information...allow me to expand. 

First, I got a baking tray and set a silicone mat on top (so the corn wouldn't stick. I know from melting candy in the microwave that it does not like to come off of a surface once melted).

Then I scattered the contents of a bag of candy corn on the sheet.

Then I preheated the oven to 300 degrees F. I just kicked back and looked at Facebook til it was fully warmed, with the tray of candy corn right next to me.

Then I popped the tray in the oven, and set the timer for 15 minutes. After 15 minutes, here's what I found.

It flattened a bit as it cooled. Perfect.

I let it cool for a while longer, then noticed that it began to firm so that I could actually pick up an edge.

Actually, the whole thing. It looked like beautiful stained glass.

I tried to roll it, and it rolled. But then I had an even better idea!

I unrolled and re-rolled into a cornet shape.

I put some foil in, and used a mug to keep the opening in shape as it set.

Once it did, I filled it with candy corn, for a...

CANDY CORNUCOPIA! 

Oh my god, I am so brilliant.

*Pats self on back.*

Oh, and P.S., once the cornucopia set, it was crisp. That means that you can crack off shards of it and have a little snack once you've finished the candy corn kernels you stuffed inside.

So...what happens when you melt an entire bag's worth of candy corn in the oven?

You may find that you need more candy corn, is what. Because it's a lot of fun to get crafty with your sheet of candy corn melt!

Check out all of my #whathappenswednesday experiments - on this site, and I also document them on Twitter, Facebook, and instagram, via the hashtag. 

What Happens When You Boil Cake Batter?

Can you boil cake batter to cook it? #whathappens wednesday, yo! Let's find out!

On the one hand, the answer to this question is obvious, right? Cakes have to be baked, so boiling is impossible, wrong, and gross. Obviously...?

But think about it.

There's more than one way to make a cake. There's the classic way--baked--of course. But if you think about it, it's also possible to fry cake (cake batter pancakes? Funnel cake? Helloooo). And it's also possible to steam one--aren't baked puddings basically steamed cakes? 

So why not at least try boiling cake batter before dismissing it? That's what I did.


I was baking up a batch of homemade Hostess-style cupcakes and I had a little batter left; I decided it was the right time for my experiment. So I set up a pot of water and brought it to a rolling boil...

and then I dripped a spoonful of batter into the boiling water.

At first, the batter stuck together and began to float a little, like homemade pasta would.

I began to feel hope. I began to have fantasies of little gnocchi-like pillows of cake that I could snack on. This might be the next big thing! I spent several moments dreaming of how to combine "cake" and "gnocchi" into a clever word like Cronut. 

But then, things began to change quickly. The cake batter started to spread a little bit. It began to look like little amoeba in the water.

I let the batter boil for about 1 minute total, then I used a spoon to remove it. I did this with four separate portions of batter.

ut of the four spoonfuls I dropped in the pot, only two remained cohesive. They were gooey and delicate. Here's what they looked like.

 the other two had pretty much evaporated into the  water, giving a very not right look. 

Now, I won't lie...those little blobs of boiled cake didn't look too excellent.

And while they did "set" slightly, they remained too soft to handle and gooey. 

Unfortunately, I can't give you a happy ending on this story, either: they were snot-like in texture, and tasted (surprise!) like watered down and waterlogged cake. It was not the finest moment in baking. 

What this experiment was, however, was interesting and informative. I feel like I now have an idea of why cakes are steamed instead of boiled: because the indirect contact to the moisture allows them to more slowly "set" as they cook. In boiling water, the batter was too thin to set up sufficiently before it began to disintegrate. 

And furthermore, I feel very secure in that baking really is a superior way to prepare a cake. It's good to challenge things that we have always just accepted, though, right?

And yes, flavor-wise, I suggest we both stick to a classic baked version of chocolate cake next time. 

Have you ever prepared cake in an unexpected way?


What Happens When You Whip Ice Cream?

Can you whip ice cream like whipping cream? That's the question on tap for today's #whathappenswednesday. 

If you were to ask me what happened when you whip ice cream in the manner you would whipped cream, I'd probably guess that it would whip just fine. I mean, it's creamy, it's thick, it's already halfway there, right? 

Plus, ice cream usually has stabilizers so I figured this would just make it a really nice, thick whipped substance.

But as you probably know, guessing about this type of thing isn't my style. I like to get my hands dirty and to keep my sweets interesting. I wanted to see for myself what would happen. So basically, I was already on the way to the store five minutes after the question had occurred to me, and I bought some ice cream. To keep it interesting, I bought a peanut butter cup ice cream.

I let the ice cream soften, until it was not totally liquid but close to it. Then I loaded it into a stand mixer fitted with the whisk attachment.

And I whisked away, just like I would if it was heavy cream.


And I whisked. And I whisked. It progressed from definitely ice cream to much more liquid-y.

After a while, I began to have visual cues of whipped creaminess. The mixture thickened and increased in volume, and the cream began to create those little spatters on the side of the bowl that happen when the cream transformation into whipped cream begins to happen. I got excited. 

When I stopped the mixer, the ice cream even stuck to the whisk attachment the way whipped cream would when it has formed soft peaks. So I mixed just a little longer.

While the mixture retained soft peaks, they never progressed to stiff. And even the soft peaks became sort of drippy after just five minutes.

All the same, the whipped ice cream had a fascinating quality. It had the texture of a Wendy's Frostee, but the flavor of ice cream. 

See how it becomes a different thing entirely when whipped? 

So, to answer the question...what happens when you whip ice cream?

Well, you don't get some sort of superpower ice cream flavored whipped cream. But you do get a smooth, frosty treat with a texture somewhere between soft serve and a thick milk shake. 

So while you won't get a whipped cream-like substance, you will be rewarded with something tasty.

Were you surprised by the results?