Alarmingly Adorable: Baby Cake Designs by Whipped Bakeshop

I don't want you to die. BUT. The photos that follow are basically heart attack-inducing cute, so consider yourself warned.

These cakes are part of the new baby cake collection by Philadelphia bakery Whipped Bakeshop. I consider them worth their own post just to showcase their adorableness.

If you're in Philadelphia, you should go buy one, whether there's a baby in your life or not.

If you're not in Philadelphia, either go there, right now...

or just enjoy and coo at the photos and send a link to someone you know in the Philadelphia area.

Seriously - how freaking cute are these?? And there are more designs coming.  

Check out all of Whipped Bakeshop's designs here

Chocolate Milk Poke Cake

Seven minute frosting

I don't like the term "poke cake" because quite frankly, it sounds kind of dirty. Like, I feel like I should be blushing when I talk about them. But I love, love, love eating them. Because poke cakes aren't anything dirty at all: they're simply cakes which have been poked with a skewer of some sort so that they can be more receptive to delicious soaking liquids (tres leches cake would be a famous poke cake, btw. So would Better than Sex Cake).

Seven minute frosting

And I have to say: this poke cake is spectacular. It starts with a cake mix, but it's fancied up right quick by using melted butter and milk instead of the water and oil called for on the package, and then once baked, it's poked and soaked (see? dirty-sounding!) with an absolutely dazzling chocolate and sweetened condensed milk mixture. Even served just like that, this cake could make you cry with joy.

But save the tears, because there's still frosting! I used seven minute frosting, but you can use whatever type of buttercream or topping you'd prefer.

Seven minute frosting

It's a joy to dig into this cake, because it has all the joy of a yellow cake but the moisture and decadence of a gooey chocolate dessert. 

I'll leave it at this: it's a great cake. And anyone you make it for should consider themselves very lucky! 

Chocolate milk poke cake

Printable version here

Makes one, two-layer, 8-inch cake

For the cake

  • 1 box cake mix (I used Pillsbury yellow cake)
  • 1 stick butter, melted
  • 3 eggs 
  • 3/4 cup milk
  • pinch salt

For the topping

  • 4 ounces dark chocolate
  • 1 can (14 ounces) sweetened condensed milk 
  • Pinch salt 

To top it all off

  • 1 batch seven minute frosting (recipe here) or buttercream of your choice

Procedure

  1. Preheat the oven to 350 degrees F. Generously grease two 8-inch cake pans. I greased mine with some Bertolli spray because it had recently been sent to me and I thought it would be nice to say thanks. They didn't pay me to say that. 
  2. Poke cake
  3. Combine all of the cake ingredients in the bowl of a stand mixer. Blend on medium speed until smooth and lump-free.
  4. Poke cake
  5. Divide into the two cake pans, and bake for 30 minutes or until golden and a cake tester inserted in the center comes out mostly clean.
  6. Poke cake
  7. Remove from the oven, and after a few minutes, invert on to a wire rack set above a baking pan (to catch drips in the next step). 
  8. Poke cake
  9. In a medium saucepan over medium heat, combine the sweetened condensed milk and chocolate, stirring frequently, until the chocolate has melted. Remove from heat and stir in the salt. You can also do this while the cake bakes (that's what I did). 
  10. Poke cakePoke cake
  11. Poke the cake all over at 1 inch intervals using a chopstick--but don't go all the way to the bottom.
  12. Pour the chocolate mixture gently on top. If you're careful you shouldn't have too much loss of chocolate goo. Because it is tasty, and you want it in your mouth, not on the bottom of a pan. 
  13. Poke cake
    See how interesting they look?
Poke cake
    Let the cakes set for a while. Meantime, make some frosting. I used seven minute frosting but you can use whatever kind you like.
    Frost the top of one of the layers, stack the second, and frost the sides and top. Enjoy! 
Seven minute frosting

Have you ever tried a poke cake?

Grandma's Killer Chocolate Cake from Author James Patterson

Mystery Writers of America cookbook excerpt

Here's a riddle: what kind of cakes do mystery writers like?

Happily, the new book The Mystery Writers of America Cookbook: Wickedly Good Meals and Desserts to Die For is ready and willing to answer this question in the most delicious way. It is a collection of recipes culled from famous mystery writers, and it makes for mighty sweet eating. 

When choosing an excerpt recipe to feature here, my eye was drawn right away to "Grandma’s Killer Chocolate Cake: via mystery writer James Patterson. I hope you'll enjoy!

Grandma's Killer Chocolate Cake

Recipe headnote:

Here’s one “killer” Alex Cross always loves to catch—Grandma’s Killer Cake! A special family recipe dating from the 1940s, this decadent cake seems to get better with age; it is tastier on day two. And you need to be a good detective around the house after it has been made, sitting there in its glass­domed cake stand, staring back at you with deadly temptation, because a piece seems to mysteriously disappear every time I go into the kitchen. Not to be caught red­handed, so looms the “Killer Cake Killer”!

YIELD: 1 SINGLE­ LAYER 9x12 INCH CAKE OR 1 DOUBLE LAYER 9­ INCH CAKE

CAKE

  • 2∕3 cup butter
  • 2 cups granulated sugar
  • 2 eggs
  • 2 cups flour
  • 11∕3 cups buttermilk
  • 11∕3 teaspoons baking soda dissolved in 2 ∕ 5 cup hot water 31∕2 squares bitter chocolate, melted gently
  • 1 teaspoon vanilla extract

FROSTING

  • 1∕2 cup butter
  • 3 squares bitter chocolate
  • 2 cups granulated sugar
  • 2∕3 cup milk 1 teaspoon vanilla extract
  • 1 teaspoon almond extract


1. Preheat oven to 350°F. Cream butter and sugar together. Add eggs.

2. Blend in flour and buttermilk in alternating additions, starting and ending with the flour. Add baking soda mixture, followed by chocolate and vanilla extract.

3. Pour batter into one 9­by­12­inch pan or two round 9­inch springform pans. Bake for 30 minutes, or until a toothpick inserted into the center comes out clean. Remove from oven and let cool.

4. Combine all frosting ingredients in a saucepan, bring to a full boil, and boil for 2 minutes. Let cool. You can put saucepan on ice if necessary to cool quickly.

5. Remove the cake from the pan, frost, and serve.

About the author: James Patterson has sold 300 million books worldwide, including the Alex Cross, Michael Bennett, Women’s Murder Club, Maximum Ride, and Middle School series. He supports getting kids reading through scholarship, Book Bucks programs, book donations, and his website, readkiddoread.com. He lives in Palm Beach with his wife, Sue, and his son, Jack.

Excerpted from The Mystery Writers of America Cookbook: Wickedly Good Meals and Desserts to Die For edited by Kate White. Reprinted with permission from Quirk Books. 

The Only Flourless Chocolate Cake Recipe.

If you believe my mother (and she's a pretty honest person), my first word as a baby, aside from "mama" and "papa"...was "chocolate". Apparently, it occurred following an incident where my grandma gave baby-me a fat spoonful of chocolate frosting, against my mother's wishes. As the story goes, my eyes lit up and I said the magic word: "chok-lit". True story.

So clearly, chocolate has played an important role in my life. It's been a lifelong friend.

In spite of that, however, I don't consider myself a "chocoholic". I would more often choose a blondie than a brownie, and I like the cookie part better than the chocolate chip part of cookies. But when I do get a chocolate craving, it is fierce, and I want chocolate and nothing else in my mouth.

In Santa Fe, where I currently reside, I have been introduced to one of my favorite chocolate cakes, which always satisfies chocolate cravings: the flourless decadence cake at Whole Foods. It's a very dense chocolate cake with (because, why not) a thick ganache topping). I don't know exactly what it is about this cake, but it is GOOD. Here's a picture of it:

Birthday cake

When I recently wrote an article for New Mexico Magazine (out in January!), one of the recipes I developed was for a decadent flourless chocolate cake. When I made it, I was surprised at how close the cake part was to the Whole Foods variety, so I tried a new variation which featured not only flourless chocolate cake, but an all-over ganache topping.

Well, my friends, it worked, and I believe I have found the perfect homemade hack of the Whole Foods decadence cake.

Flourless chocolate cake

I don't know how to express it in words, quite, but I will try. This cake is very, very, very, very, very, very, very, very, very, very, very chocolatey. If you have a chocolate craving, this will do the trick. There's more than a full pound of chocolate encased in its glossy ganache-coated exterior. This cake means chocolate business.

The salt is key in this recipe, as it brings out the chocolatiness. If you want, you can add a teaspoon of coffee powder to amp up the chocolate flavor even more, but I don't find it necessary.

If you love chocolate, this is the only flourless chocolate cake recipe you'll ever need. If you don't love chocolate, this might be he one that makes you a believer.

Process shots from cake making: Flourless chocolate cake

Whipping the egg whites

Flourless chocolate cake

Adding the eggs to the chocolate Flourless chocolate cake

Folding the egg whites into the chocolate

Flourless chocolate cake

Pour into the pan

Flourless chocolate cake

Baked cake

The only flourless chocolate cake recipe.

Makes one 9-inch round cake

For the cake

  • 1 pound bittersweet or semisweet chocolate, coarsely chopped
  • 11 tablespoons (1 stick plus three tablespoons) unsalted butter, cut into ½ inch cubes
  • 5 large eggs, divided
  • 1 teaspoon vanilla extract
  • ¼ teaspoon salt
  • 2 tablespoons sugar

For the sauce

Procedure

  1. Preheat the oven to 325°F. Grease a 9-inch round cake pan and line the bottom with parchment paper. Grease the top of the parchment paper.
  2. In the top of a double boiler or in a large bowl set atop a saucepan of lightly simmering water with 2 inches between the top of the water level and the bottom of the bowl, melt the chocolate and butter. Stir frequently until the chocolate and butter have melted to the point where there are only a few small lumps. Remove from heat and continue stirring until these unmelted bits have melted in the residual heat.
  3. Whisk in the egg yolks into the still-warm chocolate mixture. Whisk quickly so that the eggs will be incorporated without beginning to cook (nobody likes scrambled eggs in their cake). Stir in the vanilla extract.
  4. In a separate bowl using a hand mixer, or the bowl of a stand mixer, beat the egg whites and salt until soft peaks form. Once soft peaks form, stop the mixing and add the sugar. Scrape down the sides of the bowl if necessary to make sure no sugar has stuck to the sides of the bowl. Continue mixing until the whites have attained firm peaks, but not so long that they become dry.
  5. Using a rubber spatula, fold the egg white mixture into the chocolate mixture in two separate additions (it’s just easier to manage that way). Mix only until there are no more traces of white and the mixture is fully combined.
  6. Using the same rubber spatula, scrape the thick chocolate mixture into your prepared baking pan.
  7. Place the pan in a larger baking dish or roasting pan, and fill the larger pan with water until it reaches halfway up the cake pan’s height.
  8. Place the entire unit (cake pan within bain-marie) into the oven. Bake for 30 minutes. The top and sides will be set, but the middle may jiggle a bit. This is OK.
  9. Remove the cake from the pan of water (the water level should have reduced making it easier to remove). Let the cake cool in the pan. When ready to remove from the pan, run a sharp knife around the perimeter of the cake pan to loosen the edges. Place a serving platter on top of the cake pan, and flip both the pan and the plate so that the cake is on top. It should come out easily. The parchment may stay in the pan or it may come off with the cake; remove from the cake if so. Store in the refrigerator until the cake has completely set.
  10. While the cake cools, make the ganache as specified in the recipe. Let it cool until it has thickened to a spreadable but thick consistency, and spread all over the cake. 
  11. Keep the cake in the refrigerator until ready to serve; let it come to room temperature before serving.

Do you like flourless chocolate cake?

"The Cake"

I need to tell you about something called The Cake.

Here's the story: my darling one has a handwritten book of family recipes, and one is definitely more captivating than any others, because its name is simple, mysterious, and a bit imperious...

It has a credit of Claire Goddard. I have never had the pleasure of meeting Claire, but based on her cake, I'm pretty sure I would like her. 

This cake is pretty, but perhaps not exceptional to look at: it just looks like a pleasant cake baked in a doughnut shape.

But one bite will tell you that there is something special about the cake. It's rich, probably owing to the high amount of eggs, and it is a bit tipsy, owing to the whopping 3/4 cup sherry (or rum, thankyouverymuch). It also has that certain addictive quality that boxed yellow cake always seems to impart on a cake (evidence: gooey butter cake). It's the sort of cake that doesn't need frosting...

but hey, why not?

Even in spite of the above selling points, I'm not sure how exactly to explain the pleasure of The Cake. It isn't the fanciest dessert you've ever had, but it's got star quality--a certain je ne sais quoi that you can't quite put your finger on, but you're drawn to nonetheless.

The Cake is worth your time--I promise. A little treasure from my family's memory box to yours.

"The Cake"

Slightly adapted from Claire Goddard

Note: the original recipe calls for 3/4 cup vegetable oil; we used part coconut oil. You can use 3/4 cup vegetable oil if you prefer.

I used Pillsbury Super Moist Yellow Cake Mix for this recipe. 

  • Serves 6-8 
  • Prep: 10 minutes
  • Baking time: 45-50 minutes

Ingredients

  • 1 box yellow cake mix
  • 1 package vanilla instant pudding
  • 4 unbeaten eggs
  • 1/2 cup vegetable oil
  • 1/4 cup coconut oil plus 1 tablespoon 
  • 3/4 cup sherry or rum
  • 1 teaspoon nutmeg
  • 1 1/2 cups buttercream frosting, for topping (optional but suggested)

Procedure

  1. Preheat the oven to 350 degrees. Grease a tube or bundt pan; set to the side.
  2. Combine all of the ingredients in the bowl of a stand mixer. Beat on medium speed for 5 minutes.
  3. Transfer to a greased tube pan (we used a bundt pan). 
  4. Bake for 45-50 minutes. Let cool for about 20 minutes before inverting on to a serving rack. Serve as-is, or covered with frosting (that is my suggestion) or with ice cream. 

Do you have any mysterious family recipes?

Brown Sugar Swirl Birthday Cake With Brown Sugar Frosting

Last week, even though it was a bit early for my August 26th birthday, I made a cake.

You see, I was in New Jersey for a few days with my parents, and I would be leaving before the big day, so I decided we should all have a little party. Any excuse for more cake, right?

I was writing a post for Craftsy about brown sugar buttercream, and I decided to make a cake to go with it (although, for the record, I have nothing against eating it by the spoonful). I hit up my mom's old cookbook collection and found an old treasure: silver white cake, AKA my birthday cake growing up. Birthday cake with brown sugar Birthday cake with brown sugar I doctored it up a bit, making it richer by including the entire eggs and by adding a swirl of brown sugar. The "swirl" came out more like little lumps of brown sugar here and there...but DELICIOUS lumps. Oh, and I also doubled the salt. Because if I've learned anything in my baking years, it is that brown sugar loves salt.

This cake came out tremendously, if I do say so myself. Everyone took seconds, which is always a good sign. Maybe it can add some joy to your non-birthday day, too!

Birthday cake with brown sugar Birthday cake with brown sugar Birthday cake with brown sugar Birthday cake with brown sugar Birthday cake with brown sugar Birthday cake with brown sugar

Brown Sugar Swirl Birthday Cake with Brown Sugar Frosting

For the cake

Makes one 2 layer 8-inch cake

  • 2 cups all purpose flour
  • 1 1/2 cups granulated (white) sugar
  • 3 1/2 teaspoons baking powder
  • 1 1/2 teaspoons salt
  • 1/2 cup (1 stick) butter, softened
  • 1 cup milk
  • 1 teaspoon vanilla
  • 4 eggs
  • 2 tablespoons brown sugar
  • 1 tablespoon melted butter

Procedure

  1. Heat oven to 350 degrees F. Grease and flour 2 8-inch round cake pans. Set to the side.
  2. Beat the flour, sugar, baking powder, salt, butter, milk, and vanilla in a stand mixer on low speed, scraping the bowl occasionally, for 2 minutes.
  3. Add the eggs, and increase the speed to high, scraping the bowl occasionally, for 2 more minutes, or until the mixture is pretty much smooth and lump free. 
  4. In a small bowl combine the brown sugar and melted butter. It should be pretty thick yet smooth. Fold into the cake mixture, trying to incorporate little bits of the mixture throughout the batter.
  5. Pour into the prepared pans. Bake 30 to 40 minutes, or until golden on top and a cake tester comes out mostly clean. Remove the cakes from the oven and immediately run a sharp knife around the perimeter of the pans to loosen the cakes. After a few minutes, invert them on to a wire rack to cool completely.
  6. While the cakes cool, make the frosting. When ready to assemble, start by generously frosting the top of one of the cakes; layer the second on top of that, and then frost the whole thing all over. I found this cake did not require a crumb coat.

Brown sugar buttercream

Ingredients

  • 2 sticks butter, at room temperature
  • 1/2 cup light brown sugar, packed
  • 1 teaspoons ground cinnamon
  • 4-6 cups confectioner's (powdered) sugar
  • 1 teaspoon vanilla extract
  • 1/8 teaspoon salt
  • 1/4 cup of half and half, plus more if needed

Note: This recipe yields a perfect amount of buttercream to ice a two-layer 9-inch cake or a 9x13-inch oblong cake. This recipe can be doubled.

  1. Cream the butter until fluffy. Add the brown sugar and cinnamon; beat until it has become smooth in texture yet whipped.
  2. Add three cups of the confectioners' sugar, and mix on low speed so that you don't have a snowstorm. Stir in the vanilla extract, salt, and cream. Stir until incorporated.
  3. Add the remaining confectioners sugar to your taste. If it becomes too stiff, add a bit more cream. Store unused portions of the buttercream in the refrigerator for up to a week.

What kind of cake will you have for your birthday this year?

Single Serving Dessert: Microwaveable Chocolate Cake in a Bowl

To some, the idea of a "single serving dessert" seems sad. Like, poor you, you don't have anyone to share dessert with.

I don't find single serving desserts sad at all. I see it as a definite reason not to have to share. It only makes one! So you can see, it's a decision that you can make to treat yourself and no one else. The recipe which follows is for a quirky little single-serving chocolate cake which you can make in the microwave. I stuffed mine with hershey's kisses so it would be a little gooey inside, but you can do whatever you want, from topping it with ice cream or fruit (if you're into health food) or even some buttercream frosting

If you started to feel panicky there, don't: you won't be sharing the toppings either.

If this all sounds quite terrible of me, so be it, but I wasn't planning on sharing dessert with you anyway.

I'm going to try something a touch different today and put all of the photos before the recipe, so that if you want to follow the recipe, you can easily follow it without picture breaks. Which way do you prefer? 

All right, here we go.

Next time you're feeling greedy and want something all for you that nobody else can have, here's how you do it. 

First, you'll mix up a couple of wet ingredients.

Then you'll add some dry ones and mix til it's smooth.

If you want, add a generous handful of (unwrapped!) chocolate candies such as Hershey's Kisses.

Then you'll put the bowl you mixed it in right in the microwave for a few minutes. It will puff up and pull away form the sides of the bowl. Actually, it will kind of look ugly. But...

Go for it. Don't share. What do you think?

Single Serving Chocolate Cake in a Bowl

Makes one

  • 4 tablespoons sugar
  • 1 egg
  • 3 tablespoons canola oil
  • 1 teaspoon vanilla extract
  • 4 tablespoons flour
  • 1 tablespoon unsweetened cocoa
  • 3 tablespoons milk
  • a handful of chocolate candies

Procedure

  1. Mix together the sugar, egg, oil, and vanilla in a bowl. And by "a bowl" I mean the one you indend on microwaving. Use one with decently high walls, so that the cake has room to rise.
  2. Add the flour and cocoa. Mix until incorporated. Add the milk and mix until smooth. You can use a fork, spoon, or mini spatula for this.
  3. Fold in the chocolate candy.
  4. Put the bowl in the microwave and heat on high for 3 minutes (if you know your microwave is a lower powered model, go four minutes. It will puff up, and then deflate once removed from microwave.
  5. What are you waiting for? Top it, if you want to, and eat.

What's your favorite dessert to not share?

It's Not My Birthday: Marvelous Marble Swirl Cake Recipe

Taste of home cake

I understand that sometimes you want a pinkies-out, delicate and beautiful dessert.

And other times...you just wanna stuff your face with cake.

A week or so ago, I was having one of those days. And almost as if it was a sign from the heavens, I opened up Taste of Home Magazine--you know, to gaze at the feature which included my mini pies. Here I am with the spread:

Listen. The cake in the magazine looked like this.

I am not a photographer...but here is mine.

Taste of home cake

The photos in this post prove that. But I hope that my words can convince you that in spite of the "not ultra pinnable" images, this cake is worth giving a try. Because gosh-darn was it good. It is such a rich cake that I am honest, a slice will do it for you. It's almost like the cake part of a crumb cake, swirled with chocolate. So buttery, so creamy.

And then, the frosting. I sort of improvised with it, and decided to try a sort of sour cream frosting. It was a good decision--the slight tang of the frosting worked so beautifully with the rich cake. The overall result was richer than a king's ransom, and far tastier. 

The decorating was fun, too. Swirling chocolate in the frosting was surprisingly easy, and looked pretty. It also gave a wonderful flavor contrast, adding a solid, dark undertone to go with the sweet and buttery stuff.

Please, please tell me you'll try this cake. It's like having your birthday again, no matter what day of the year. 

Taste of home cake

Marvelous Marble Swirl Cake

Adapted from Taste of Home

For the cake

  • 4 ounces bittersweet chocolate, chopped
  • 1 tablespoons, plus 1 1/4 cups butter, softened, divided
  • 2 cups sugar
  • 5 eggs
  • 3 teaspoons vanilla extract
  • 2 1/4 cups all purpose flour
  • 2 teaspoons baking powder
  • 1/2 teaspoon salt
  • 1/2 cup sour cream
  • 1/2 cup chocolate chips

Frosting

  • 3/4 cup sour cream
  • 6 3/4 cup confectioners' sugar
  • 2 teaspoons vanilla
  • some milk on hand, to thin if needed
  • 2 tablespoons chocolate chips

Procedure

  1. In a metal bowl over barely simmering water, melt the chocolate and 3 tablespoons of butter; stir until smooth. Cool to room temperature.
  2. Meanwhile, preheat the oven to 375 F. Line the bottoms of two 8-inch round baking pans with parchment paper; grease the paper, too.
  3. In a bowl, cream the remaining butter with the sugar until light and fluffy. Add eggs, one at a time, beating well after each addition. Beat in the vanilla. In another bowl, whisk flour, baking powder, and salt; add to creamed mixture alternately with the sour cream, beating well after each addition.
  4. Remove 2 cups batter to a small bowl; stir in cooled chocolate mixture. Drop plain and chocolate batters by tablespoonfuls into the prepared pans, dividing the batter between the pans. 
  5. Bake for 20 to 30 minutes, or until a toothpick inserted in the center comes out clean. Cool in the pans 10 minutes before removing to wire racks. Peel off the parchment, and let cool completely.
  6. When you have a feeling the the cake will be cool soon, begin on the frosting. In a large bowl, cream the sour cream with the confectioners' sugar until nice and smooth but thick. If it gets too thick and stiff, add the milk as needed to thin. 
  7. If the cakes have rounded tops, level them with a serrated knife. 
  8. Place one cake layer on a serving plate; spread with 3/4 cup frosting.
  9. Top with remaining cake layer. Apply a thin crumb coat and let chill for 20 minutes to lightly set. 
  10. Now, put a nice dollop on the top of the cake. Drop the remaining chocolate on top, and spread the frosting in a circle so that it is woven with chocolate, too. Yum.
  11. Ice the sides with the remaining (plain) frosting. 

Enjoy.

The Bake-Off is Coming: Blueberry Cinnamon Roll Coffee Cake

Blueberry Cinnamon roll cake

CakeSpy Note: OMG! The 46th Annual Pillsbury Bake-Off is coming! Since I so deeply loved attending the 45th Bake-Off, I thought I would get you excited early by sharing some of the finalists' recipes. Do I need to tell you that the winner will receive one million dollars? My posting is on hyperdrive since the event is less than a week a day--check back often, because I will be posting recipes like crazy until the big event! You can follow them by clicking the bakeoff tag below the post to see which ones have been posted so far. Enjoy! 

Marie Sheppard Chicago, Illinois is the one to thank for this tasty morning treat. Hey, I'll bet it would taste good in the PM, too!

Blueberry Cinnamon Roll Coffee Cake

Prep Time: 25 Min Total Time: 1 Hr 15 Min Makes: 8 servings

Ingredients

  • 1 medium lemon
  • 3/4 cup fresh blueberries
  • 1/4 cup Smucker's® Blueberry Preserves
  • 2 teaspoons cold butter, cut into small pieces
  • 2 cans Pillsbury® refrigerated cinnamon rolls with cream cheese icing
  • 1 egg
  • 1/4 cup pecans or cinnamon pecans, coarsely chopped

Procedure

  1. Heat oven to 350°F. Spray nonstick 9-inch tart pan with removable bottom with Crisco® Original No-Stick Cooking Spray. Line cookie sheet with parchment paper; place tart pan on cookie sheet.
  2. In medium bowl, grate 1 teaspoon zest from the lemon. In small bowl, squeeze 1 tablespoon juice from the lemon; set aside.
  3. Mix 2 tablespoons of the blueberries with the lemon zest, mashing berries slightly with fork. Stir in preserves, remaining blueberries and butter; set aside.
  4. Separate rolls from both cans; reserve icing. On parchment paper, press rolls, cinnamon side down, into 3- to 4-inch rounds. Spoon about 1 tablespoon blueberry mixture in center of each round. Fold dough over filling, pressing edges to seal. Place filled rolls in pan, seam side up in spoke fashion with 2 in the center.
  5. In small bowl, lightly beat egg with wire whisk; brush over rolls. Bake 22 to 32 minutes or until center is deep golden brown. Remove to cooling rack.
  6. Cool 5 minutes. Remove side of pan; cool 10 minutes longer. Stir reserved icing into lemon juice. Drizzle evenly over rolls. Sprinkle with pecans. Serve warm or cool.


The Bake-Off is Coming: Mocha Cappuccino Pull Apart Cake

Mocha Cappuccino pull apart cake

CakeSpy Note: OMG! The 46th Annual Pillsbury Bake-Off is coming! Since I so deeply loved attending the 45th Bake-Off, I thought I would get you excited early by sharing some of the finalists' recipes. Do I need to tell you that the winner will receive one million dollars? My posting is on hyperdrive since the event is less than a week a day--check back often, because I will be posting recipes like crazy until the big event! You can follow them by clicking the bakeoff tag below the post to see which ones have been posted so far. Enjoy! 

This recipe allows you to have your coffee and eat your cake, too. And why not incorporporate a little chocolate, while you're at it? I like the way Janet Gill of Canton, Ohio thinks when she creates recipes.

Mocha Cappuccino Pull Apart Cake

Prep Time: 20 Min Total Time: 1 Hr 30 Min Makes: 12 servings

Ingredients

  • 1 container (8 oz) mascarpone cheese, softened
  • 1/2 cup sugar
  • 1/2 cup Jif Mocha Cappuccino Flavored Hazelnut Spread
  • 1/4 cup butter, melted
  • 1 cup pecans, chopped
  • 2 cans Pillsbury Grands! Flaky Supreme refrigerated cinnamon rolls with icing
  • 1 teaspoon instant coffee granules

Procedure

  1. Heat oven to 350°F. Generously spray 12-cup fluted tube cake pan with Crisco® Original No-Stick Cooking Spray.
  2. In large bowl, beat mascarpone cheese, sugar, mocha cappuccino hazelnut spread and butter with electric mixer on low speed 45 seconds or until smooth. Stir in pecans.
  3. Separate dough into 16 rolls; reserve icing. Cut each roll into 6 pieces. Place 1/2 of the biscuit pieces into mascarpone mixture, gently folding to coat. Fold in remaining biscuits to coat; spoon mixture in pan.
  4. Bake 40 to 50 minutes or until deep golden brown and biscuits are no longer doughy in center. Cool 15 minutes. Place heatproof serving plate upside down over pan; carefully turn plate and pan over. Remove pan.
  5. Meanwhile, in small bowl, stir 1 teaspoon boiling water and instant coffee granules until granules are dissolved. Stir in 1 container of the icing until well blended; drizzle over warm rolls. Cool 5 minutes. Drizzle with remaining container of icing. Serve warm.


Sweet Discovery: Mexican Wedding Cake, Mary and Tito's Cafe, Albuquerque


Mexican wedding cake

 I'd like to share with you the most interesting dessert I've had in a while.

It's called Mexican Wedding Cake. But this is kind of a funny name, for a few reasons.

First off, when I think "Mexican Wedding Cake", I think of a cookie--a snowball sort of cookie. Not an actual cake.

Second, it doesn't really look like a wedding cake. It actually more resembles a Hummingbird cake, with walnuts and pineapple and cream cheese frosting...but without the banana. It's baked in a bundt type pan.

Third, we're not in Mexico. We're in New Mexico, at an eatery specializing in New Mexican food. It can't be denied that New Mexican cuisine is heavily influenced by that of Mexico, but they're not *quite* the same. Although to this last point, I feel as though at least one of the employees referred to it as "New Mexican Wedding Cake".

But who really cares about the name when a cake tastes this good?  


Mexican wedding cake

 As previously mentioned, it's a nice, dense, sort of Hummingbird-esque cake, but without the banana. It is dense with spices, fruit, and buttery cakey goodness. When I say dense, I mean it. It's almost gooey, like the texture of a baked pudding. Upon reflection, it's like having a glimpse at the evolution between fruit cake and fluffy layer cakes, with delicious results. And the frosting, oh, the frosting. Here's a posterior view to give you an idea:Mexican wedding cake

 It's somehow light, almost with the texture of whipped cream, but rich in cream cheese flavor. It's applied thickly, and you'll be so glad it is. This is a very, very special cake, served in an unassuming spot (picture below): 

What a find!

As I learned from the fantastic site NM Gastronome, (owner) Antoinette has been making this cake for better than 30 years (though she doesn’t look much older than 30 herself) and says she’s made it thousands of times.  You won’t find any better in New Mexico.  You won’t find anything close.

As I learned from the same post,

In the February, 2013 edition of Albuquerque The Magazine  celebrated the Duke City’s best desserts. The fabulous Mexican wedding cake was recognized as the “to die for dessert to remember.”  I’m not too sure what that means, but if it means the Mexican wedding cake is unforgettable, the honor is certainly well deserved.  It’s certainly one of the very best desserts in New Mexico. 

You've got to try this one if you find yourself in Albuquerque! 

Mary & Tito's, 2711 4th Street, N.W. Albuquerque, NMMary & Tito’s Facebook Page.


10 Layer Peanut Butter Cake for Peanut Butter and Co.

Let me take a brief break from telling you about my book tour (remaining dates here, btw--I'm in the Chicago area tonight, at the Aspen Drive Library, 701 Aspen Drive, Vernon Hills IL, from 7-8 p.m.) to tell you about this amazing cake I crafted for my friends at Peanut Butter and Company.

It's a 10 layer cake, inspired by Smith Island Cake (the recipe for that one is in the new book). 

Regarding the peanut butter cake, here's what I have to say about it:

Want to really show off with your next dessert offering? Well then, you’ll definitely want to make this cake. It looks like a pretty normal cake on the serving plate, but once cut into, the amazing interior is exposed. Composed of 10 thin stacked cakes, each sandwiched with a layer of White Chocolate Wonderful peanut butter frosting, this is “frosting with the cake,” a delightful treat that begs for a glass of milk. It’s a peanut butter-ized version of a famous cake from Maryland (actually, if you want to get technical, it’s the Official State Dessert!) called Smith Island Cake, which is given out as the prize during community events. But no need to sing and dance when you’ve got this recipe–everyone’s a winner!

Find the recipe here.

My Yoga Teacher's Chocolate Beet Cake Recipe

Choco beet cake

Sometimes, recipes come from the most unexpected places.

For instance: I am at a yoga class. I'm doing yoga. Whatever. Then after class...

the teacher slips me a tupperware package. Inside of it is a piece of CHOCOLATE CAKE. YES! I love exercise!

Choco beet cake

This was indeed a fascinating specimen: a chocolate cake sweetened with beets and maple syrup. Sound virtuous? Don't worry. It's not. The beets add a wonderful earthiness and natural sweetness to the dark richness of the chocolate, and the maple adds an interesting sweetness that works very nicely with the beets and chocolate. 

Choco beet cake

Now, I will confess, it was given to me sans topping. But I found that while the moist and tasty chocolate cake was great sans frosting...it was even better with a healthy dollop of creme fraiche or whipped cream. Yum!

Here's the recipe, with thanks to Blue Moon Hot Yoga for being the ones to introduce me to it. Doing yoga beforehand not necessary.

Chocolate Beet Cake

  • 1 1/2 cup cooked and pureed beets
  • 4 ounces unsweetened chocolate, coarsely chopped
  • 3 eggs
  • 1/2 cup buttermilk
  • 1 teaspoon vanilla
  • 1 stick butter
  • 3/4 cup or 1 cup grade B Maple syrup (depending on how sweet you want it)
  • 1 3/4 cup flour (can be whole wheat, spelt and rice flour, etc)
  • 1 1/2 teaspoon baking soda
  • 1/4 teaspoon salt
  • 1/2 teaspoon cinnamon
  1. Grease and flour a 9x13-inch pan.
  2. Scrub the beets well and slice into 1/4 inch rounds. Steam until tender; puree the cooked beets in a processor.
  3. Melt the chocolate in a double boiler. Melt the butter over low heat in a sauce pan.
  4. In a large bowl, cream together the butter and maple syrup. Add the eggs and combine thoroughly, then stir in the chocolate, beet puree, buttermilk, and vanilla.
  5. In another bowl, combine the flour, salt, baking soda, and cinnamon. Add this to the liquid ingredients and mix into a smooth batter.
  6. Pour into your prepared pan and bake at 350 degrees F for 30 minutes or a little longer until a cake tester comes out clean.


Macrina Bakery's Almond Cake with Raspberries & Chocolate Ganache

You know what I love? Everything Macrina Bakery makes, that's what. And while I no longer live in Seattle, I keep track of them and their delicious recipes by virtue of their monthly newsletter. And I love to pass on what I have learned! So here's the most recent installment: Almond Cake with Raspberries and Chocolate Ganache. Here's what they have to say about it:

This combination of toasted almonds in a buttery cake, accompanied by fresh raspberries and bittersweet chocolate ganache is our best-selling wedding cake. It satisfies everyone's taste with nuts, fruit, and of course, chocolate. This recipe makes individually sized cakes that are baked in a jumbo muffin pan. Once they've cooled, you remove the paper liner, invert the cakes so the tapered side is up, fill with sweetened cream and raspberries, and top with chocolate ganache. 

Almond Cake with Raspberries & Chocolate Ganache

For the batter:
  • 1/2 cup raw almonds (skins on), toasted 
  • 1-1/2 cups cake flour
  • 1/2 teaspoon baking powder
  • 1/2 teaspoon baking soda
  • 1/4 teaspoon kosher salt
  • 1/2 cup plus 2 tablespoons low-fat plain yogurt, divided
  • 2 large eggs
  • 1/2 teaspoon pure almond extract
  • 1/4 teaspoon pure vanilla extract
  • 3/4 cup (1-1/2 sticks) unsalted butter
  • 1 cup plus 2 tablespoons sugar
For the whipped cream filling:
  • 1 pint fresh raspberries (about 24 berries)
  • 1/2 cup heavy cream
  • 2 tablespoons sugar
For the chocolate ganache:
  • 1/2 cup heavy cream
  • 1/2 cup semisweet chocolate chips
  • 1/2 cup bittersweet chocolate chips

Makes 8 Jumbo Cupcakes

  1. Position a rack in the center of the oven and preheat to 400°F. Lightly grease the top of a jumbo muffin pan with canola oil to prevent any stray batter from sticking, and line 8 cups with jumbo cupcake liners.
  2. To make the batter, first grind the toasted almonds in a food processor until they are very fine and powdery. (Alternatively, grind them by hand: chop the nuts as finely as you can with a chef's knife, then use the flat side of the knife to crush the chopped nuts into a powder.) Sift together the flour, baking powder, baking soda, and salt into a medium bowl. Add the almonds and toss with your hands to evenly distribute. Set aside. 
  3. Whisk 2 tablespoons of the yogurt, eggs, and almond and vanilla extracts in a small bowl. Set aside. 
  4. In the bowl of a stand mixer fitted with the paddle attachment, cream the butter and sugar; start on low speed and increase to medium, stopping to scrape down the bowl with a rubber spatula as needed to fully incorporate the ingredients. The mixture will be light, fluffy, and pale. Add the flour mixture and the remaining 1/2 cup yogurt, slowly mixing for 1 minute. Once the flour is incorporated, increase to medium speed and mix for 1 minute more, then scrape down the bowl again. Add the egg mixture in 3 additions, mixing for 20 seconds after each addition, then scraping down the bowl. 
  5. Using a large spoon or #30 ice cream scoop, fill the cupcake liners three-quarters full with batter. Smooth the tops for even baking. Place the pan on a rimmed baking sheet and bake for 30 minutes, or until the cupcakes are deep golden brown and a skewer inserted into the center comes out clean. (Note that these cupcakes will rise only to the top of the muffin pan as they bake.) Cool them in the pan for 45 minutes, then remove them and peel off the cupcake liners. Invert the cakes onto a plate, so the bottoms are up and using a teaspoon, scoop out a 1-1/2 inch ball from the center of each cake and discard (or eat!) the cake.
  6. To make the filling, pick through the raspberries, reserving 8 beauties for garnish. Whisk the heavy cream and sugar in a small bowl, whipping until they form medium-firm peaks, then fold in the raspberries. You want the berries to break up a bit—but don't let them get soupy. Spoon the raspberry whipped cream into the hole in the cakes, piling in as much as you can and leveling the top. 
  7. To make the ganache, pour the heavy cream into a small saucepan. Over medium heat bring the cream to a froth just before it boils. Turn off the heat and add the semisweet and bittersweet chocolate chips. Using a rubber spatula, stir until the chocolate completely melts, then remove the pan from the heat and set aside to cool for about 10 minutes. The ganache will thicken as it cools. 
  8. To assemble, top each cake with 1 tablespoon of the ganache; spread it evenly, but leave a little of the golden cake showing around the edges. Garnish with a raspberry. 
  9. These cakes taste best the day they are made. You can prepare them up to the point of making the filling and store, covered, at room temperature for 2 days. 

Five Spring Cakes to Make You Smile

Image: Whipped BakeshopSpring has sprung, people! With it comes a sense of refreshing newness, not to mention an awfully pretty palette of blossoms and greenery beginning to sprout. Inspired by the pretty colors and the utter happiness that comes with the world coming to life again after a long winter, here's a collection of sweet Spring-like cakes to inspire you and get your appetite going for the season.

Pinwheel Cake (pictured above): Philadelphia bakery Whipped Bakeshop always inspires me, but this sweet cake takes the...well, you know. A delicate pastel pink cake garnished with adorable pinwheels evokes the gentle breezes and free-wheeling spirit of the first warm spring days. 

Image: Southern LivingStrawberries and Cream Cake: What says spring-into-early summer like strawberries? They taste like sunshine and happiness, especially when paired with rich cream. This lovely cake takes advantage of seasonal produce and dresses it up in its finest spring party outfit. Find the recipe here.

Image: Juliet Stalwood Cakes and BiscuitsDaffodil Cake: It's hard not to love daffodils--they're like little yellow sunshines growing from the earth! This cake captures the bursting blossoms of happy daffodils, and happily, this piece of art is bursting with sugar, too! Created by Juliet Stalwood Cakes, it appears to be reatively shaped fondant that give the sides and top its sweet look.

Image: Martha StewartCrocus Cake: You know that spring is starting when you start to see crocus buds peeking through the cold ground, sometimes even through snow! This cake perfectly shows the first flush of spring, complete with cocoa "earth" and a bird's nest made of phyllo dough! 

Image: Better With ButterSunshine Ombre Cake: This cake by Better With Butter just makes me smile. I imaging that a slice of this orange ombre cake is like eating graduated rays of sunshine. If you are what you eat, then I'd warrant a guess that you'd have a good sunny glow going on after a slice of this delightful cake.

The Delicious Tale of Dobos Torte

Dobos torte

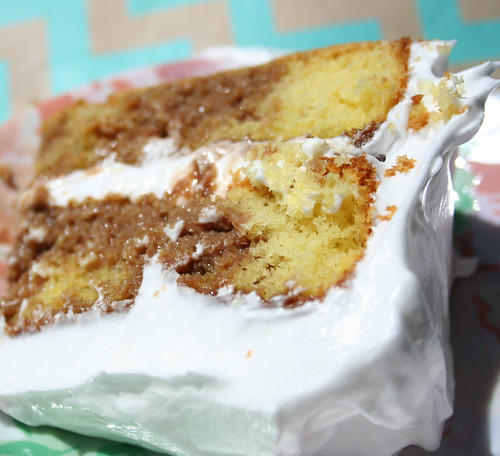
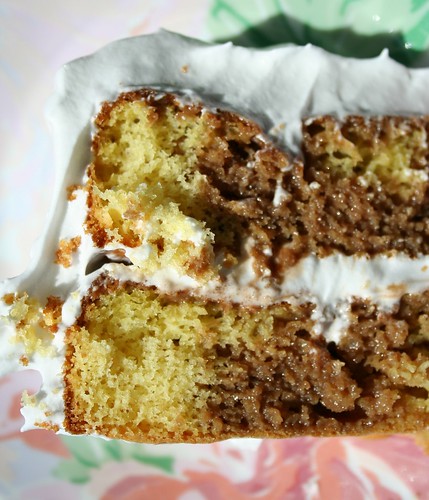
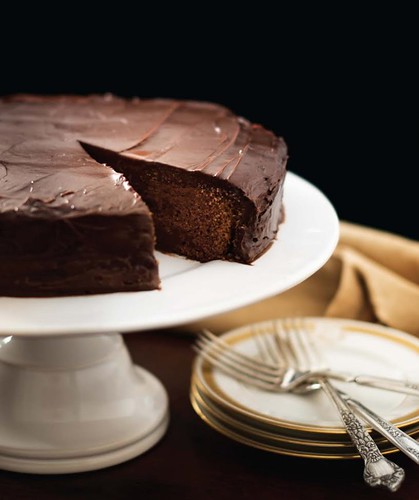
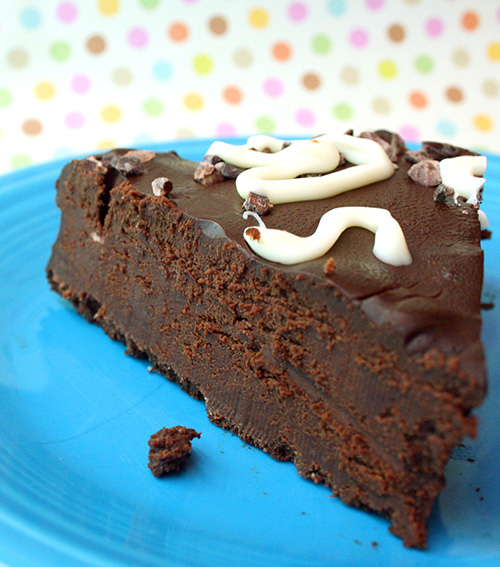
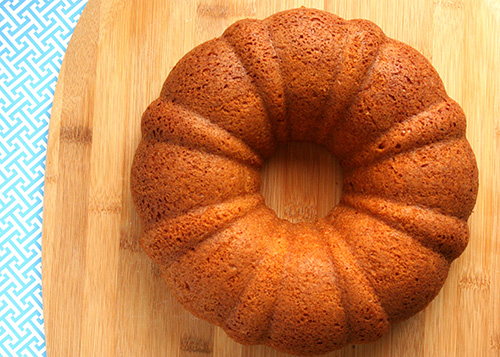
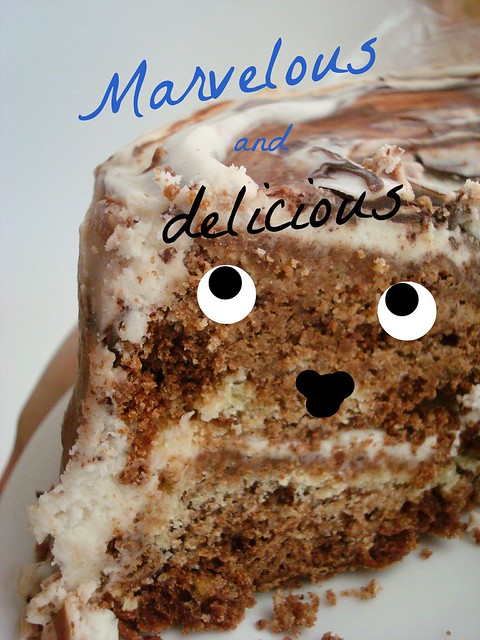
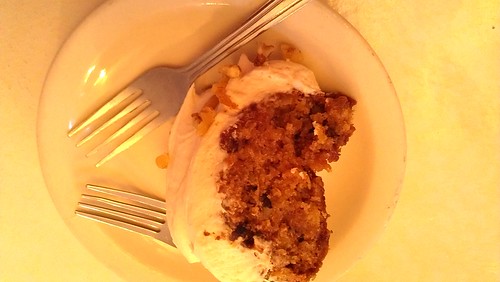
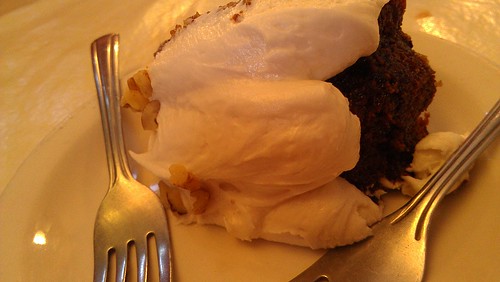
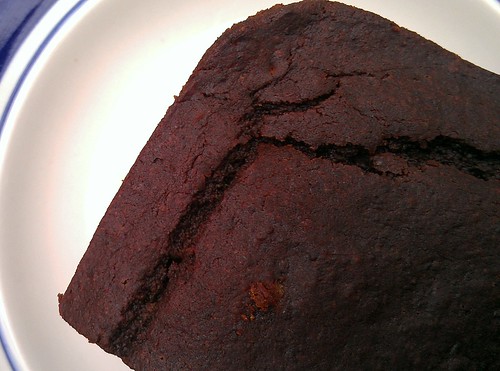
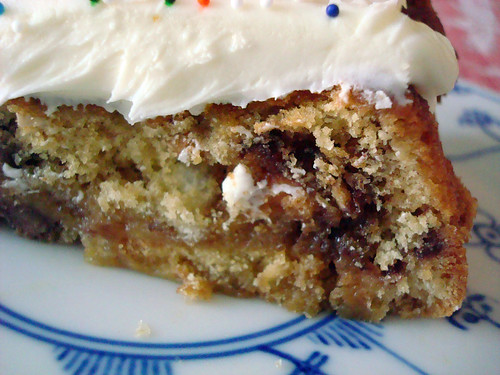
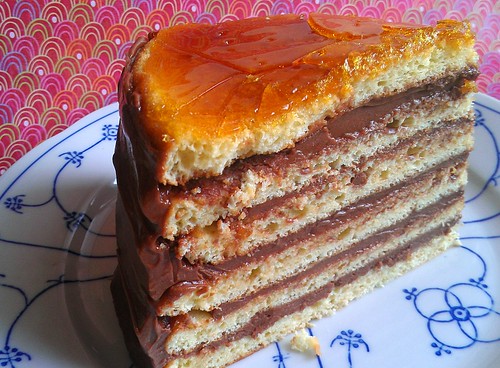
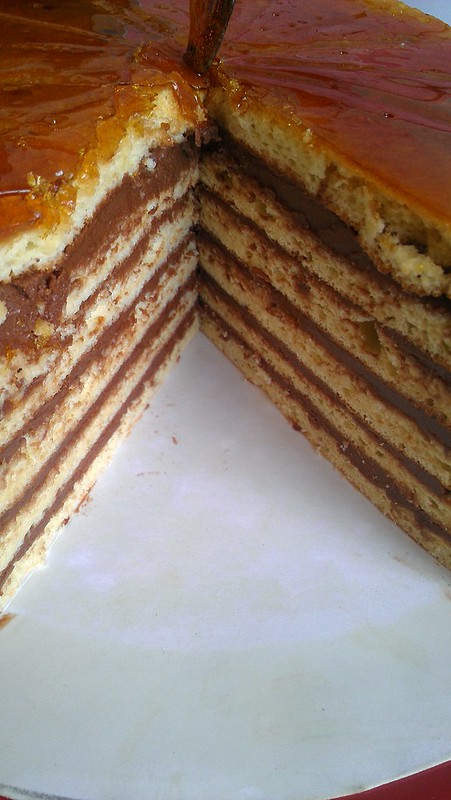
He may not have had nine lives, but József C. Dobos left a many-layered legacy that's considered a symbol of Hungary. It's called Dobos Torte, an elegant caramel-coated cake which, when cut into, becomes even better--because once you get past that eloquent exterior, you'll find several (between 7 and 11) layers of delicate sponge cake sandwiched with a luscious chocolate buttercream.

Dobos torte

Sometimes thought of as the Hungarian equivalent to Escoffier, the famous French foodie who was the inventor of, among other dishes, Cherries Jubilee, Dobos was a fancy chef from a long line of fancy chefs. After spending his life in the culinary arts, he settled down in his later years to open a gourmet food shop in Hungary. He created this cake as a pleasurable way to satisfy the need for a dessert that would keep well: refrigeration wasn’t as easy to come by as it is today, and the high ratio of rich frosting to cake ensured that the cake would stay moist for far longer than a plain sponge cake.

Dobos Torte

 But that wasn't the only selling point of the cake: Dobos, a true pastry pilgrim, had discovered buttercream in his travels to France--ooh la la! When he used it in his cake (at a time when most cakes were filled with cooked creams or custards), the sinfully luxuriant, sweet buttercream-filled Dobos Torte stood out. That's right: while the combination of cake with buttercream filling is commonplace today, at the time it was really quite a revolutionary dessert concept! 

Dobos Torte

Mr. Dobos also seemed to be quite the marketing expert for his time: after he grandly introduced his Dobos Torte at the National General Exhibition of Budapest in the 1880s, the cake became a sensation throughout Europe, earning devotees from far and wide. Dobos, like a modern-day pastry rock star, even toured European capitals, introducing the cake to different cities and presenting it in a special, custom-made container. Talk about hyping your brand!
 
Dobos went to the great meringue in the sky in the 1920s, but his very unique cake has lived on: among the many honors bestowed on him and his creation over the decades, my favorite remains the time when  a six-foot-diameter Dobos torte was paraded by pastry chefs through the avenues of Budapest! Dobos torte remains a classic today; look for it when you're traveling the world, visiting fancy hotels, restaurants, and pastry shops.
 

Dobos

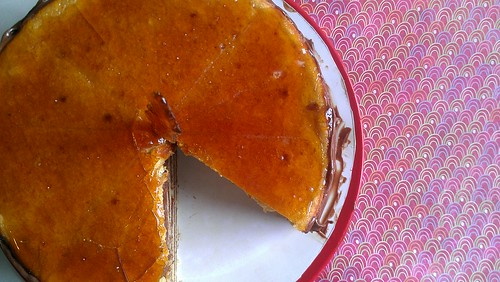
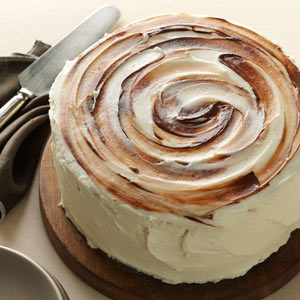
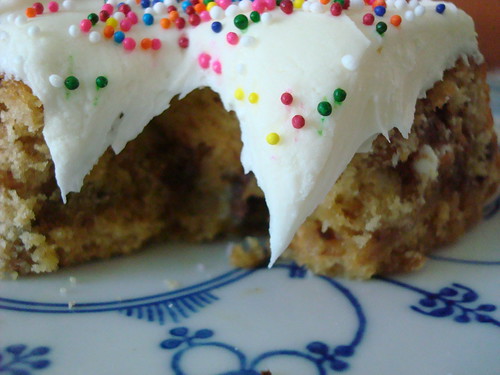
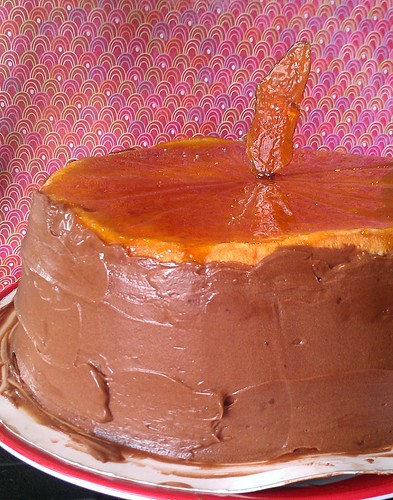
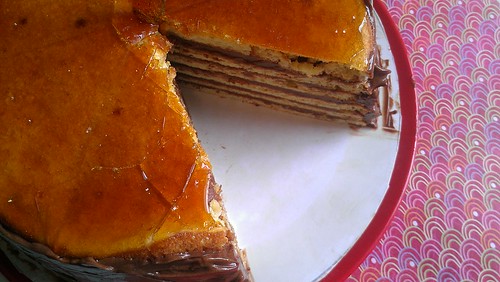
When it comes to making Mr. Dobos' creation yourself, don't be daunted by the long list of ingredients and instructions: this is definitely a recipe that requires time and attention, but it's not very difficult to prepare, and once it's served, you'll secure a spot as baking royalty among your family and friends. The crowning glory is the caramel top layer, which, when applied, will undoubtedly make you feel as if you are adding the torch to the Statue of Liberty.

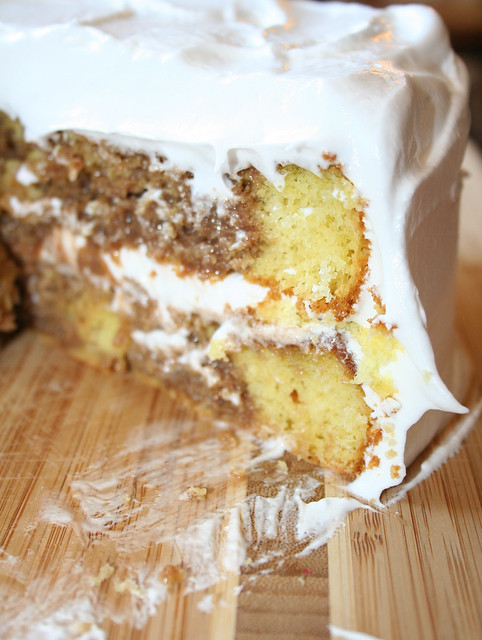
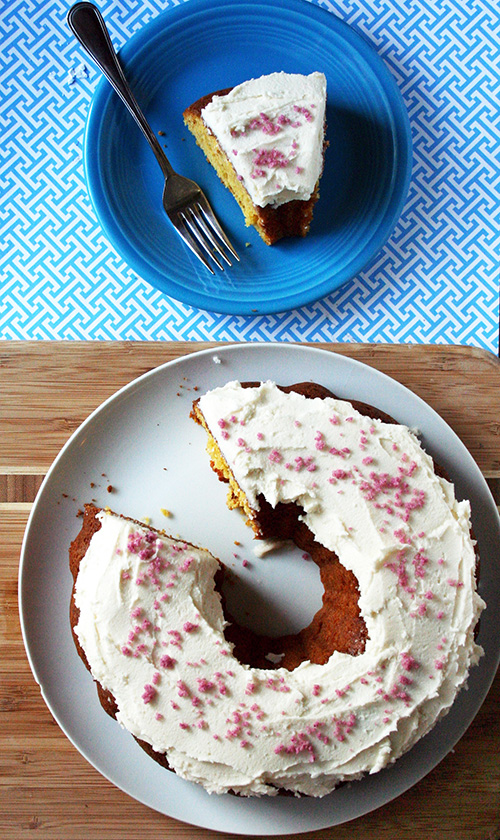
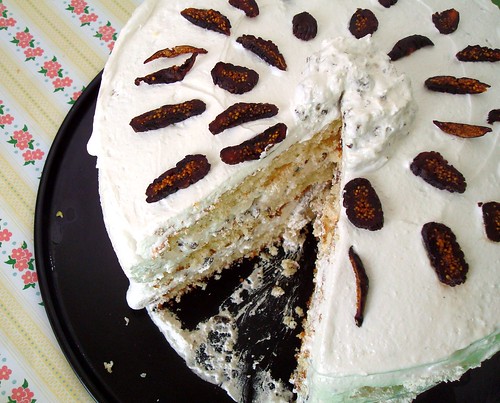
Full disclosure? When I made this cake, I made it slightly wrong. Usually the caramel is cut as triangles and then placed at a rakish angle along the cake's top, like this. I made it as a topping layer. You know what? Still tasty, even if not quite 100% traditional. So I have it that way in my tutorial!

Dobos

Dobos

Dobos Torte (Printable version here!)

Makes one tall 9-inch layer cake (16 servings) 

For the cakes:

  • 9 egg whites
  • 1 cup granulated sugar
  • 8 egg yolks (use the last egg yolk for the buttercream)
  • 1/4 cup milk (whole or 2%)
  • 1 tablespoon lemon zest, from 1 large lemon
  • 1 1/2 teaspoons vanilla extract
  • Pinch of salt
  • 1 1/2 cups all-purpose flour, sifted
  • Confectioners' sugar, for dusting 

For the buttercream:

  • 12 ounces bittersweet chocolate, chopped (about 2 cups)
  • 1 cup sugar
  • 1/4 cup water
  • 2 large eggs
  • 1 egg yolk
  • 1 pound (4 sticks) unsalted butter, cut into pieces 

For the caramel:

  • 1 cup granulated sugar
  • 3 tablespoons water

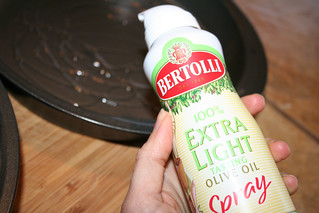
Preheat the oven to 400 degrees F. Generously grease and flour the bottom and sides of a 9-inch springform pan. Have ready two 10-inch cardboard circles.

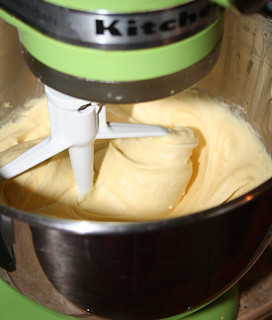
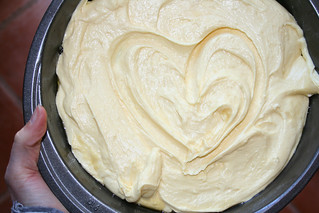
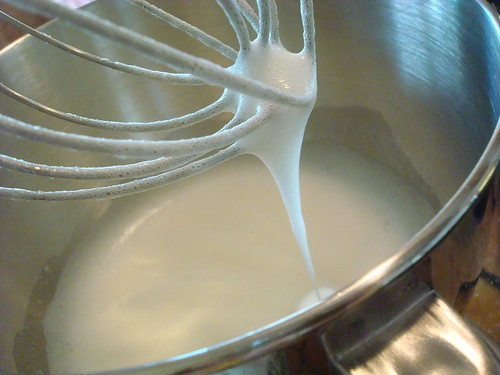
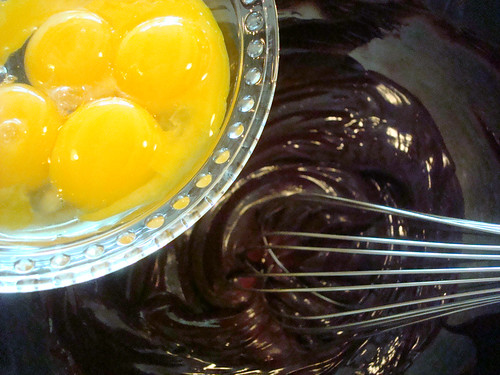
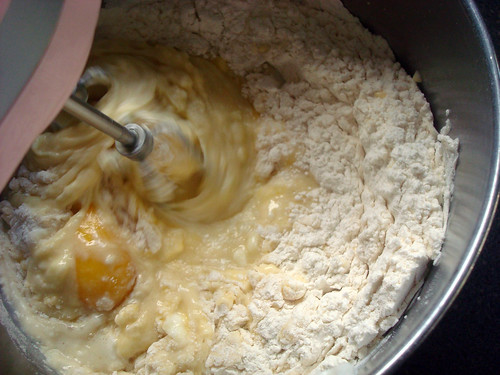
 To make the cake, put the egg whites in the very clean bowl of a stand mixer fitted with the whisk attachment. Beat the egg whites until frothy, then gradually add the sugar. Continue beating just until soft peaks form. Transfer to a large, wide bowl to make later steps (folding, etc) easier.  

In another bowl, whisk the  8 egg yolks with the milk, lemon zest, vanilla, and salt until well blended. Fold about ¼ of the egg yolk mixture into the egg whites to lighten the mixture; fold in the rest of the yolks in a second addition. This will keep the mixture from deflating. Sift the flour over the egg mixture, and fold in two additions, making sure that the flour has been completely incorporated.  

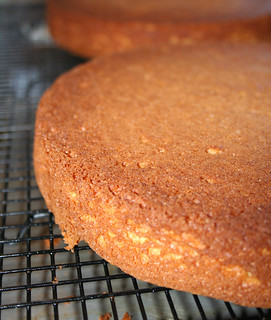
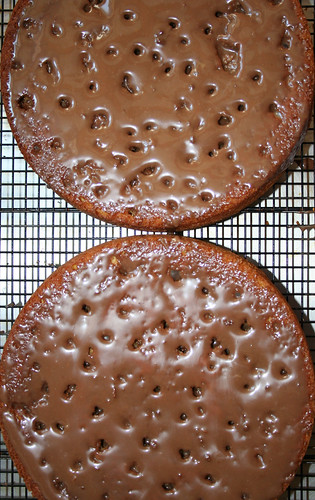
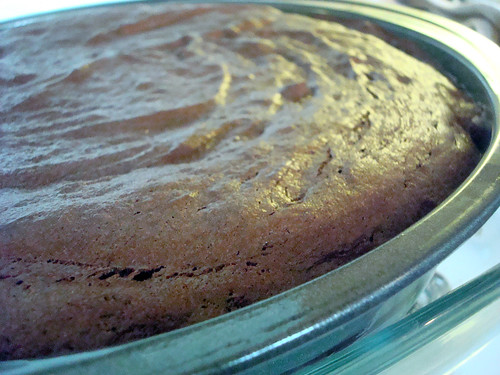
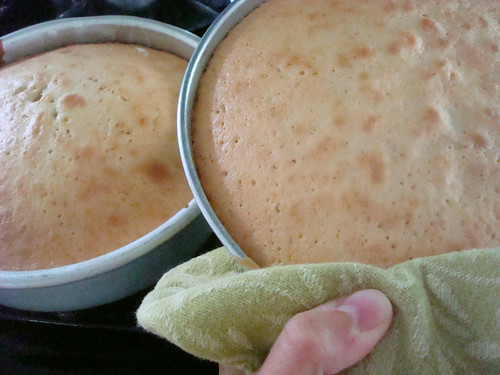
Measure about 1 cup batter into the prepared pan, then spread and level it, using an offset or rubber spatula. Bake for about 4 to 7 minutes, or until lightly browned on the edges, with a dull finish on top, and the cake has begun to pull away from the edges of the pan slightly. Remove the cake from the oven, and let sit for a 3 to 4 minutes before removing the layer from the pan with a metal spatula. Dust the cake lightly with confectioners' sugar (this will keep the layers from sticking), and place on a rack to cool.

Clean and grease the pan; repeat this process until all of the batter is used, about 6 times more. As you bake, stack the layers between waxed or parchment paper, and cover with a clean towel. Refrigerate the layers until completely cold, about 2 hours.

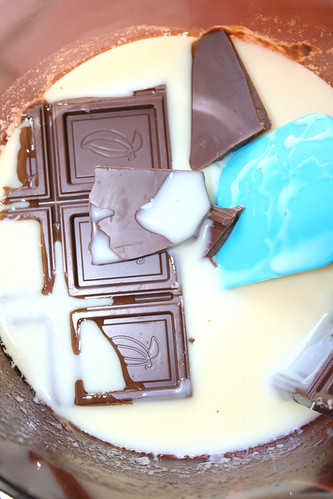
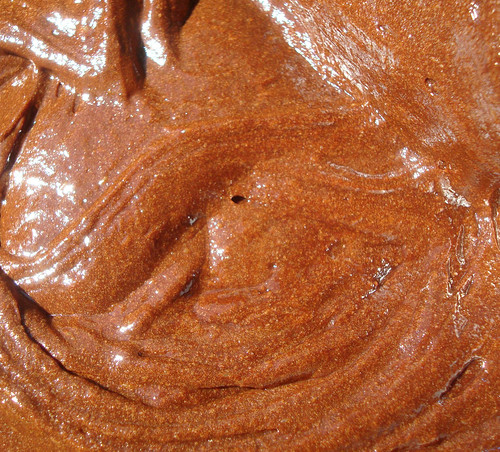
To make the buttercream, start by melting the chocolate in a heavy-bottomed saucepan over low heat, or in the top of a double boiler. Stir slowly and constantly until the chocolate melts. Set aside.

Using an electric mixer, whisk the eggs and egg yolk on medium-high speed until they reach the ribbon stage (“ribbons” will drip when you hold up a whisk, rather than just drips). Turn off the mixer, but leave the egg mixture in the bowl.

In a small saucepan combine the sugar and water, stirring until the sugar is dissolved. Stop stirring and let the mixture come to a boil; cook to 240 degrees (the soft-ball stage) on a candy thermometer Take pan off the heat.  

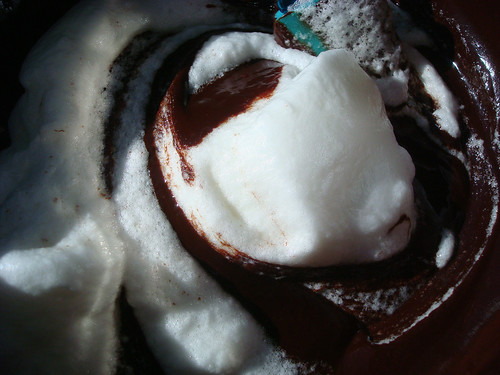
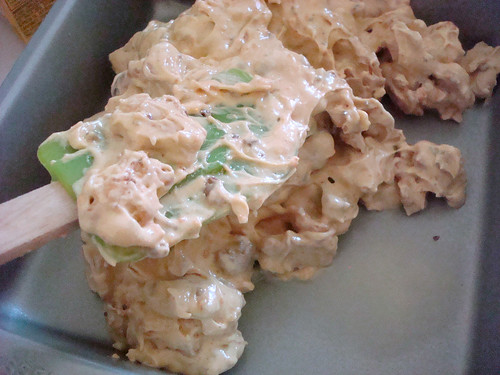
Return to the egg mixture. Whisk on low speed,and pour the hot syrup into the egg mixture in a slow but steady stream. Increase the mixing speed and whip the mixture until it is roughly the texture of whipped cream and has cooled to room temperature (the mixing bowl may still feel slightly warm). Add the butter in 3 parts, stirring so that it gets mixed in. Then add the melted chocolate (it should be just slightly warm). Continue to whip until smooth and well blended.

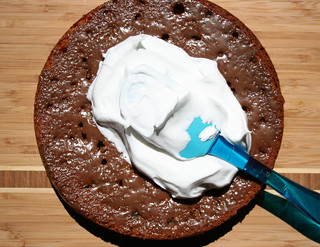
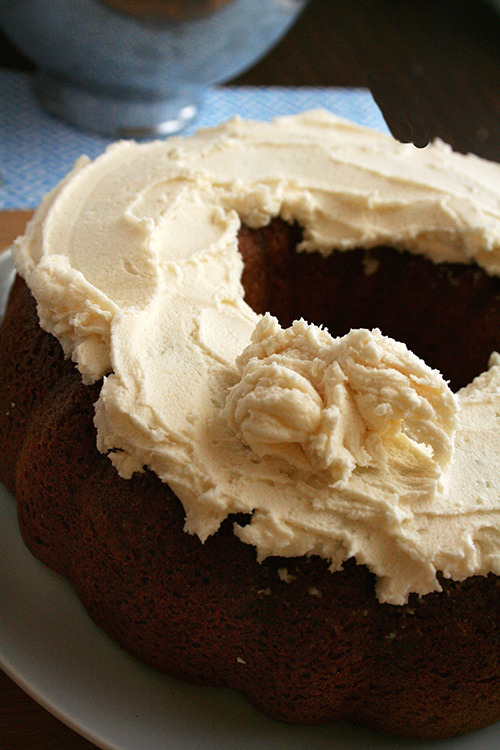
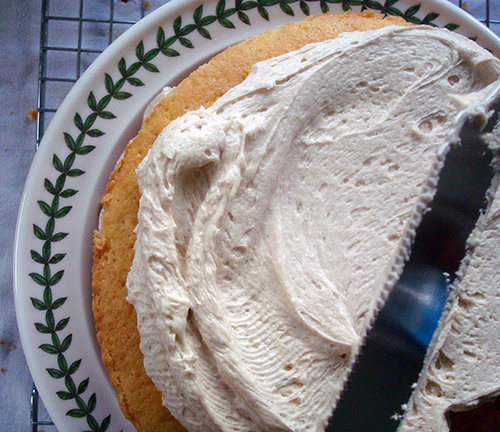
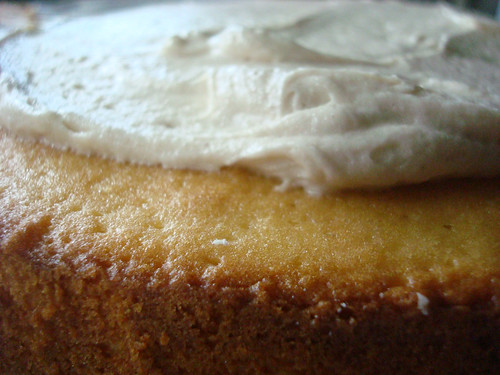
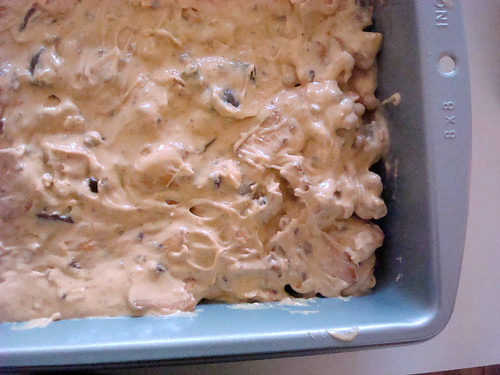
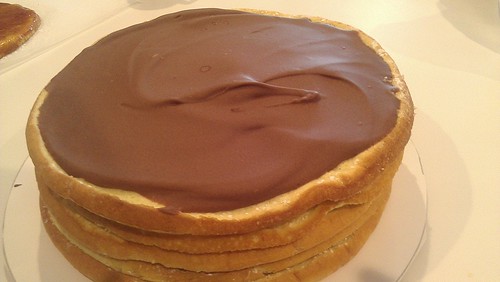
To assemble the cake, start with one layer of cake; set it on one of the 10-inch rounds; cover the top surface with some buttercream ( a slightly overflowing 1/3cup), and then press down with another layer to make a good seal. Repeat this with all but one of the cake layers. Wrap the torte in plastic, and refrigerate for at least 6 hours; also wrap and chill the remaining buttercream (you should have about 2 cups left). Place a sheet of parchment paper on top of the other cardboard round, and place the last layer on it; wrap and refrigerate.

To make the caramel topping, in a medium saucepan, cook the sugar and water over moderately high heat, stirring occasionally, until an amber caramel forms, about 5 minutes.

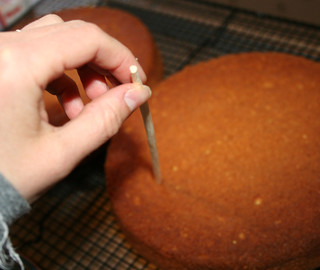
Unwrap the single cake layer. Carefully pour the caramel over the cake layer and spread it thinly, using a small offset spatula. Don't worry if some of it drips off of the cake while you spread it. Working quickly, use an oiled or buttered sharp knife to indent the top of the caramel into 16 wedges (this will ensure that the caramel doesn't crack when you cut slices). Allow to cool slightly, and then retouch the indents with the knife again. Place the layer onto a countertop dusted with confectioners'sugar, and allow the caramel to cool completely.

Place more buttercream on top of the chilled torte, and top with the caramel round. Frost the sides with the remaining buttercream. Cover loosely, and chill the torte for about an hour before serving; let come to room temperature before serving.

Store, loosely covered, in the refrigerator, for up to 3 days. 

Teatime Tastiness: Lady Baltimore Cake Story and Recipe

Lady Baltimore cake

Here’s a cake that was built for genteel tea parties: a large layer cake filled with chopped nuts and dried fruits and topped with a dramatic (but ever ladylike) billow of boiled frosting. But while one might suppose that this distinguished cake was named after Lady Baltimore, that's not quite how the story went. Like many cakes, its origins are disputed--but like any teatime gossip, this makes the story so much more fun to delve into. A very helpful resource in my delving was The Old Foodie, by the way. Oh, and if you like tales like this, you should probably pre-order my new book, The Secret Lives of Baked Goods: Sweet Stories & Recipes for America's Favorite Desserts.

Lady Baltimore Cake

Let's start with the tales that are likely false. First: the Lady Baltimore connection. Highly unlikely that the cake dates back to her day: the Lady, whose Irish husband inherited Maryland in the mid-seventeenth century, never even lived in America, and in any case baking powder leavening agents were not invented until well into the nineteenth century – making a cake of this sort not very likely to have been invented as a casual teatime treat during her day. The Big Fella of American Cookery, James Beard, says of Lady Baltimore that it is “said to have originated in Maryland, this one one of the first fine-textured cakes mentioned in old cookery books. It required a delicate touch in mixing and exact measurements--this, in the days of no standard measuring cups, teaspoons, or tablespoons.” Second: the Dolley Madison connection. Some say that the cake rose in popularity due to the fact that it was similar to a cake enjoyed by Dolley Madison, the fourth First Lady but this story fails to explain why it is not then called Dolly Madison cake. Also, she's already got an ice cream named after her—isn't that enough?

And now, the favored explanations for the cake—likely, the true story is a combination of the two. First: It originated in Charleston at the end of the nineteenth century, at “The Lady Baltimore Tearooms”, and was a variation of another popular cake.

Lady Baltimore Cake

Second: novelist Owen Wister is the one who made this cake famous--while writing his 1906 romance, Lady Baltimore, set in a fictional city based on Charleston, he was extremely taken with the city and a cake he ate there. In fictional form, it is described as being not unlike a wedding cake, and the suggestive passage is as follows:

"I should like a slice, if you please, of Lady Baltimore," I said with extreme formality. I thought she was going to burst; but after an interesting second she replied, "Certainly," in her fit Regular Exchange tone; only, I thought it trembled a little.

I returned to the table and she brought me the cake, and I had my first felicitous meeting with Lady Baltimore. Oh, my goodness! Did you ever taste it? It's all soft, and it's in layers, and it has nuts--but I can't write any more about it; my mouth waters too much.

Upon reacting in a strongly favorable way, the narrator realizes that the girl he’d been speaking to was the cake-maker. He finds that it has broken the ice, and their sweet flirtation continues. Some say that it is an instance of art imitating life: could it be possible that Wister had been served some delicious cake by an appealing Southern belle, and was inspired to immortalize the experience?

Supporting this is the fact that there seems to be no mention anywhere of a cake called “Lady Baltimore” until the first known publication of the recipe in 1906. Suddenly there was a flood of newspaper articles mentioning the cake; one writer in 1907 only agreeing to part with the recipe ‘with the sanction of Owen Wister’. Most likely? The cake preceded Wister's novel, but was renamed toute-suite after the novel's popularity became evident. Perhaps some entrepreneurial cake-shop owner took note after reading the book and tweaked the recipe to live up to the novel. Perhaps it was even the ladies at the Lady Baltimore Tea Rooms in Charleston.

Lady Baltimore, in cake form, has a male companion: the Lord Baltimore Cake. This yellow cake variation was created as a clever way to use up all of the egg yolks discarded while making the Lady version of the cake, yielding a rich, decadent counterpart.

Lady Baltimore Cake

Delicate and fine-crumbed, this cake is nicely paired with the rich fillings and toppings which keep it from being too light and angel food-like. Precision with the cake is necessary to get the “lift” from the egg whites, but it's worth the effort: it makes for sweet, easy eating, and the cake's history will make for some fascinating conversation.

Lady Baltimore Cake (printable recipe here!)
16 servings

  • 3 cups flour
  • 1 tablespoon baking powder
  • 1/2 teaspoon salt
  • 1 cup (2 sticks) unsalted butter, softened
  • 2 cups sugar
  • 2 teaspoons vanilla extract
  • 1 cup milk
  • 7 large egg whites
  • 1/4 teaspoon cream of tartar

Boiled frosting (recipe follows)

  1. Preheat the oven to 325 degrees F. Grease and flour the bottoms and sides of three 8-or 9-inch round cake pans; line with rounds of parchment paper.
  2. In a large bowl, sift together the flour, baking powder, and salt. Set aside.
  3. In the bowl of a stand mixer fitted with the paddle attachment, cream the butter with the sugar until the mixture is light and fluffy, about 3-5 minutes on medium speed. Stir in the vanilla.
  4. Add the flour mixture to the butter mixture in 2-3 additions, alternately with the milk, and stir the batter until it is just combined.
  5. In another large bowl, beat the egg whites, cream of tartar, pinch of salt until they form stiff peaks.
  6. Stir a portion of the egg whites into the batter to lighten the mixture; follow by gently folding in the remaining whites.
  7. Divide the batter evenly among the prepared pans. Use a spatula to smooth the top of the batter in the pans.
  8. Bake for 25-35 minutes, or until a tester comes out clean.
  9. Let the cake layers cool in the pans on racks for 10 minutes, turn them out onto the racks, and let them cool completely. If the cakes have formed a dome on top, slice using a serrated knife to level. 

Boiled frosting

  • 6 large egg whites
  • 2 cups sugar
  • 3/4 cup water
  • 2 teaspoons vanilla extract
  • 1/2 cup finely chopped dried figs plus sliced dried figs for garnish
  • 1 cup pecans, toasted lightly and chopped fine, plus pecan halves for garnish
  • 1/2 cup raisins, chopped
  1. In the bowl of a stand mixer, beat the egg whites until they hold soft peaks. Set aside.
  2. In a small saucepan over medium-high heat, combine the sugar and the water, stirring occasionally. Once it comes to a boil, continue stirring, more frequently, until the sugar is dissolved; boil the syrup until it registers 248 degrees F on a candy thermometer.
  3. With the mixer running add the hot syrup to the egg whites, in a slow, steady stream.
  4. Add the vanilla, beating the icing until it is smooth and cool.
  5. Transfer two cups of the frosting to a bowl. With the remaining portion of frosting, fold in the chopped figs, pecans, and raisins.
  6. Place the first cake layer on a serving plate, flat (un-cut) side up. Spread it with half of the fruit and nut-filled frosting, keeping a ½ inch margin around the edges—the weight of the next layer will spread the filling to the edges. Place another cake layer on top of the frosting, once again so that the flat side faces up. Spread the remaining fruit and nut-filled frosting on top of this layer, once again leaving a margin. Place the third cake layer on top, flat side up. Use the reserved plain frosting to frost the top and sides of the cake. Garnish with any remaining fruit or nuts.

Heart Shaped Peanut Butter and Jelly Roll Cake for Peanut Butter and Company

I’m not saying that you should totally ignore chocolate on Valentine’s Day. But…why not also include a cake that is more fun to make with a partner: the Peanut Butter and Jelly Roll! If you’ve ever made a Jelly Roll cake at home, you know that it can be hard to handle the rolling of the cake while baking solo–so why not employ your Valentine with this most delicious task? You’ll be rewarded with a delicately spongy cake which gives way to a rich, deliciously smooth white chocolate peanut butter filling, beautifully paired with sweet strawberry jelly. Bonus points if you roll it into the shape of a heart! This is an adaptation of a classic Jelly Roll recipe I discovered in Taste of Home.

For the full post and recipe, visit Peanut Butter and Company!

Clean Out the Cabinets Cake Recipe

Clear out the Cabinets Cake

It doesn't happen, but every now and again (usually when I know I'm moving soon) I get the urge to clean out all the random ingredients that I have lying around in the kitchen. But I absolutely despise throwing things out--it seems so wasteful. But how to make use of these ingredients in an efficient way? 

Well, when I found myself cleaning out the cabinets recently, I had an inspiration.

Clear out the Cabinets Cake

It started when I found a box of Jiffy Yellow Cake mix. All of a sudden, I looked at everything else with new eyes.

What if I could combine orphan ingredients, all in one cake? It would certainly be something completely awful, or awesome. Maybe both.

Clear out the Cabinets Cake

So I rounded up a few things that I thought could possibly work in this monster of a cake: half a jar of peanut butter, a third of a box of Teddy Grahams, a handful of Fun-Size candy bars, and about 2 handfuls of potato chips (plain, salted). 

I started by mixing the cake according to the box ingredients (1 egg, 1/2 cup of water). Then, I stirred in the peanut butter. It smelled really good, and my spirits began to get high.

Clear out the Cabinets Cake

I then stirred in the rest of it--I broke each candy bar into 3 or 4 pieces, crushed the chips in my hand before adding, but just added the Teddy Grahams as-is. It made for an extremely thick, lumpy batter.

Clear out the Cabinets Cake

I spread it into a well-greased 8x8-inch pan.

Clear out the Cabinets Cake Clear out the Cabinets Cake

I baked it for 22 minutes at 350 degrees, at which point I took out one of the most alluring-smelling cakes my nose has ever known.

When it cooled, I realized that this was a great opportunity to use another ingredient--half a can of cream cheese frosting--so I added that too. Why not? And sprinkles. Rainbow! 

So, you're wondering after this big buildup, how did it taste? 

Clear out the Cabinets Cake

I was so glad I hadn't thrown anything out--this cake was a keeper. The peanut butter mixed throughout the batter worked amazingly with the chocolate chunks studded everywhere from the Fun-size candy bars, making it feel like you were eating birthday cake with alternating bites of a peanut butter cup. But all mixed in your mouth. The only weirdness was the Teddy grahams, which had lightly softened in the baking process, just to the point where they were just crunchy enough to distract from the cake texture, but not different enough to really have a crunchy crunch impact. Clear out the Cabinets Cake Next time I'd crush them before adding. The chips were a pleasant surprise, adding a nice saltiness which made all the competing tastes--peanut butter, cake, frosting, chocolate--come together in a beautiful salty end note. It's like the most beautiful epilogue. 

Clear out the Cabinets Cake

Clean Out the Cabinets Cake (Printable recipe here!)

Serves 9

  • 1 Box Jiffy Cake
  • 1 Egg 
  • 1/2 cup water
  • Whatever stuff you want to add (I added: half a jar of The Bee's Knees peanut butter by Peanut Butter and Company, 2 handfuls of potato chips, about 6 fun-size candy bars, and a third of a box of Teddy Grahams

Procedure

  1. Preheat the oven to 350. Grease a cake pan (round or square).
  2. Prepare the cake mix per the package instructions (1 egg and 1/2 cup water). 
  3. Once the batter is ready, stir in the peanut butter (or any "wet" ingredients).
  4. Stir in the rest of your ingredients.
  5. Bake for 20-25 minutes, per the package instructions. When golden, remove from the oven. Cool the cake, and turn out on to a wire rack. Let cool completely.
  6. If you have frosting, go ahead and frost it. Add sprinkles (why not?). Enjoy!