Pillsbury Bake-Off Countdown: Chewy Chocolate Chip-Almond Bars


CakeSpy Note: OMG! It's getting to be that time of year again. The Pillsbury Bake-Off is coming in November! Since I so deeply loved attending the 45th Bake-Off as well as the 46th Bake-Off, I thought I would get you excited the 47th one early by sharing all of the sweet recipes in the running. I will focus on sweets! You can follow them by clicking the bakeoff tag below to see the recipes posted so far (as well as recipes from previous Bake-Off events). 

I wouldn't be surprised if your response to these bars is like mine: absolute delight. There's no part of the recipe that doesn't completely please me, from the sweetened condensed milk gooeyness to the decadent chocolate chip base and the almonds all over the batter and flecked on top which give it a distinct Almond Joy tone.
This clever recipe is courtesy of Rachel Ruiz of Hurlburt Field, Florida. Good luck at the Bake-Off!

Chewy Chocolate Chip-Almond Bars

  • Prep Time: 15 Min
  • Total Time: 2 Hr 25 Min
  • Makes: 12 bars

Ingredients

  • 1 package Pillsbury Ready to Bake! refrigerated chocolate chip cookies
  • 2 oz marzipan, diced (1/4 cup)
  • 1/4 teaspoon almond extract
  • 1 can (14 oz) sweetened condensed milk
  • 1/2 cup crunchy almond butter
  • 1/2 cup semisweet chocolate chips
  • 1/2 cup sliced almonds

Procedure

  1. Heat oven to 350°F. Spray 9-inch square pan with non-stick spray.
  2. In large bowl, break up cookie dough. Add marzipan and almond extract. Beat with electric mixer on high speed about 2 minutes or until well blended. Press dough evenly in bottom of pan.
  3. In small bowl, mix condensed milk and almond butter until smooth; pour over dough in pan. Sprinkle chocolate chips and almonds evenly over condensed milk mixture.
  4. Bake 35 to 40 minutes or until edges are golden brown and center still jiggles slightly. Cool completely in pan on cooling rack, about 1 1/2 hours. Cut into 4 rows by 3 rows. Store covered in refrigerator.

King Corn: Cornmeal Blueberry Cookie Bars

So, when I first encountered a review copy of the book Good to the Grain: Baking with Whole-Grain Flours, I have to confess, I had my doubts. The concept--a book of recipes for baked goods (both sweet and savory) using whole grain flours sounded vaguely...virtuous.

But once assured that they still did include plenty of sugar and butter, I figured it was worth a try.

And after looking through the book (and lovingly, at some of the pictures), I decided to try the cornmeal blueberry cookies. Why? Well, for one thing, I like cookies, and I like corn muffins, and these kind of sounded somewhere in between. Plus, I happened to have all of the ingredients on hand.

Well, I veered a little from the original recipe: for one thing, I used frozen instead of dried blueberries, dehydrating them by baking them at 200 degrees farenheit for a few hours to dry them out; and second, instead of cookies I made my batch as bars, using an 8x8-inch pyrex baking sheet. Because I had dehydrated the berries and they weren't completely dried, I placed them on top of the batter rather than mixing it in; however, even with these changes, the yield was a very dense and pleasing bar, like cornbread meets sugar cookie, with a nice tart edge from the berries.

Here's the recipe.

Cornmeal Blueberry Cookie Bars

Adapted from Good to the Grain: Baking with Whole-Grain Flours

Dry mix:

  • 2 cups corn flour
  • 2 cups all-purpose flour
  • 1 cup finely ground cornmeal
  • 1 1/2 teaspoons baking soda
  • 2 teaspoons cream of tartar
  • 2 teaspoons kosher salt (I used Secret Stash Sea Salt's Pistachio cherry)

Wet Mix:

  • 8 ounces (2 sticks) cold unsalted butter, cut into 1/2 inch cubes
  • 2 cups dark brown sugar
  • 1 cup dried blueberries (I had frozen; I baked them for a couple of hours at 200 degrees to dehydrate them)

Finish:

1/2 cup sugar (I used brown sugar)

Procedure

  1.  Preheat the oven to 350 F. Rub your baking pan with butter.
  2. Sift the dry ingredients into a large bowl and set aside.
  3. Add the butter and brown sugar to the bowl of a standing mixer fitted with a paddle attachment. Turn the mixer to low speed and mix until the butter and sugar are combined, then increase the speed to medium and cream for 2 minutes. Use a spatula to scrape down the sides and the bottom of the bowl.
  4. Add the eggs, one at a time, mixing until each is combined. Add the flour mixture to the bowl and blend on low speed until the flour is just barely combined, about 20-30 seconds (it's very pretty to watch). Scrabe down the sides and bottom of the bowl. Add the milk (and if you're using dried, add the blueberries now). Slowly mix until the dough is evenly combined.
  5. Spoon your batter (it will be thick) into your prepared pan, spreading with a spatula to even out the top. Sprinkle the dehydrated blueberries and finishing sugar on top. (or, if you want to make cookies, pour the sugar into a bowl scoop mounds of dough, each about 3 tablespoons in size, form into balls, and set on a plate; dip each ball into the sugar, coating it lightly; arrange the balls on baking sheets, leaving about 3 inches between them--balls that don't fit on the first baking sheet can be dipped in the sugar and chilled til ready to bake).
  6. Bake the bars for somewhere between 20-30 (possibly a few more) minutes depending on your pan size (more minutes for a taller pan, less for a shallower pan); (20-22 for cookies), rotating the sheet at about 10 minutes. The bars will puff up and crack at the top and are ready to come out when the sugar crustis golden brown and the cracks still faintly yellow.
  7. These bars / cookies are best eaten warm from the oven or the same day. But, if you must, they'll keep in an airtight container (at room temperature) for up to 3 days.

Sweet Freedom: Wheat, Egg, and Dairy-Free Figaro Bar Cookie Recipe

If pressed to name the basic building blocks of a delicious baked good, most people would probably include flour, eggs, butter, and sugar.

But not Ricki Heller, author of Sweet Freedom, a book comprised of "dessert recipes you'll love without wheat, eggs, dairy or refined sugar".

Dude. Really?

I was willing to take that challenge.

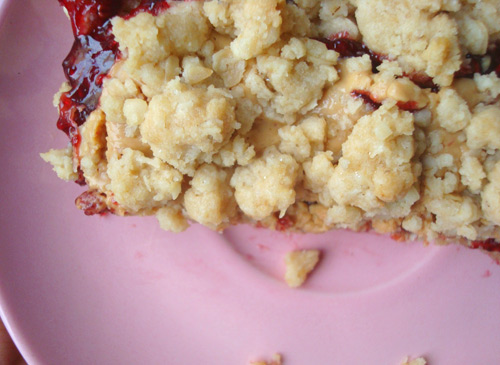
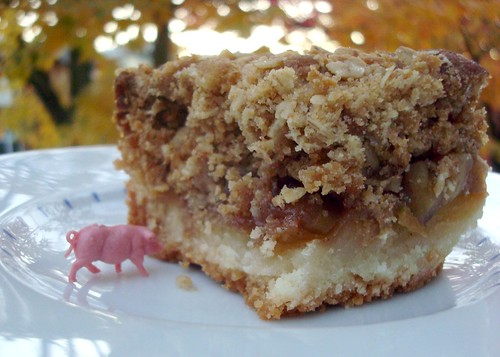
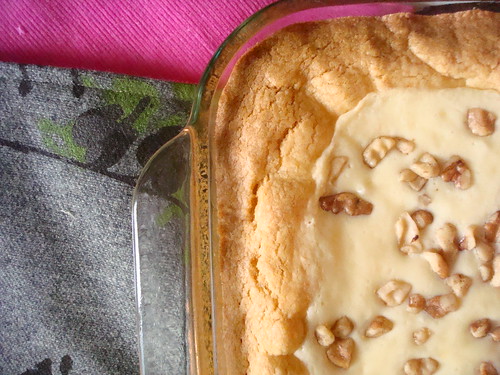
I decided to start out with familiar territory. One of the best vegan baked goods I can think of is the Vegan Oat Bar from Seattle's Caffe Ladro--a gooey, fruit-filled bar cookie which isn't just "good...for a vegan baked good" ('cos we all know there are some of those), it's just good, period. I saw echoes of the oat bar in the recipe for "Figaros", a fig bar with a dense cookie crust and crumb topping, and so I decided to try that one first.

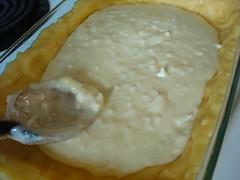
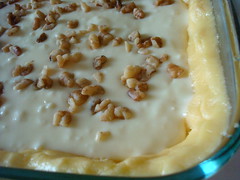
I took some small liberties with the recipe: lacking figs I tried it out using frozen organic raspberries instead; right before baking, on whim, I melted about 1/2 cup of peanut butter and drizzled it on top of the cookie base before putting the crumbs on top. I also played around with the flour ratios--where the initial recipe called for spelt and barley flour, I subsituted the barley flour with part oat and part coconut flour (you know, for fun).

The result? Goodness, were they good. Dense, chewy and decadent, these bars didn't taste like dull suffering for health's sake at all. The natural sweetness of the berries really shone, and the bars were excellent for breakfast the following morning.

Of course, sweet freedom isn't without its cost--for my pantry, which was not equipped with the various flours, agave nectar and sunflower seeds, the recipe did throw me back about $20 (of course, I did have leftovers which could be used in the future). However, if you're looking for a slightly more virtuous baked good that won't leave you feeling at a loss, these are a great bet. And I already know what I will be trying next from the book--the "Dark and Decadent Chocolate Pate"--which features--of all things--avocado along with dark chocolate, which judging by the book's pictures yield a rich, thick slab of yum.

The book can be purchased here, and for more of Ricki's writing and adventure, check out her site, Diet, Dessert and Dogs!

Figaros

Makes 12-16 squares

Ingredients

  • 1/2 cup freshly squeezed grapefruit juice
  • 3 tbsp agave nectar, light or dark
  • 1 tablespoon grapefruit zest
  • 2 teaspoons orange zest
  • 10 ounces frozen raspberries
  • 1/2 cup peanut butter, melted

(Note: the original recipe does not call for the frozen raspberries or peanut butter--if you want to use the original, use 10 1/4 ounces soft dried figs, cut in half with hard stems removed instead)

Cookie Base and Topping:

  • 1/4 cup sunflower oil
  • 1/3 cup agave nectar, light or dark
  • 1/2 teaspoon pure vanilla extract
  • 1/3 cup oat flour
  • 1/3 cup coconut flour
  • 1 cup whole spelt flour (I used light spelt)
  • 1/4 teaspoon baking powder
  • 1/4 teaspoon baking soda
  • 1/4 teaspoon fine sea salt
  • 1/4 teaspoon cinnamon
  • 1 tablespoon finely ground flax seeds

Procedure

  1. Preheat oven to 350. Line a 9 inch square pan with parchment paper, or spray with nonstick spray.
  2. Make the filling: in a small, heavy-bottomed pot, comine the juice, agave nectar, zest and figs. Bring to a boil, then lower heat and simmer, covered, 5 minutes. Remove from heat and allow to cool for 1 more minutes.
  3. Meanwhile, make the cookie base and topping. IN a small bowl, whisk together oil, 1/3 cup agave nectar, and vanilla. Set aside.
  4. In a large bowl, sift together the flours, baking powder and soda, salt and cinnamon. Add the flax and stir to combine.
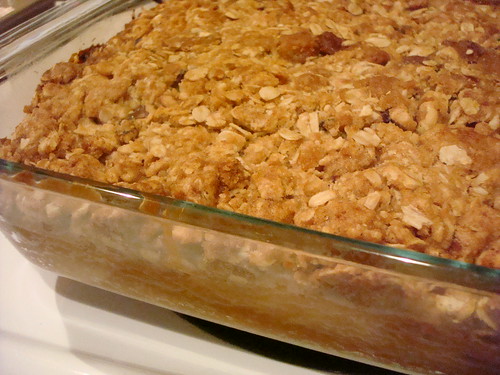
  5. Pour the wet mixture over the dry and stir until you have a soft dough. Pat about 2/3 of the dough into the bottom of the prepared pan (it will be fairly thin). Spread the fig mixture over the base, then crumble the rest of the cookie mixture over the top of the filling.
  6. Bake in a preheated oven for 25-30 minutes, rotating pan about halfway through, until edges are golden. Allow to cool completely before cutting into squares. Makes 12-16 squares. These freeze well.
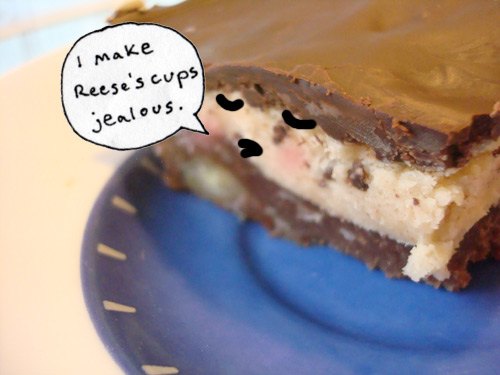
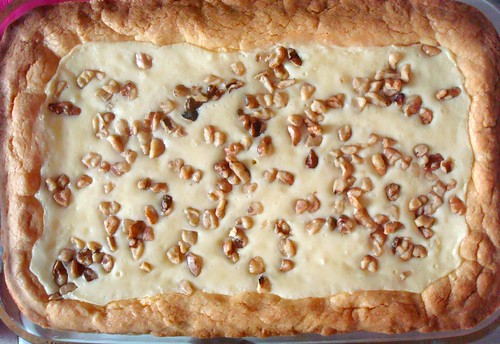
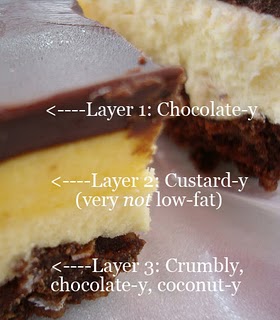
Accent on the Butter: Peanut Butter Nanaimo Bars

Nanaimo bars are quite possibly one of the most perfect foods out there, comprised of a dense, chocolatey crust, a dreamy middle layer of custardy buttercream, and a thick slab of chocolate on top as a crowning glory. But what happens when you add peanut butter to all this awesome?

What happens, friends, is that you get an indescribeably rich, irresistible, salty-sweet dessert experience: this is the type of treat that peanut butter cups dream of becoming when they grow up.

Wanna try it out? Here's the recipe.

Peanut Butter Nanaimo Bars

- makes about 36 bite-size bars -

 Adapted from a recipe found on the City of Nanaimo website

Ingredients for bottom layer
  • 1/2 cup unsalted butter
  • 1/4 cup sugar
  • 5 tablespoons cocoa
  • 1 egg, beaten
  • 1 1/4 cups graham cracker crumbs
  • 1/2 cup finely chopped roasted peanuts (or walnuts or almonds work nicely too)
  • 1 cup shredded coconut
Ingredients for middle layer
  • 1/2 cup unsalted butter
  • 2 tablespoons creamy peanut butter
  • 2 tablespoons vanilla custard powder or instant vanilla pudding powder
  • 2 cups confectioners' sugar
  • 1/2 teaspoon salt (omit this if your peanut butter is salted)
Ingredients for top layer
  • 4 squares semi-sweet chocolate (1 ounce each)
  • 2 tablespoons unsalted butter
Procedure


  1. Prepare bottom layer. Melt the butter, sugar, and cocoa in a double boiler until fully incorporated, but do not let the mixture come to a boil. Add the beaten egg and stir constantly until the mixture begins to thicken. Remove from heat and stir in the graham cracker crumbs, coconut, and nuts. Press down firmly into an ungreased 8 x 8-inch pan; try to make the mixture as flat as possible in the pan. Let this cool for about an hour.
  2. Prepare the middle layer. Cream the butter, peanut butter, instant pudding powder, salt, and confectioners' sugar together, beating until the mixture is light and fluffy. If it is too thick, you might want to add a small quantity of milk or cream to the mixture, til it is of a spreadable consistency. Spread over bottom layer, once again trying to make the surface as flat as possible. At this point, I like to put the pan in the refrigerator, as it is easier to spread the top layer on when the buttery middle layer is a bit more solid.
  3. Prepare the top layer. Melt chocolate and butter slowly over low heat. Once fully melted and incorporated, remove from heat and allow to solidify to the point where it is thick but still pourable. Pour over second layer as quickly as you can so that the middle layer doesn't begin to melt.
  4. Let the bars cool for at least one hour in the refrigerator before serving.

Rocky Romance: Rocky Ledge Bars Recipe

Delicious Rocky Ledge Bars

@mseling (yes, I just referred to her by Twitter name) is a person I admire on many levels. She's an amazing writer; she's a fixture in the Seattle music scene; and--most importantly--she bakes a mean cookie. And at my recent cookie exchange party, she brought it--literally--with two amazing batches of delicious treats. Here's the first recipe of the two, which is a bar cookie, adapted from Martha Stewart's "Rocky Ledge Bar" recipe. Let me tell you, these bars--which are weighty little morsels, chock full of marshmallows, rich, buttery and caramel-y topping, and of course, chocolate--are serious business, but seriously delicious. Some might say they're too much, but I say they're just enough.

Rocky Ledge Bars
-makes 16 bars -
Adapted from Martha Stewart

Note: if you are in a crunch, you could make these using a brownie or blondie box mix--simply use the mix as specified on the box, omit the ingredients used for the cake base, and skip to step 3.

  • 1/2 cup (1 stick) unsalted butter, room temperature, plus more for pan
  • 2 1/4 cups all-purpose flour
  • 2 1/4 teaspoons baking powder
  • 1 teaspoon coarse salt
  • 1 1/2 cups packed dark-brown sugar
  • 3 large eggs
  • 1 teaspoon pure vanilla extract
  • 1 cup miniature marshmallows
  • 1 cup semisweet chocolate, coarsely chopped
  • 1 cup white chocolate, coarsely chopped
  • 1 cup butterscotch chips
  • 18 soft caramel-candy cubes, coarsely chopped

    Directions:

  1. Preheat oven to 350 degrees. Lightly butter a 9-by-13-inch baking pan. Line with parchment paper, allowing a 2-inch overhang on the longer sides. Brush parchment with butter (not overhang).
  2. Whisk together flour, baking powder, and salt in a medium bowl. In the bowl of an electric mixer fitted with the paddle attachment, mix butter and brown sugar until fluffy, about 2 minutes. Add eggs and vanilla; mix until well combined. Mix in flour mixture until combined. Fold in half of each of the marshmallows, chocolates, butterscotch chips, and caramels.
  3. Spread batter in prepared pan. Scatter remaining marshmallows, chocolates, butterscotch chips, and caramels on top. Bake until top is golden brown and a cake tester inserted into the center comes out clean, about 35 minutes. Let cool on a wire rack. Lift out of pan, and transfer to a baking sheet. Refrigerate until set, at least 30 minutes.
  4. Remove parchment, and cut into about 16 triangles. Bars can be stored in an airtight container at room temperature up to 1 week.

Decadent Sweets Inspired by Dana Treat: Caramel Apple Pie Bar Recipe

Piggie loves Apple Pie Bars
It's not that I don't like apple pie. It's just that the parts I do like happen to be the ones that don't really involve apples: the buttery, rich crust, and the equally buttery, rich topping--which, if I have my say, is always some sort of brown sugar crumbled goodness. So when I saw a recipe for Apple Pie Bars on the Dana Treat website, I knew I had found the apple pie that my soul had always been searching for: i.e., mostly crust and topping, with a little filling sandwiched in between. I had to make these bars. I did make these bars, the very same day I found them--adding in a layer of caramel too for good measure. With a bar this rich, was that necessary? No. But it sure was good. In fact, the only mistake I made with these bars is that I halved the original recipe, which was a mistake because we ran out all too soon.

Apple Pie Bars
Caramel Apple Pie Bars
Adapted from Dana Treat
- Makes about 24 bars -

Notes: I made some changes to Dana's recipe. First, I halved her original recipe, instead making my batch in an 8x8-inch pan. This was probably a mistake as we definitely could have eaten more. I also added aforementioned caramel layer. Good decision.

For the crust
1 1/2 sticks unsalted butter, softened
1/3 cup sugar
1 1/2 cups flour
1/4 teaspoon kosher salt

For the filling
(optional) 1/2 cup caramel sauce, such as Fran's Dessert Sauces (or if you're feeling saucy, you could make your own; or, you could just use a dozen or so caramel candies--choose your own adventure!)


3 tablespoons unsalted butter
1/4 cup light brown sugar
3 large Granny Smith apples, cut into thin slices (I didn't peel mine, and nobody judged me)
1 tablespoon cinnamon cinnamon
1/4 teaspoon nutmeg

For the topping
1/2 cup walnuts
1 1/2 cups quick-cooking oats
1 cup flour
3/4 cup light brown sugar
1 teaspoon cinnamon
1/4 tsp. baking soda
1 1/2 sticks salted butter (the original recipe calls for unsalted, but I like a really salty crumb, so I used salted), cut into 1/2-inch cubes and chilled

Procedure
  1. Make the crust. Preheat the oven to 375°F. Grease an 8x8-inch pan thoroughly. In an electric mixer fitted with a paddle, beat the butter with the sugar at medium speed until light and fluffy, about 2 minutes. At low speed, beat in the flour and salt until a soft dough forms. Press the dough over the bottom of the prepared pan, leaving the edges slightly higher (but still even all around). Bake in the center of the oven for about 12-15 minutes, until the crust is golden and set. Let cool on a rack.
  2. While this is cooling, make the filling. In a large skillet, the butter and brown sugar. Add the apples to the skillet and cook over high heat, stirring occasionally, until softened, about 10 minutes. Stir the cinnamon and nutmeg into the skillet, making sure it has evenly coated the apples. Cook until the apples are caramelized and very tender and the liquid is evaporated, about 10 minutes longer; scrape up any bits stuck to the bottom of the skillet, and if necessary add a small amount of water to the pan to prevent scorching (I didn't have to).
  3. Make the topping. Lightly toast the walnuts in the oven for about eight minutes; let cool, then coarsely chop them. In a large bowl, mix the oats with the flour, light brown sugar, cinnamon, and baking soda. Using a pastry blender or two knives (or your very clean hands!) cut in the butter until the mixture resembles coarse meal. Stir in the walnuts and press the mixture into clumps.
  4. Assemble and bake. Spread the 1/2 cup caramel sauce (or caramel candies) over the bottom layer, ensuring even coverage. Spread the apple filling directly on top of the caramel. Scatter the crumbs on top, pressing them lightly into an even layer. Bake in the center of the oven for 30-40 minutes, or until the topping is golden; rotate the pan halfway through baking. Let cool completely on a rack before cutting into bars.
Note: Dana says that these bars can be stored in an airtight container at room temperature for 4 days or frozen for a month, but I can't be sure as ours didn't last that long.

For more of Dana's sweet recipes, check out danatreat.com. You won't regret it.

Disappearing Act: Houdini Bars

Houdini Bars
Leafing through The Cake Mix Doctor Returns (have you entered the giveaway, by the way?), the first recipe to catch my eye was for Houdini Bars. What's a Houdini bar? Named for the magician because because they're "so rich and delicious that they disappear quickly," these dense bars are comprised of a cakey crust filled with a buttery, cheesecake-y filling with nuts and coconut. Heaven on a plate? Yes indeed: they taste like birthday cake, cheesecake, and coconut cream pie--simultaneously--in every beautiful bite. If you love decadent desserts, these ones will disappear fast.
Houdini Bars
(P.S. If you love the pot holders shown above, they're from Rustbelt Fiberwerks!)
Houdini Bars
adapted from The Cake Mix Doctor Returns
Recipe says that it makes 30, but we only got 12 (gluttons)

  • 1 package (18.25 oz) plain yellow cake mix
  • 1 stick butter, melted
  • 3 large eggs
  • 1 package (8 oz) cream cheese, at room temperature (recipe calls for reduced-fat; I used full-fat)
  • 1 teaspoon pure vanilla extract
  • 2 cups confectioners' sugar, sifted
  • 1/2 cup sweetened flaked coconut
  • 1/2 cup walnuts (original recipe called for pecans; either way, the nuts are optional)

Spooning in the coconut-cheesecake mixtureReady to bake

  1. Place a rack in the center of the oven and preheat the oven to 350F. Set aside a generously greased 9x13-inch pan.
  2. Place the cake mix, butter, and one egg in a large mixing bowl and beat on low speed with an electric mixer until the ingredients are incorporated, about 1 minute. Press the batter into the bottom and partially up the sides of the baking pan (I used my hands) and set the pan aside.
  3. Place the cream cheese in the same mixing bowl and beat with an electric mixer on low speed until fluffy, 30 seconds. Add the remaining 2 eggs and the vanilla and the confectioners' sugar and beat on low speed until smooth and combined, about 1 minute. Fold in the coconut; pour mixture over the crust and smooth the top with a spatula. Scatter the nuts, if you've chosen to use them.
  4. Bake the bars until the edges are well browned and the center is firm to the touch, about 40 to 50 minutes. Transfer the baking pan to a wire rack and let cool for 30 minutes before cutting and serving (do not score the bars while still hot!)

These bars keep in the fridge for up to five days. If they last that long.


You Say Nanaimo: Words, Praise and Lore on the Heavenly Nanaimo Bar

Nanaimo Bar

If you've been following our cake gumshoeing for a while, you may remember that a while back, some of our spies took a Nanaimo bar adventure in Victoria, BC. However, since then, we've spent more than a little time thinking about this unusual little treat, which is beloved in Canada but still relatively unknown in the States. We consider this an import worth getting to know better--so, without further ado, here are a few interesting tidbits we've picked up on Nanaimo's pride and joy.
First off, for those of you who have never tried a Nanaimo bar, let us briefly try to explain its wonder and deliciousness.

The top layer is a solid chocolatey layer, which is firm but not hard.
The middle layer is a buttery, frosting-y, creamy, custard-y stuff that is so much the opposite of low-fat that it makes you want to weep with pleasure.
The bottom layer is a sturdy, tightly packed layer of chocolate, graham cracker and coconut, bound together with melted butter.
That is to say--super yum.

And now, we'll move on to more of the Nanaimo bar's lore:
Mysterious Origins:
By many accounts, the bar came into existence when a Nanaimo housewife entered her no-bake squares into a magazine contest. Though we see several sources citing that it was "about 35 years ago", though we were not able to locate the name of the entrant or the magazine in which it was published. However, the legend goes on to say that when the recipe was published, it put both the bar and the town on the map.
Then again, according to Wikipedia,
the earliest confirmed printed copy of the recipe "Nanaimo Bars" appears in a publication entitled His/Hers Favorite Recipes, Compiled by the Women's Association of the Brechin United Church, with the recipe submitted by Joy Wilgress (p.52); this publication is not dated, but is circa 1950s.

And still others argue that the Nanaimo bar was actually invented long before in NYC, where it is referred to as the "New York Slice". However, none of our spies who have lived or currently live in the NYC area can recall ever having seen a confection by said name (though please feel free to correct us if we simply missed it). However, we do have fond memories of a wonderful three-layer chocolate, caramel and shortbread bar from a bakery which is now closed but used to have a few locations in Manhattan called Taylor's (pictured left--and though it's a bit of a tangent, for those who miss the dear, dear Taylor's can order a similar item of equal tastiness online from clairesquares.com).
However, we elect that regardless of where it comes from, the bar came into its own in Nanaimo, and therefore credit is due to Nanaimo for the heavenly bar.
Nanaimo Bars, Zoka CoffeeFinding Delicious Nanaimo Bars:
One thing that few will argue is the bar's deliciousness. As our friend ReTorte says, "Nanaimo Bars are very popular. And why not? Chocolate and custard - are you kidding me? The reality is, though, that they're usually cheaper to buy from a wholesaler, so frequently they are not made on site. This doesn't mean that the bars are bad, however; my favourite Nanaimo Bars are still the ones sold on BC ferries, and they bring them in from a wholesaler and are awesome".
And it's true--gauche as it may be to say, we've found that our favorite Nanaimo bars have been purchased not in fancy bakeries or restaurants but in significantly less "gourmet" spots--supermarkets, ferries, or delis. However, perhaps there's a strange logic behind this. Through trial and error we've found that the bars often taste better one or two days after they're made--so perhaps the absolute freshness that most bakeries or restaurants strive for is a detriment in the case of the Nanaimo bar, whereas in the aforementioned settings, where the bars will have a longer "shelf" time, they are allowed to improve with age. Hey, just a theory!

Extended Family: If you think the Nanaimo bar resembles some other sweets (at least physically), you're right. Starting with a list of related confections on Barry Popik's site, we hunted down some sweets that resemble the Nanaimo bar (if not in taste, at least in construction) and sought out a few of our own. Aside from the "London Smog" bar though, few of them seem to be derived from the actual Nanaimo bar recipe, though they are delicious.
When making your own Nanaimo bars, the sky's the limit. While the official City of Nanaimo recipe (determined during a 1980s contest for the "ultimate" Nanaimo bar recipe, which was won by Joyce Hardcastle) is found below, there are some great variations which can be found here and here.


OFFICIAL NANAIMO BAR RECIPE


Bottom Layer

  • ½ cup unsalted butter (European style cultured)
  • ¼ cup sugar
  • 5 tbsp. cocoa
  • 1 egg beaten
  • 1 ¼ cups graham wafer crumbs
  • ½ c. finely chopped almonds
  • 1 cup coconut
  • Melt first 3 ingredients in top of double boiler. Add egg and stir to cook and thicken. Remove from heat. Stir in crumbs, coconut, and nuts. Press firmly into an ungreased 8" x 8" pan.
Middle Layer
  • ½ cup unsalted butter
  • 2 Tbsp. and 2 Tsp. cream
  • 2 Tbsp. vanilla custard powder (Cake Gumshoe Kate adds that if you don't have or can't find custard powder, instant vanilla pudding works in a pinch)
  • 2 cups icing sugar
  • Cream butter, cream, custard powder, and icing sugar together well. Beat until light. Spread over bottom layer.
Top Layer
  • 4 squares semi-sweet chocolate (1 oz. each)
  • 2 Tbsp. unsalted butter
  • Melt chocolate and butter over low heat. Cool. Once cool, but still liquid, pour over second layer and chill in refrigerator.


Baked, Not Fried: Bakedbars from Brooklyn


“Some say our bakedbar is a dangerous addiction.”


This disclaimer appears right on the website of Baked, a Brooklyn-based bakery. To some, this might seem foreboding, and perhaps it should. While technically the bakedbar can be defined (a graham crusted bar topped with layers of coconut, chocolate, condensed milk, walnuts and butterscotch), we cannot explain the certain something they possess that makes you wonder just how many you can cram in your mouth, and how quickly, before you’ll regret it. Certainly the secret must lie somewhere in those six dense, dreamy, creamy-meets-crunchy layers, but exactly where is uncertain.


Luckily, you’ll have no problem devoting yourself to research like this.

Cakespy Note: While rumor has it that the story behind the bakedbar will be revealed in the Baked Cookbook, due out in 2008, even non-Brooklynites can get sweet gratification: the bakedbar is available for shipping all over the US on their website, as well as a small but good selection of cakes, cookies, brownies, and even homemade marshmallows.

Available online at bakednyc.com, or at their storefront, located at 359 Van Brunt Street, Brooklyn; (718) 222-0345.
Baked in New York